Control and monitor your NUKI Smart locks from Crestron Home
Connects to the NUKI bridge!
Lock, unlock and view the door status of any NUKI Smart Lock 2.0 or 3.0 connected to the NUKI bridge.
Usage
Once the quick setup is completed users are able to Lock and Unlock the NUKI smart lock from any Crestron Home user interface!
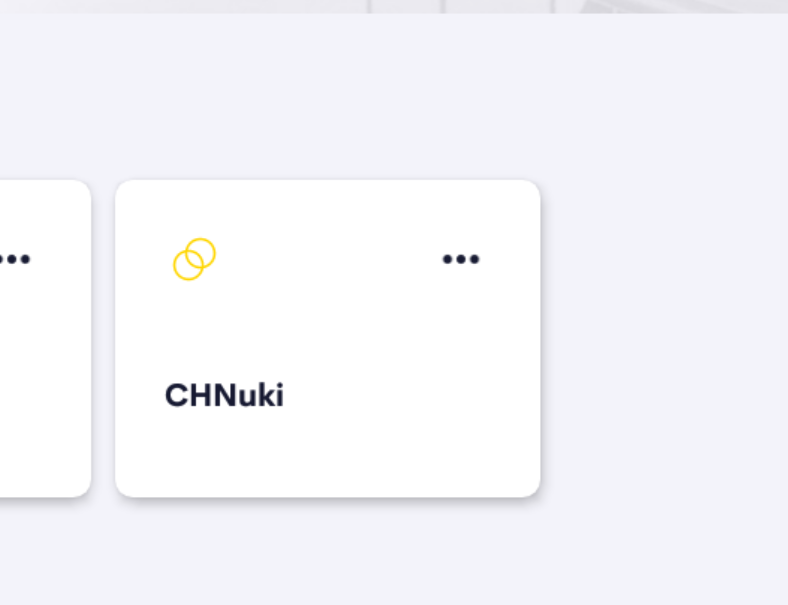
From the home page of the Crestron Home Interface the user clicks on the NUKI lock tile.
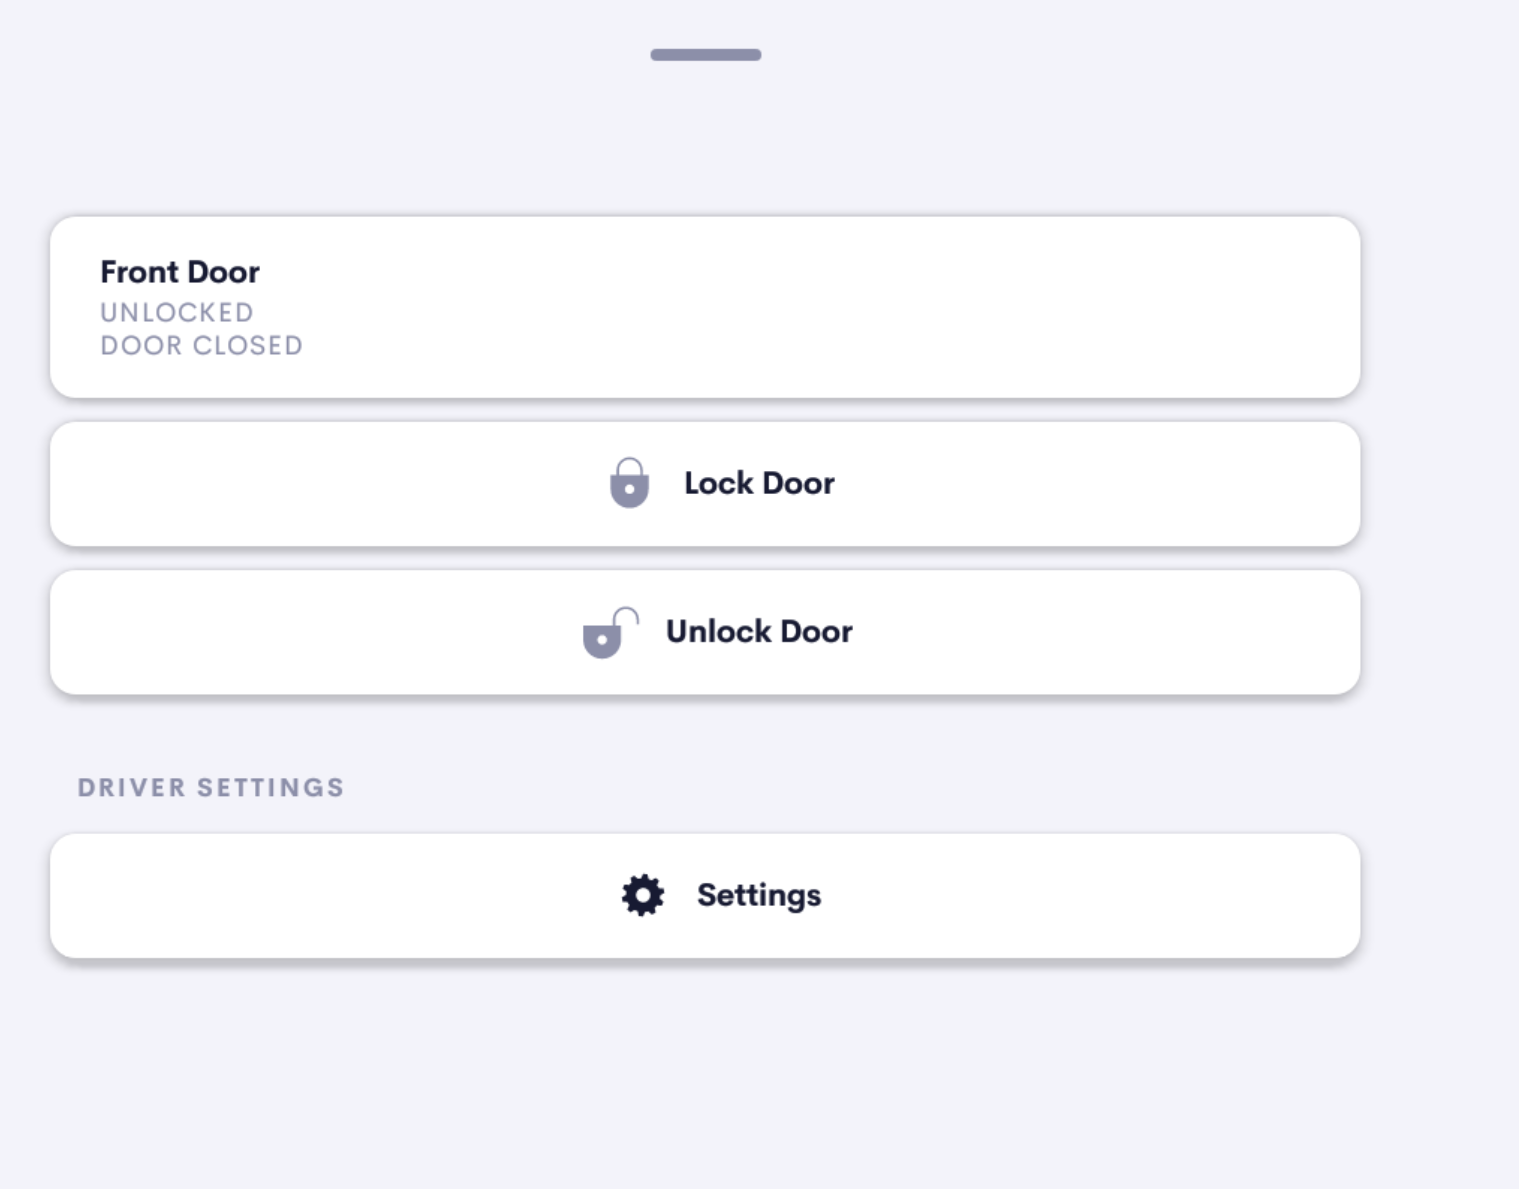
The user is presented with the current status of the lock (and door sensor if fitted) as well as options to Lock or Unlock the NUKI lock
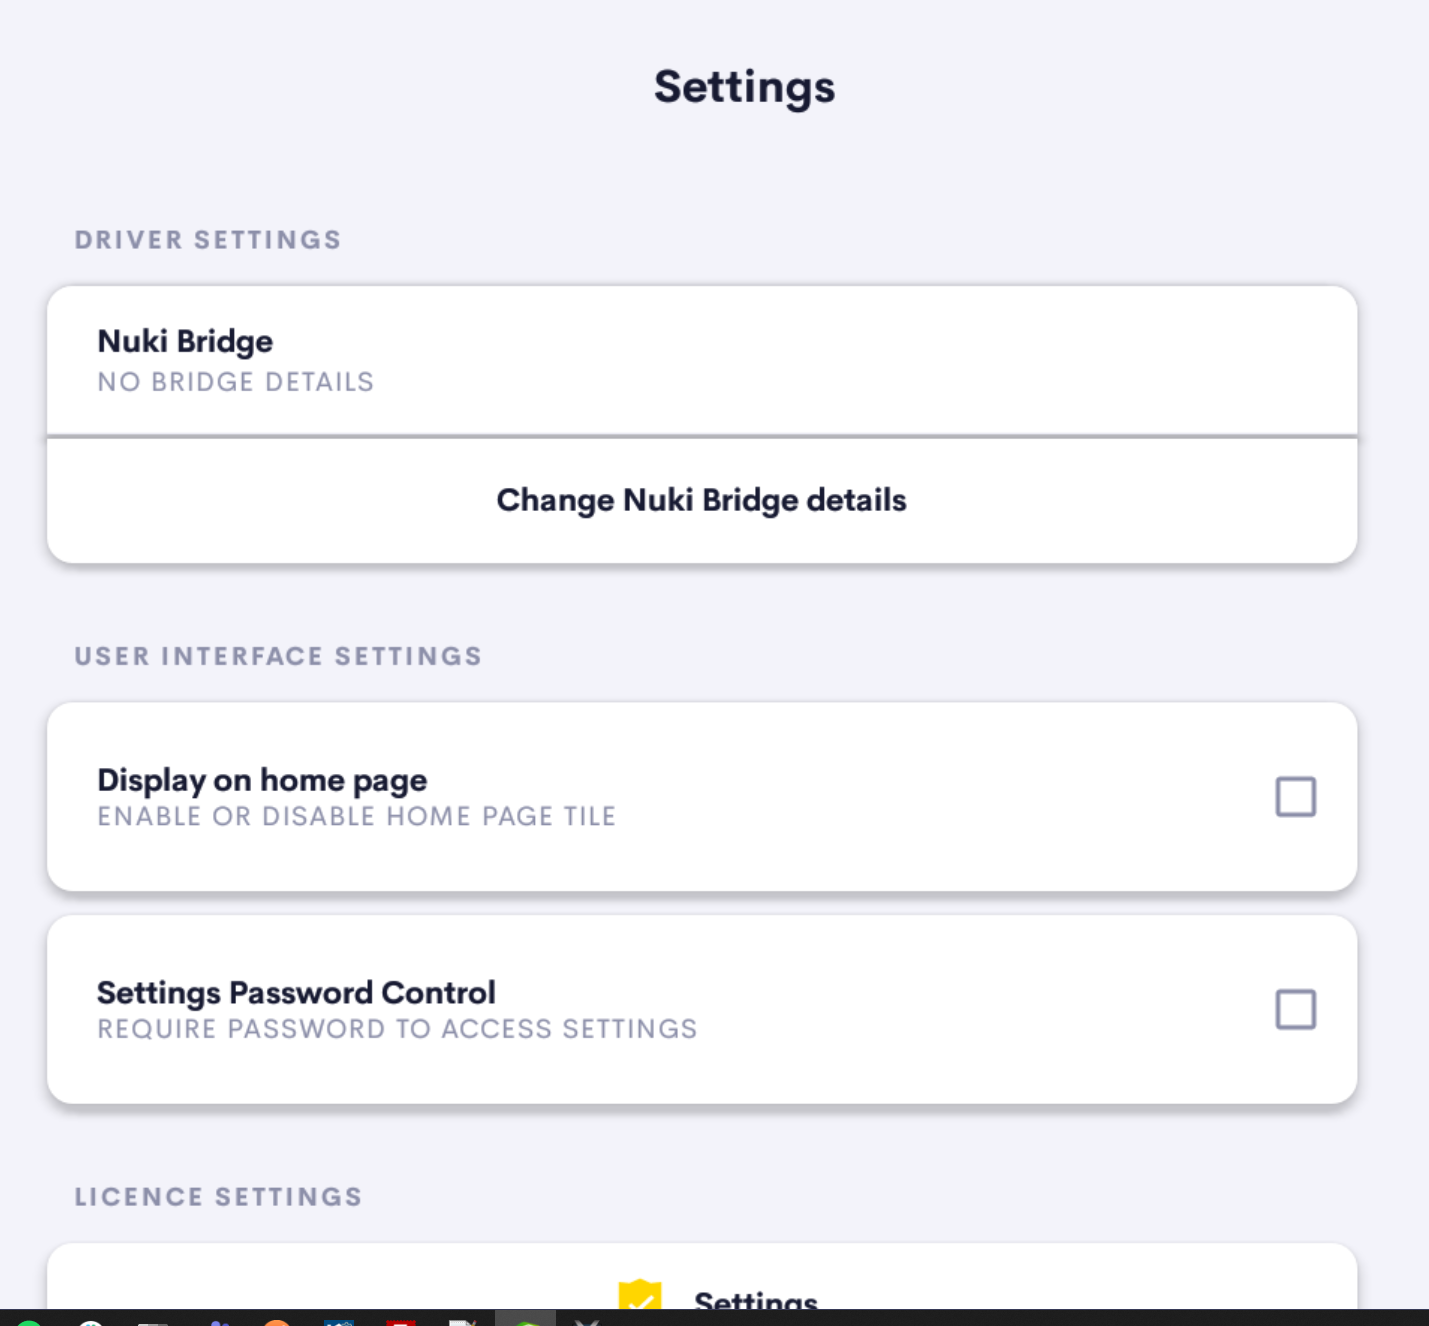
Nuki System Setup
Before adding the LCD Driver to you system you must install and setup your Nuki Bridge and Nuki Lock as per the manufacturer instructions using the Nuki App.
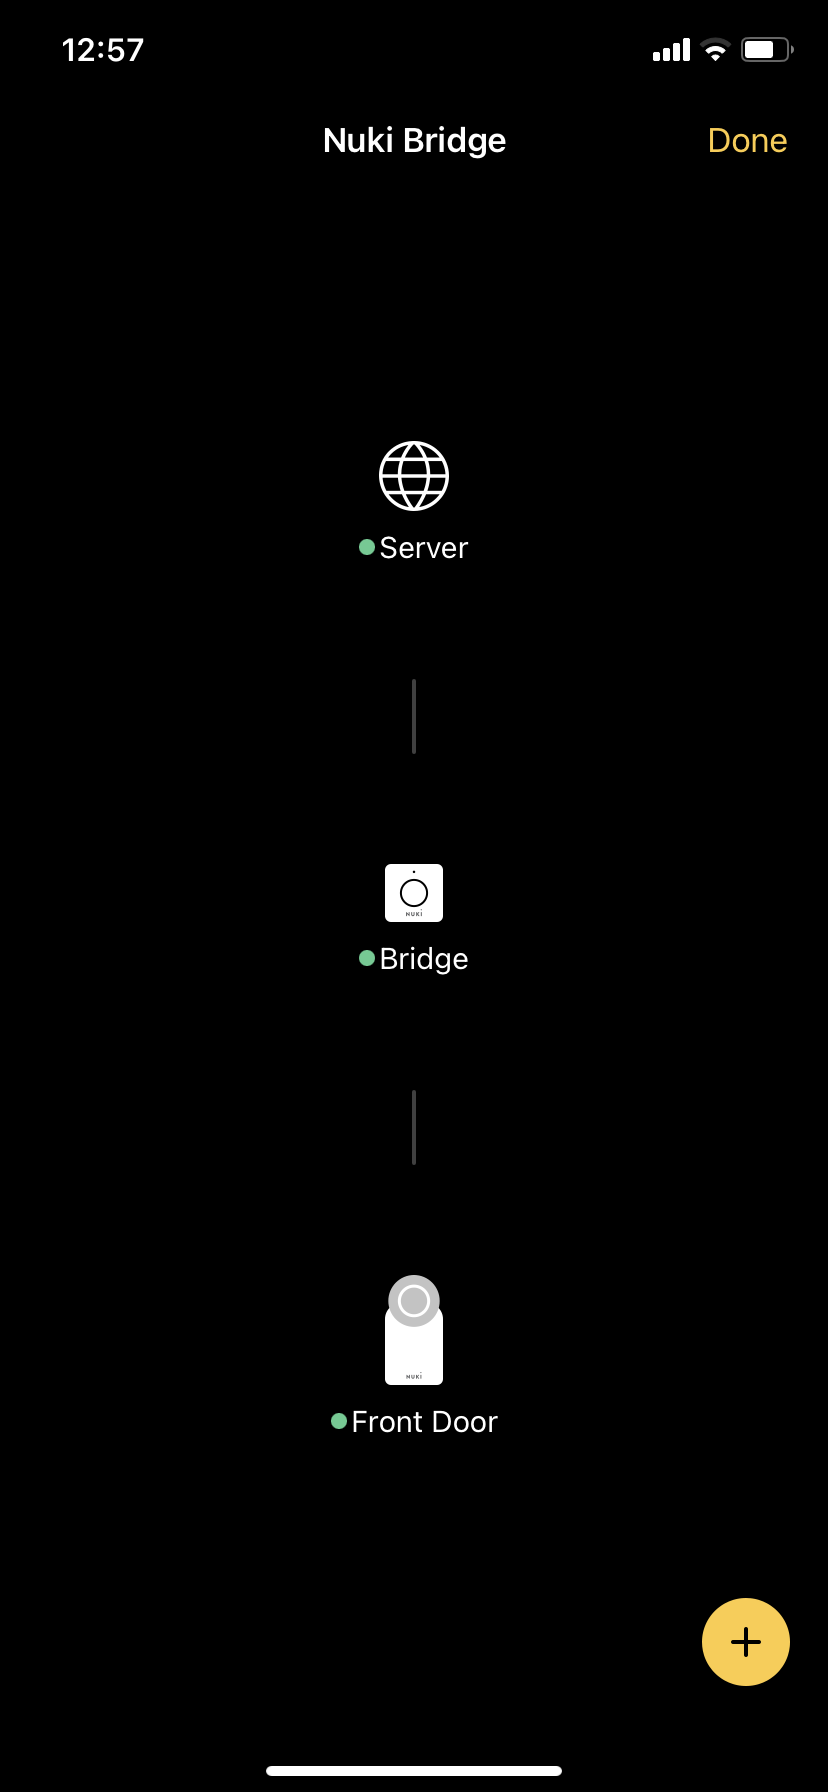
Here is a screenshot of the application showing a correctly setup system including a Bridge and a single Lock.
The green indicators show a correct Server, bridge and Lock connection which are required for discovery and pairing.
NB: Once paired a cloud server connection is not required for the Crestron Home integration.
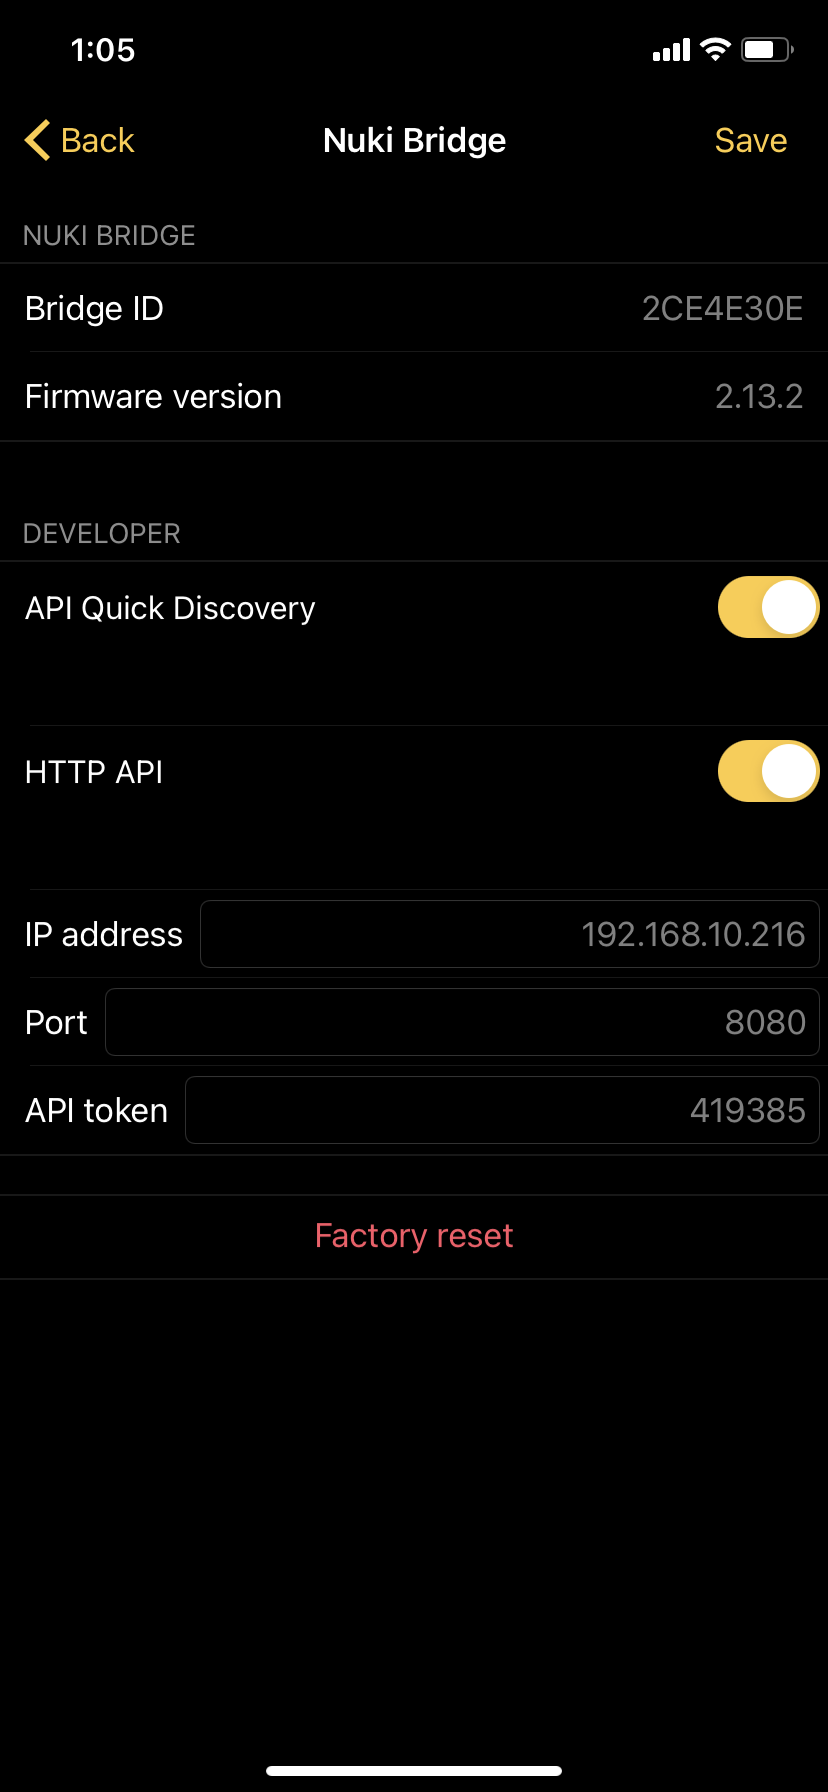
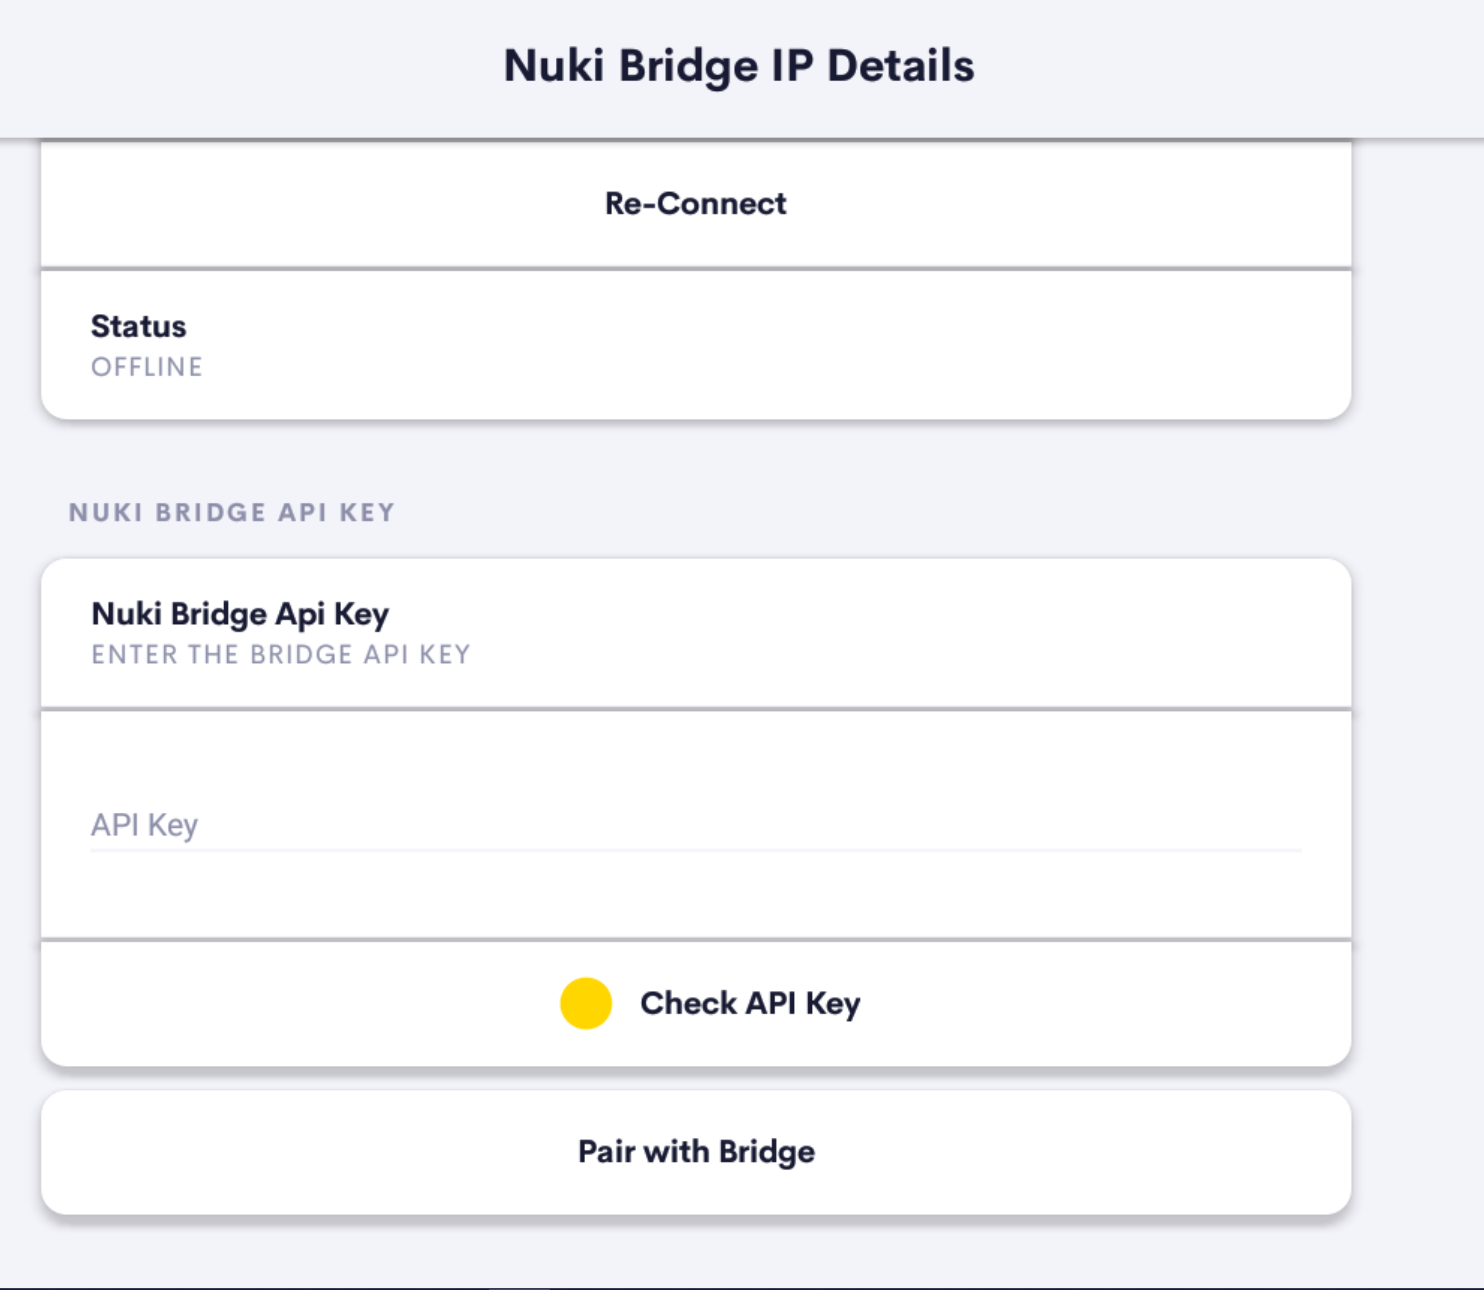
In the Nuki Bridge Settings the two developer options must be enabled:
- API Quick Discovery – ( used for automatic discovery)
- HttpAPI – (used for device control)
Add the Driver
Once you have added the Main Intercom Driver to a room you will see the controller UI tile in the room that you added the driver:
The Main page will show a button prompting you to change details of your Nuki Bridge.
Click the button to go straight to the device settings page.
Selecting Nuki Bridge

The Driver will automatically attempt to discover any Nuki Bridges on the same subnet as your device.
Click on a discovered Bridge to connect to that bridge or Click on the Connect Manually button to add a Bridge using a known IP Addess.
Top Tips:
We recommend setting up a MAC address reservation for your Nuki Bridge for the best stystem stability.
A Nuki Cloud server connection is required for the discovery to work and so we also give you the option to connect manually by adding the ip address of your bridge.
(this can be found in the Nuki App using Manage Bridges)
Pairing Nuki Bridge
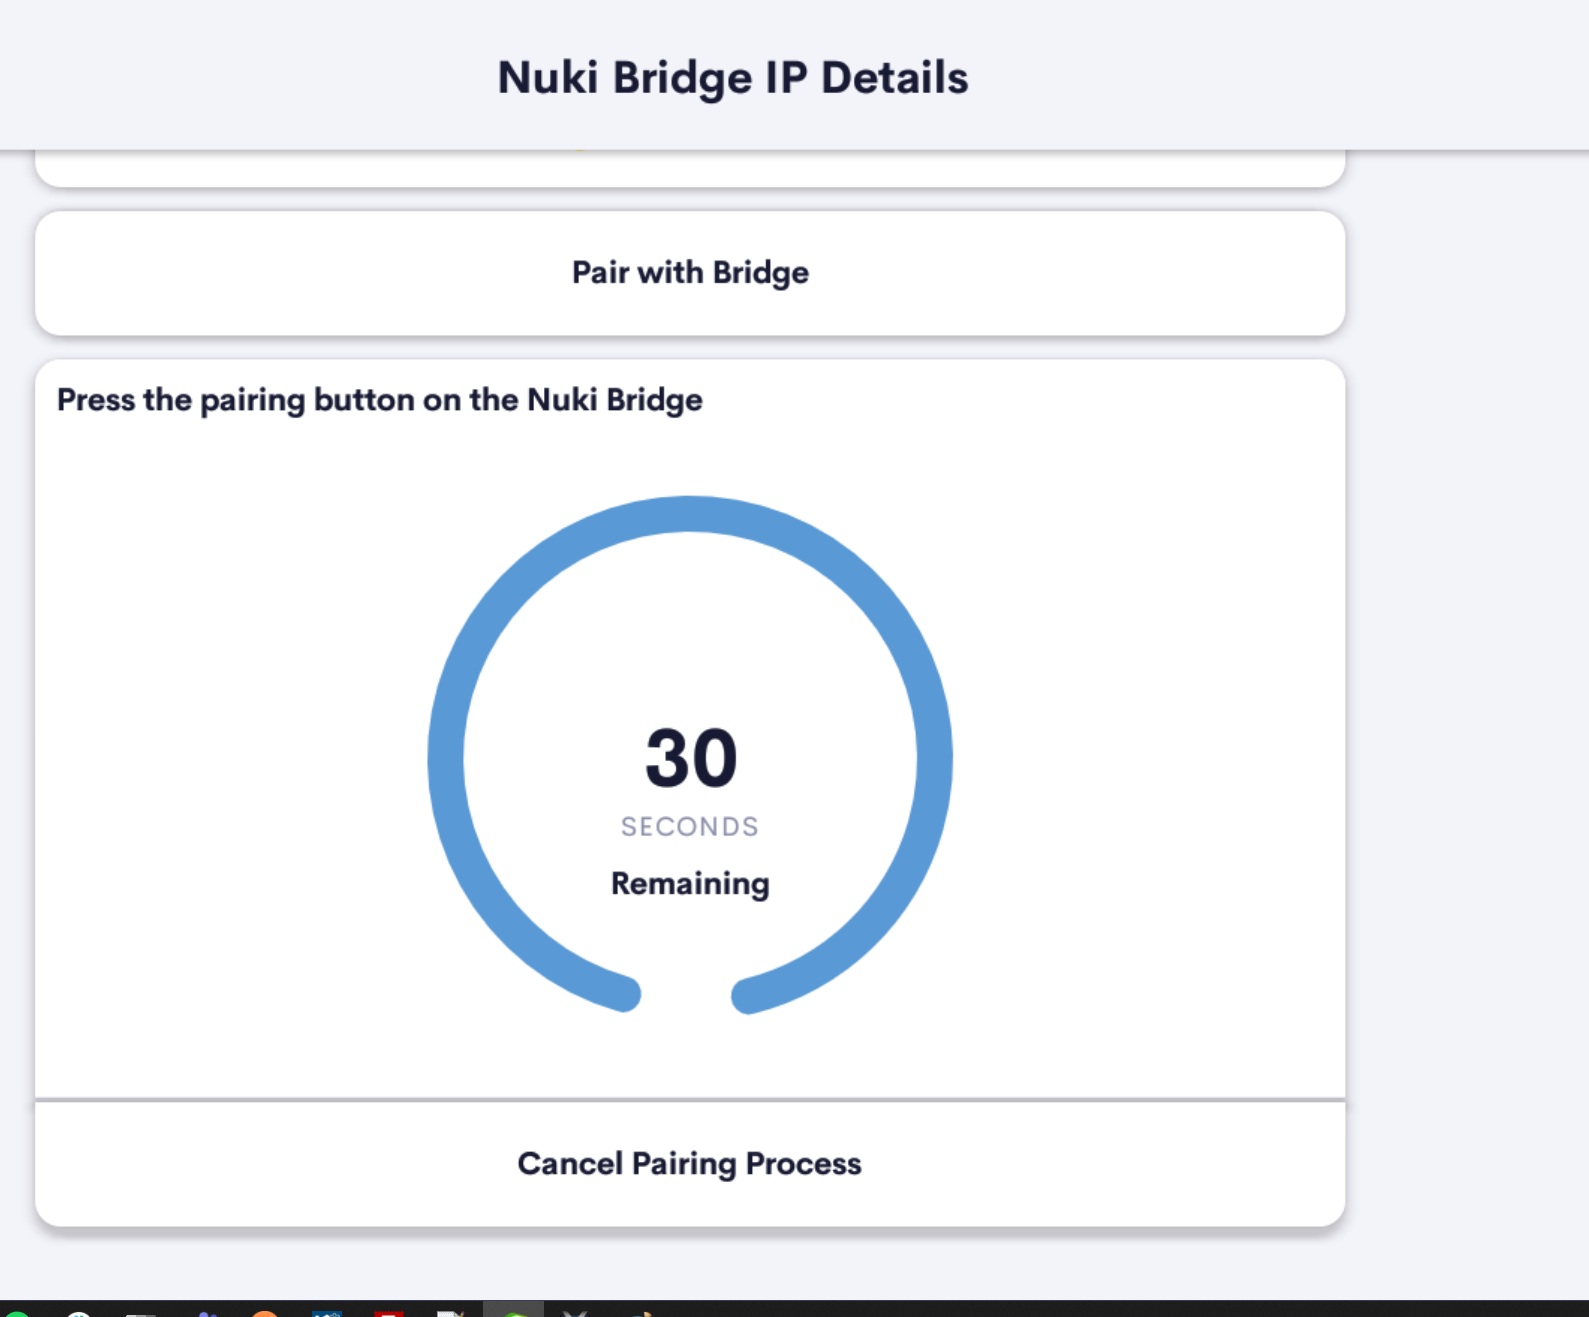
If you have already paired with the bridge the pairing information and API key will be show if its the first time then press Pair with Bridge to start the pairing process.
Once you have pressed the Pair with Bridge button you can complete the pairing (within 30 seconds) by pressing the button on the Nuki Bridge.
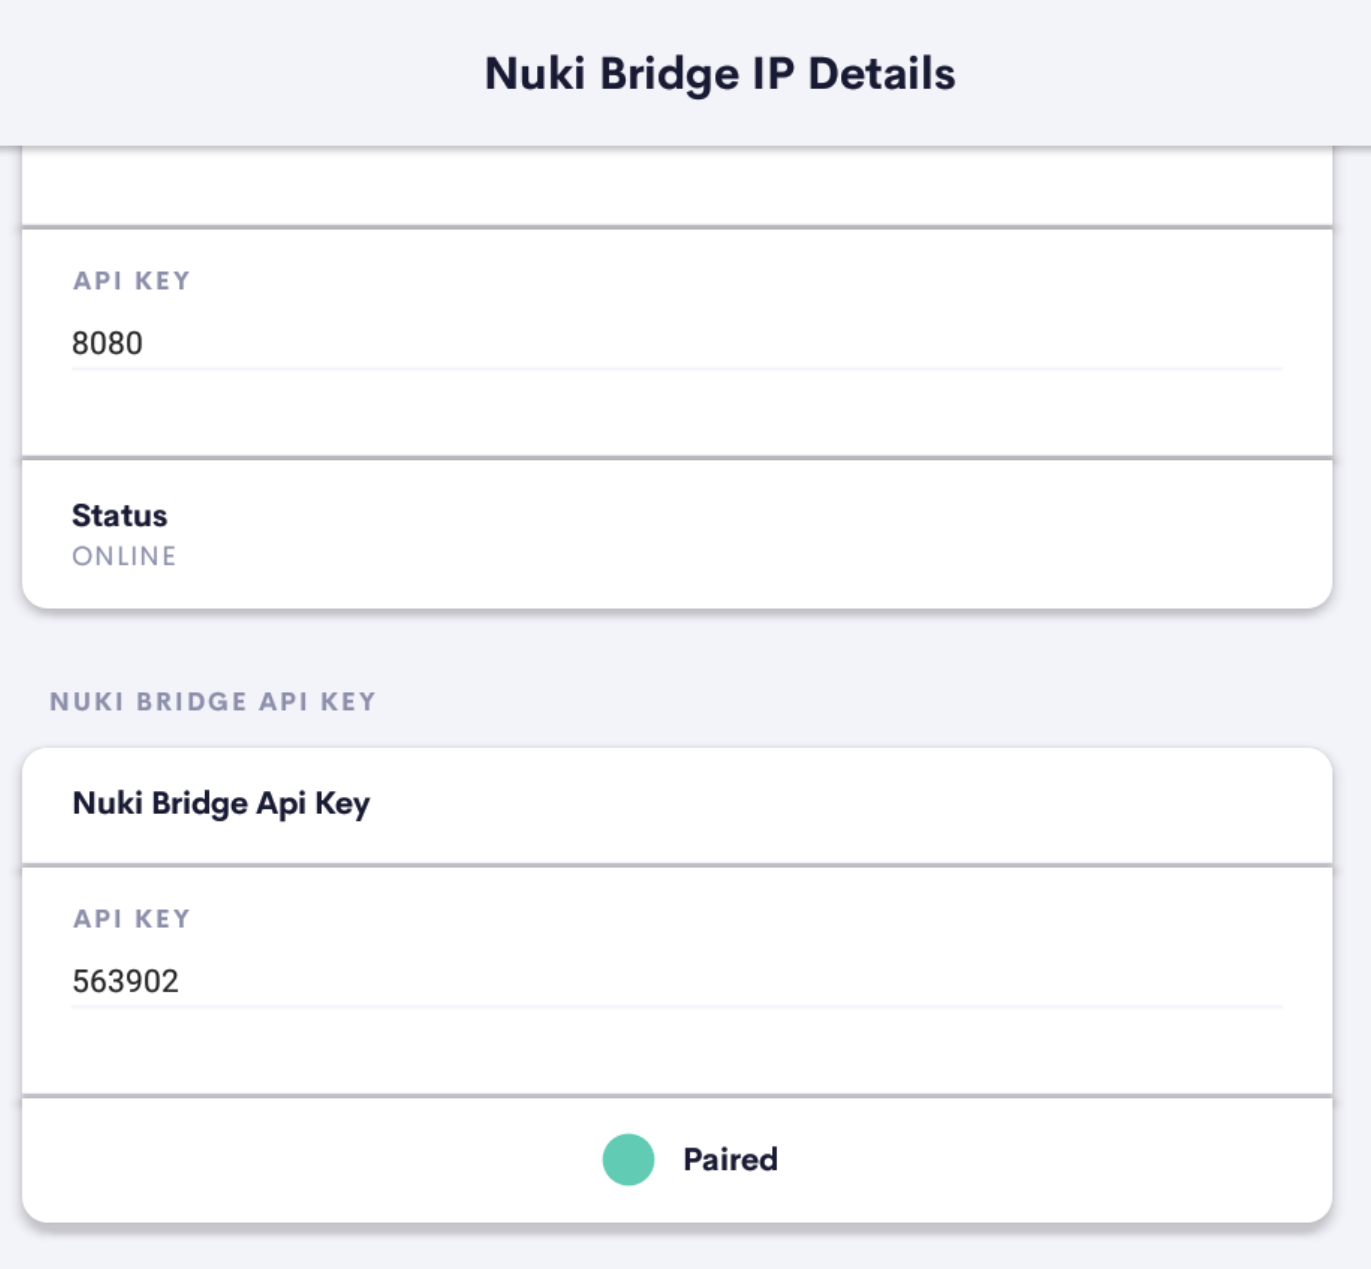
Once pairing is complete the status on the page will show the API key and a Paired Status for your System and the Online Status will show ONLINE.
Manually Pairing a Bridge
In the event that you cannot press the pair button or the discovery is not possible due to the lack of a server connection it is possible to manually add the IP and API details to the driver to pair the bridge manually.
We recommend using the automatic pairing above but this provides full flexibility to the installer.
Actions and Events
| Normal Events | ||
| Event | Locked | Event fires when state is updated to locked / closed |
| Event | Unlocked | Event fires when state is updated to Unlocked / Opened |
| Function Actions | NB: All Function Actions will trigger Normal Events above | |
| Action | Unlock | Unlock from an Action |
| Action | Lock | Lock from an Action |
| Action | Lock and Go | See Nuki Documentation for more details |
| Action | Unlatch | See Nuki Documentation for more details |
| Action | Latch | See Nuki Documentation for more details |