Panel to panel intercom for Crestron Home
No additional hardware required!
Panel to Panel intercom between supported Crestron touchpanels is now achievable with our Intercom Extension.
Usage
Once the quick setup is completed users are able to dial from one Crestron Panel to another within the property with just a few clicks!
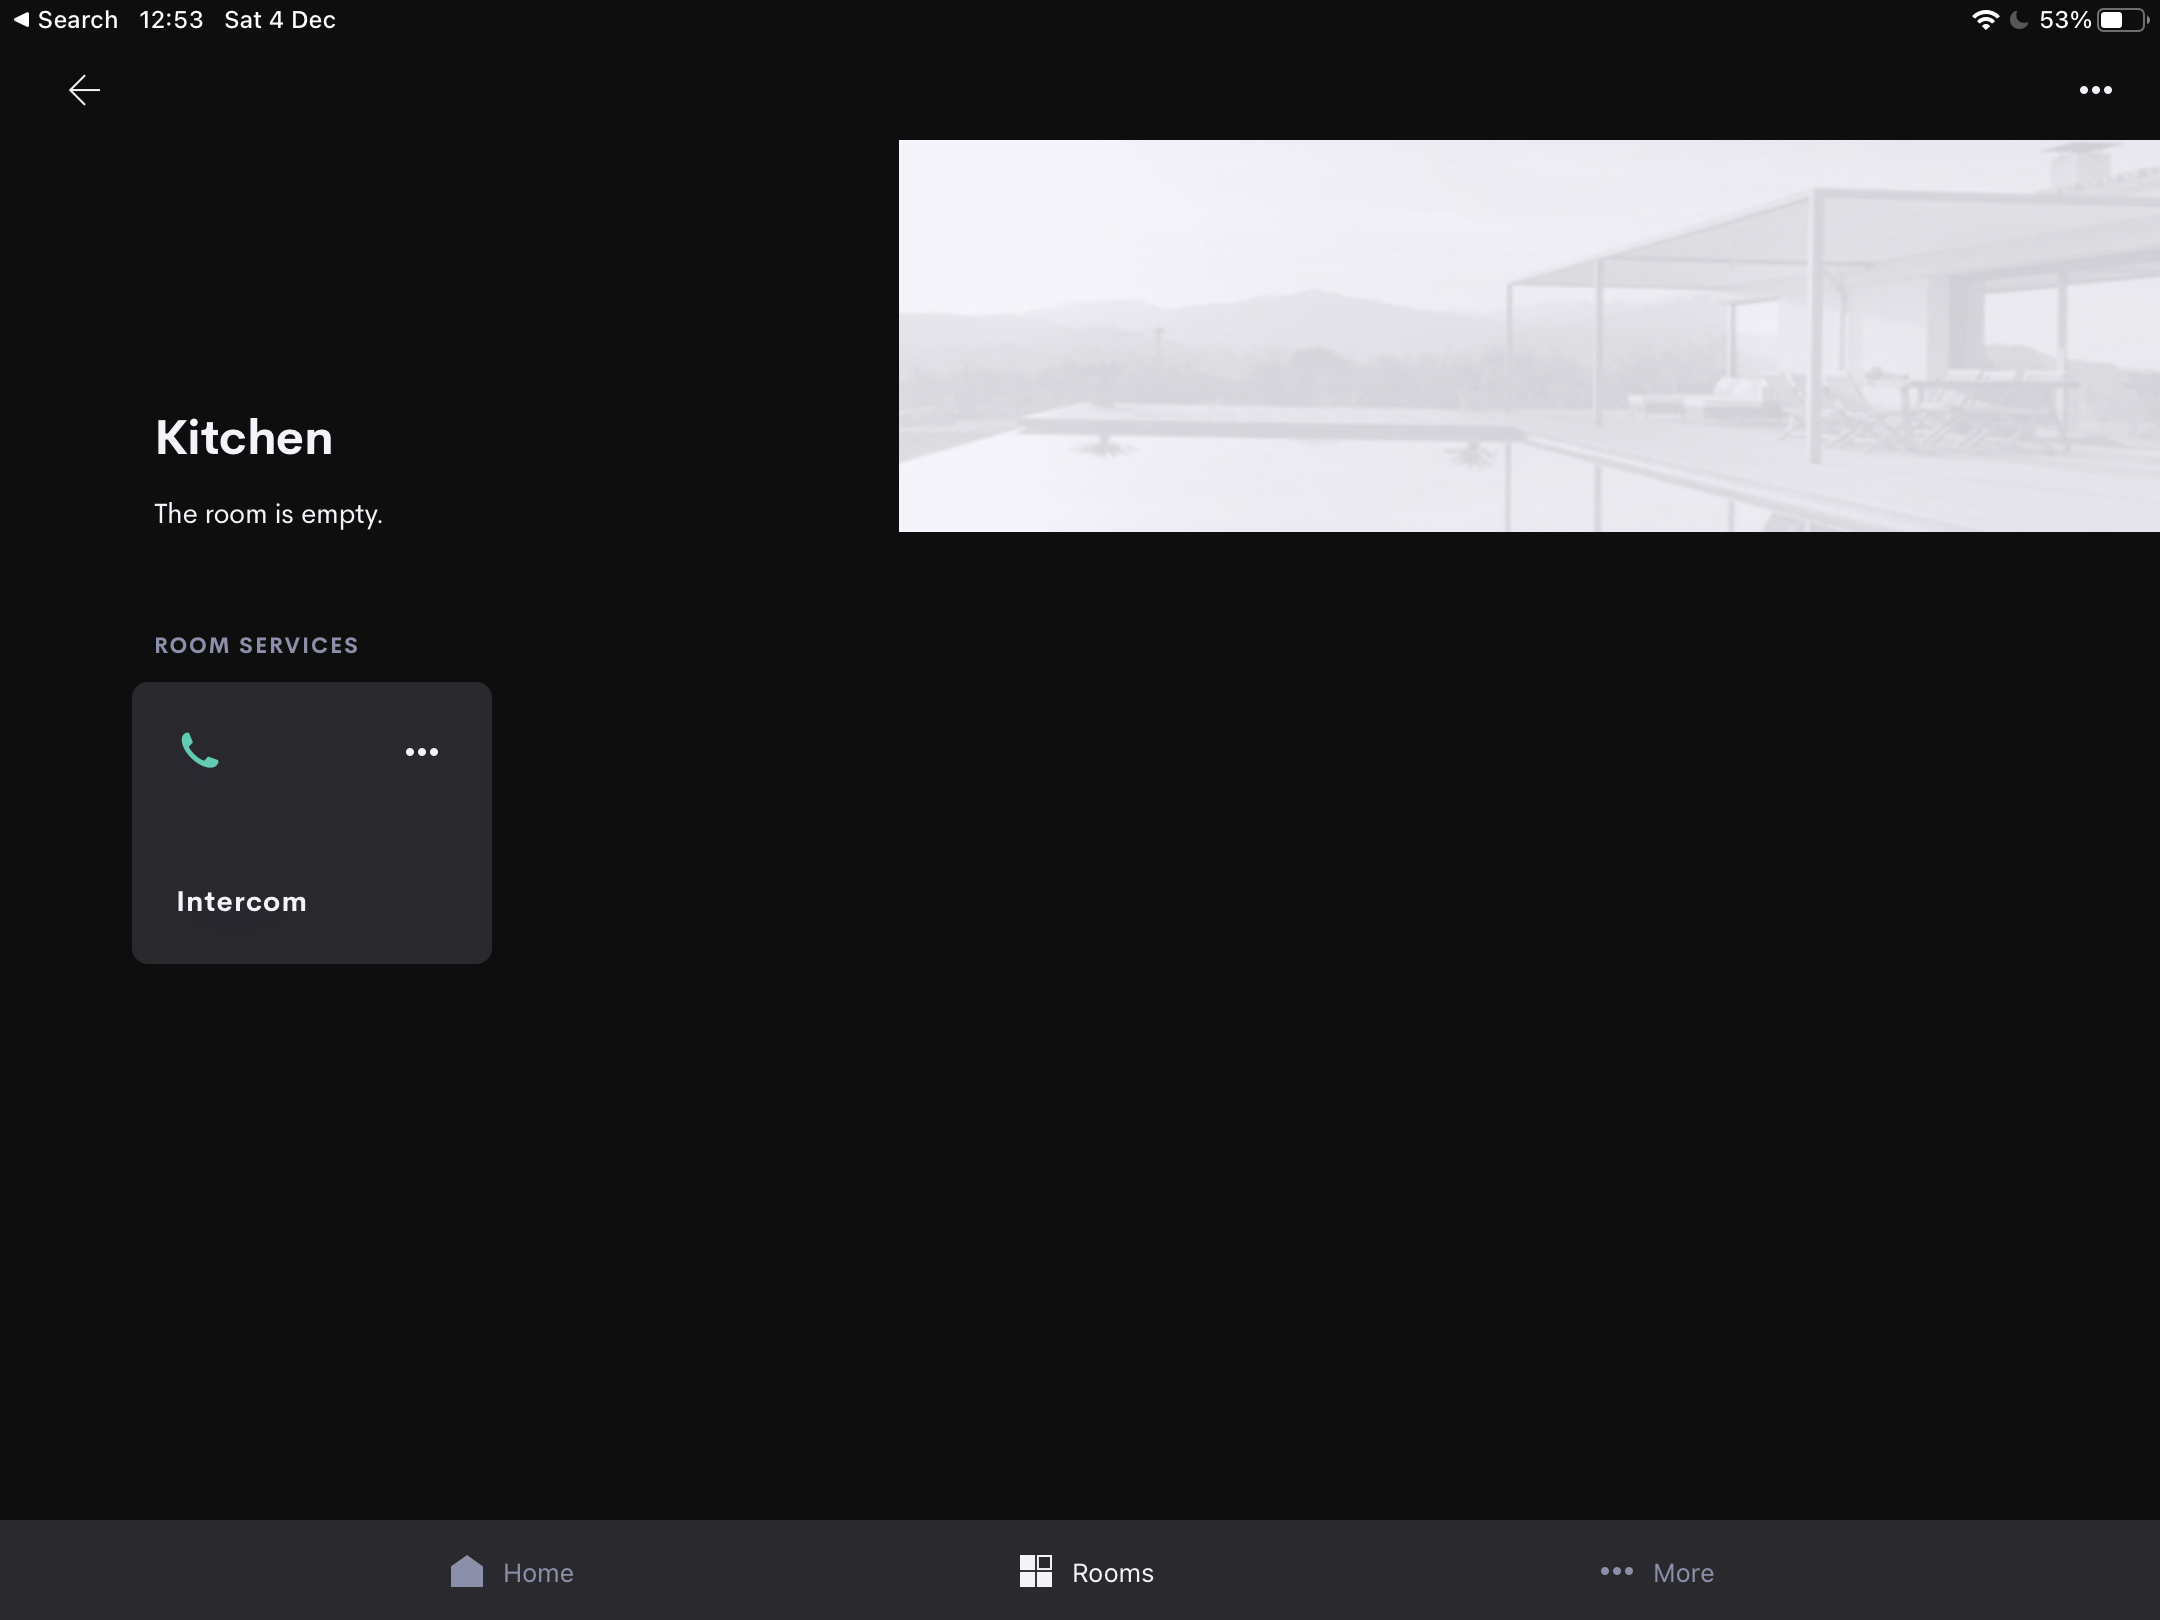
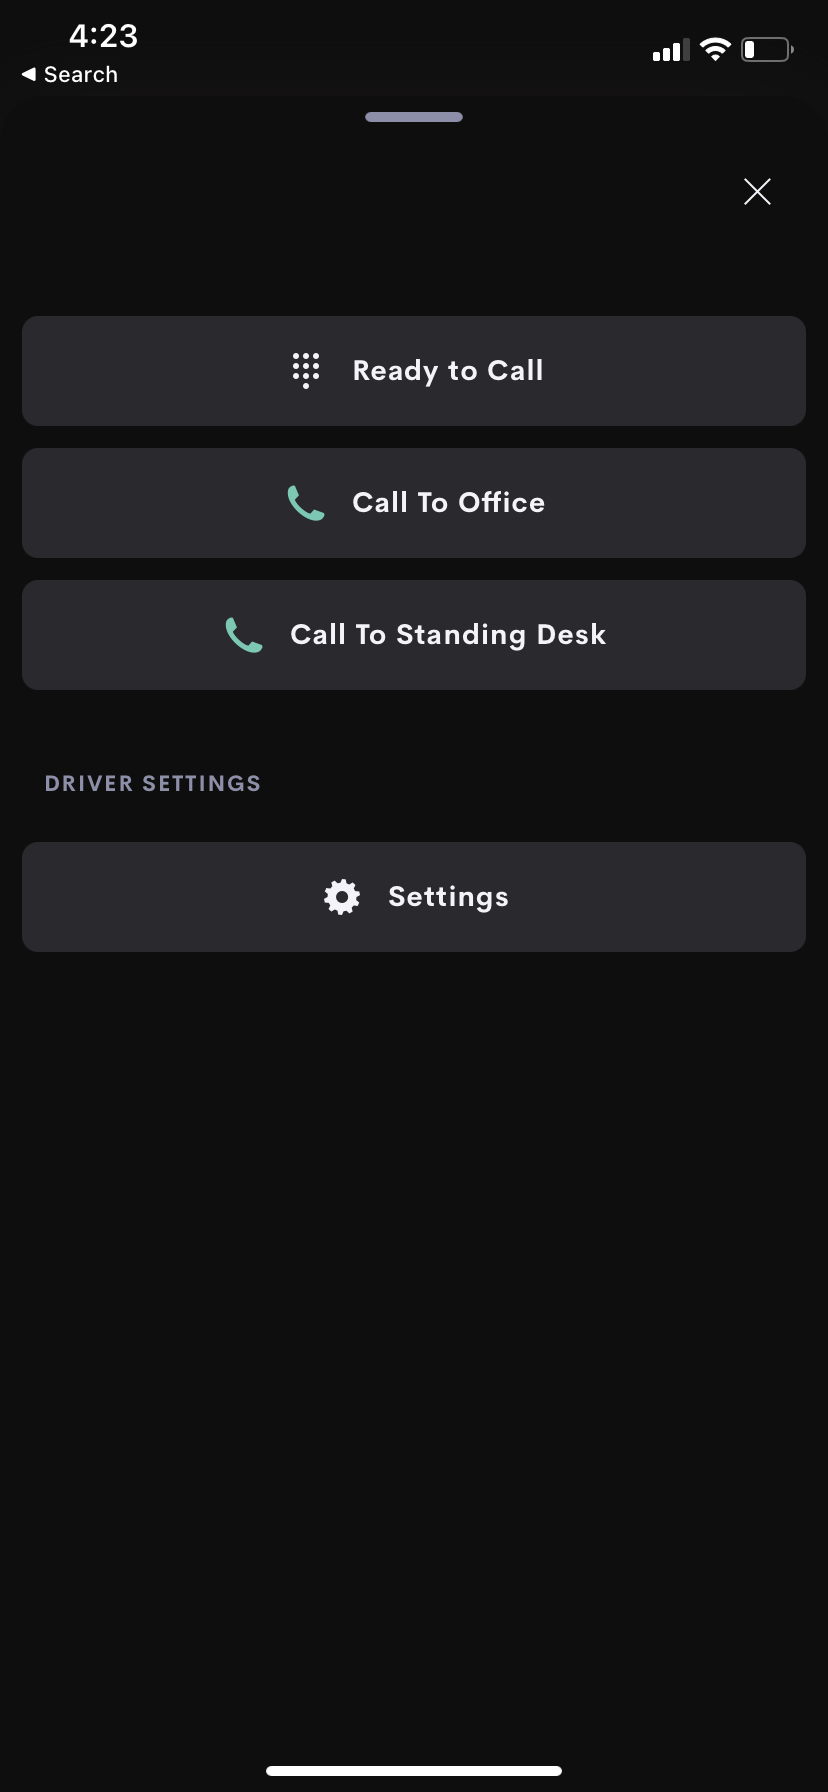
From the room page on the TSW Panel the user clicks on the Intercom tile to open the dialer.
The User is presented with a list of Extensions to call.
Simple click the desired extension to place a call.
The Call Flow for a normal panel to panel call is as Follows:
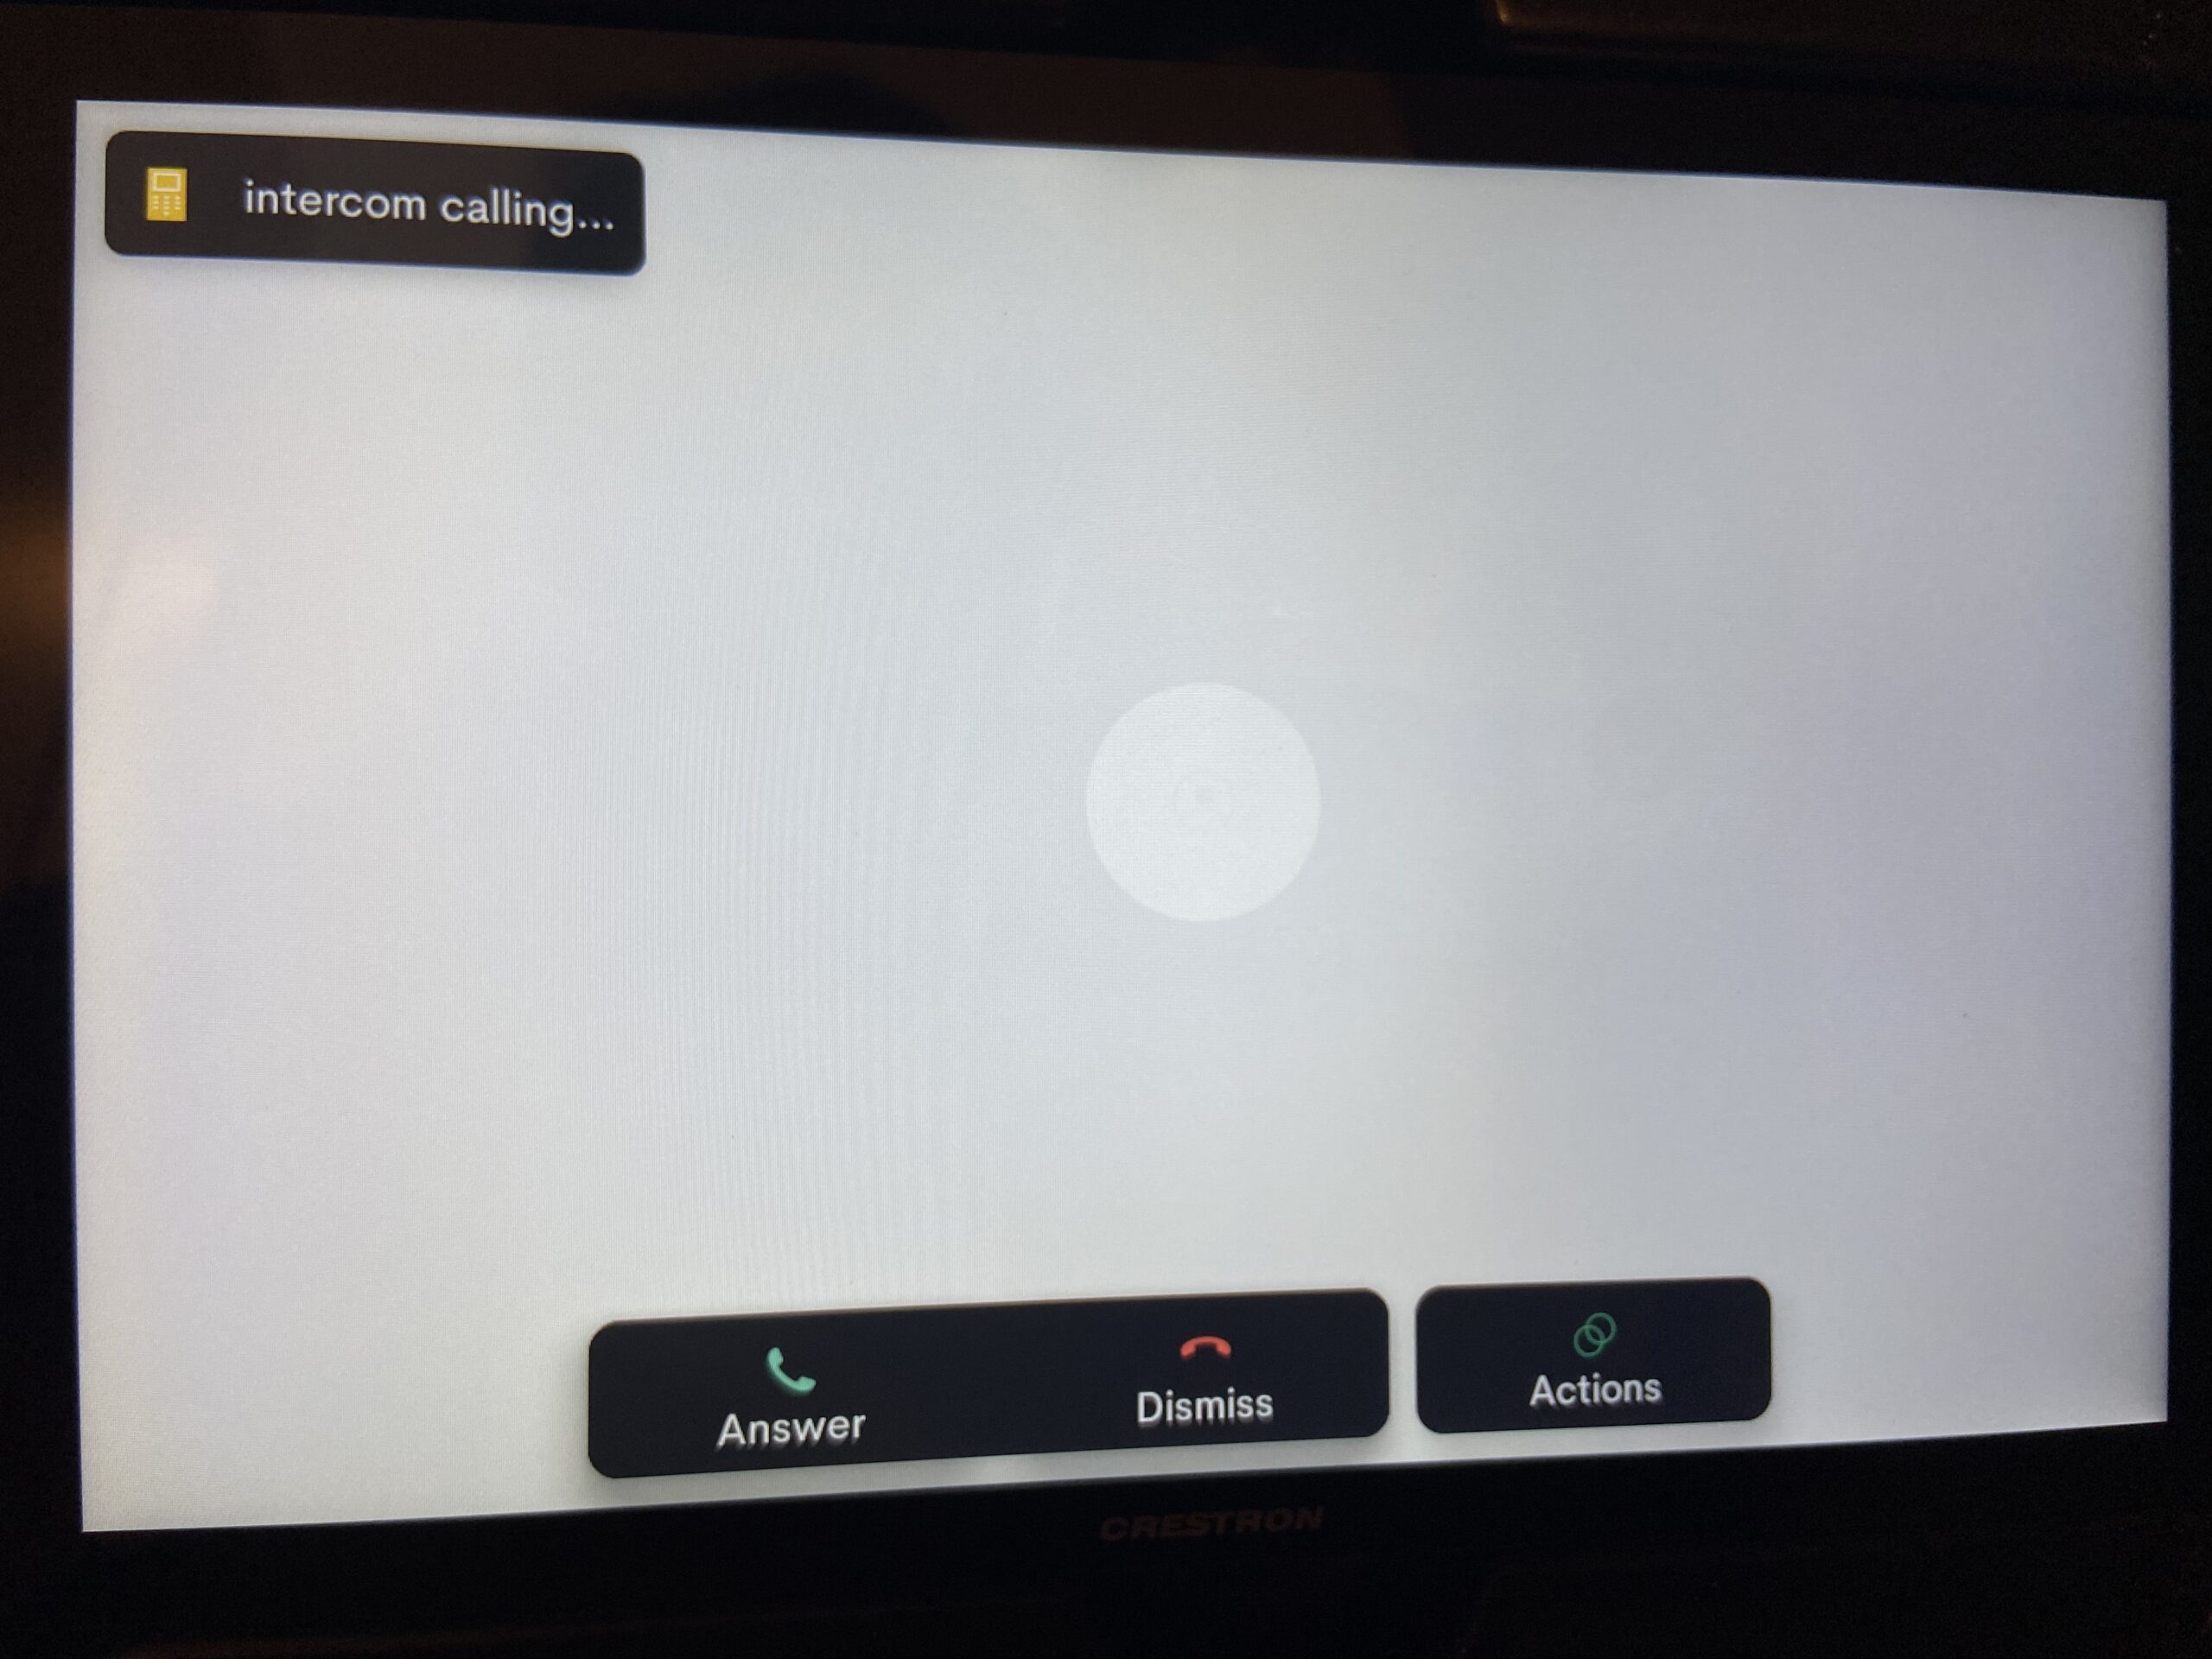
User A uses the User interface above to call Panel B.
Panel B Rings and a User B must answer the call.
Panel A then Rings and the User A must answer the callback.
At this point the point to point call is establblished and is ended by either user pressing the end call button.
System Setup
Once you have added the Main Intercom Driver to a room you will see the controller UI tile in the room that you added the driver:
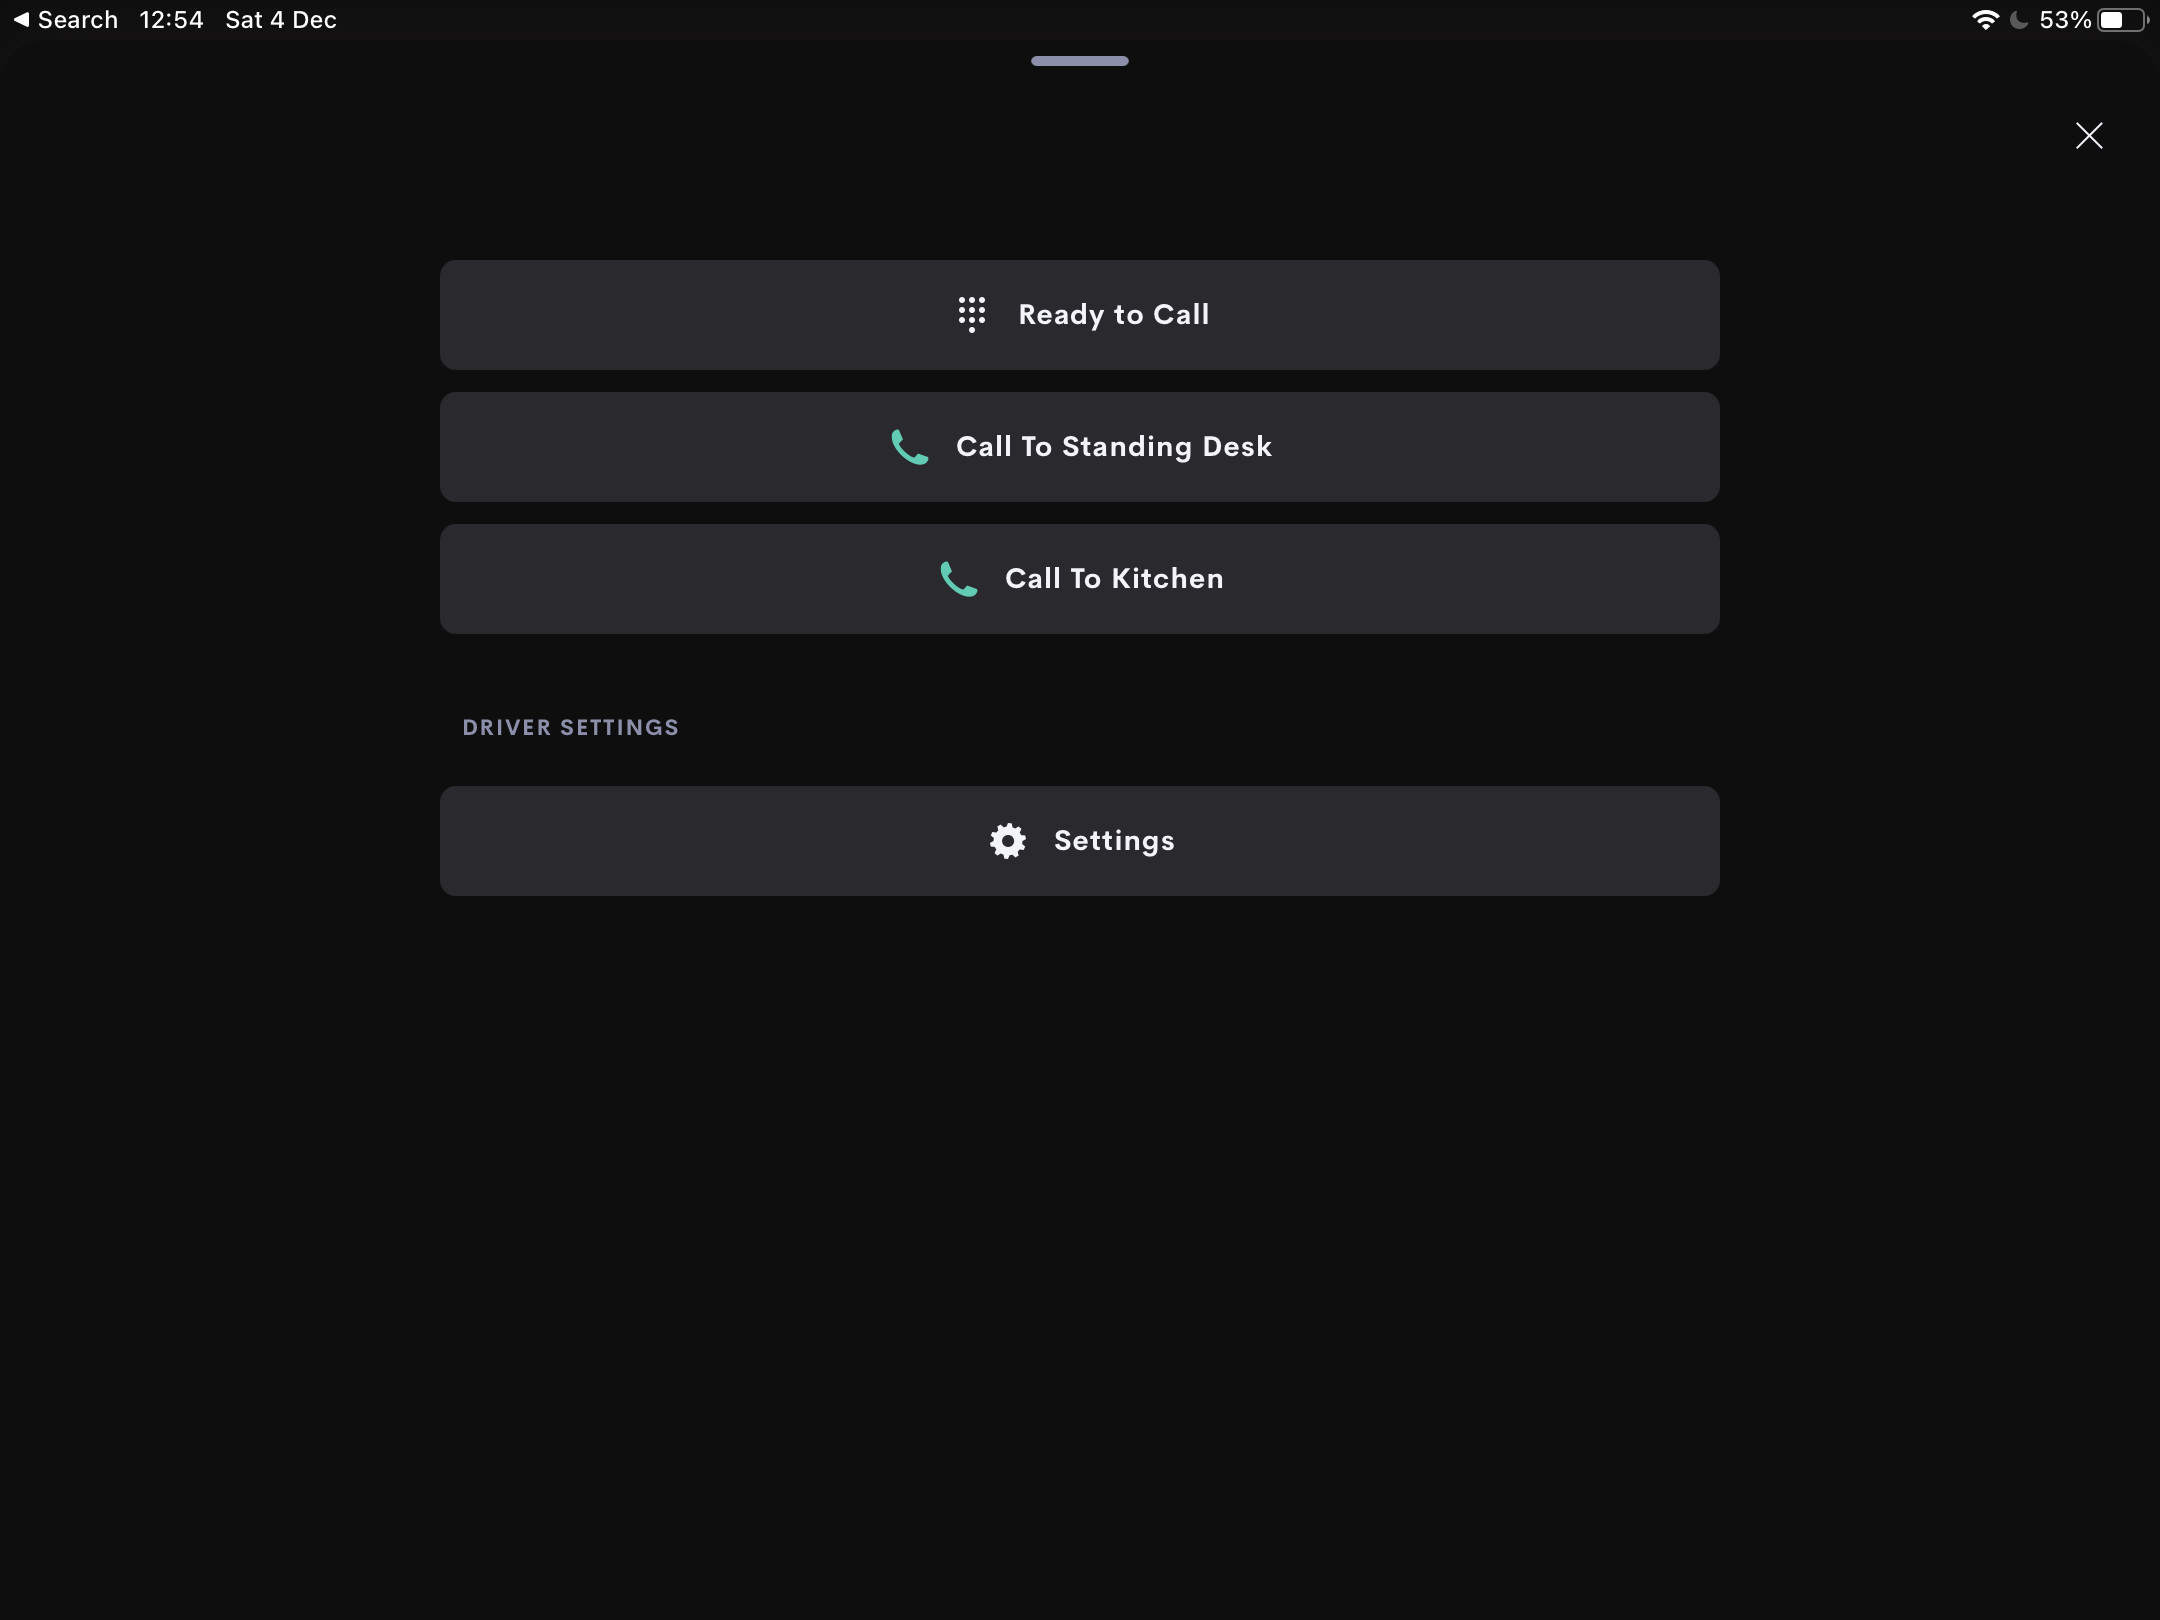
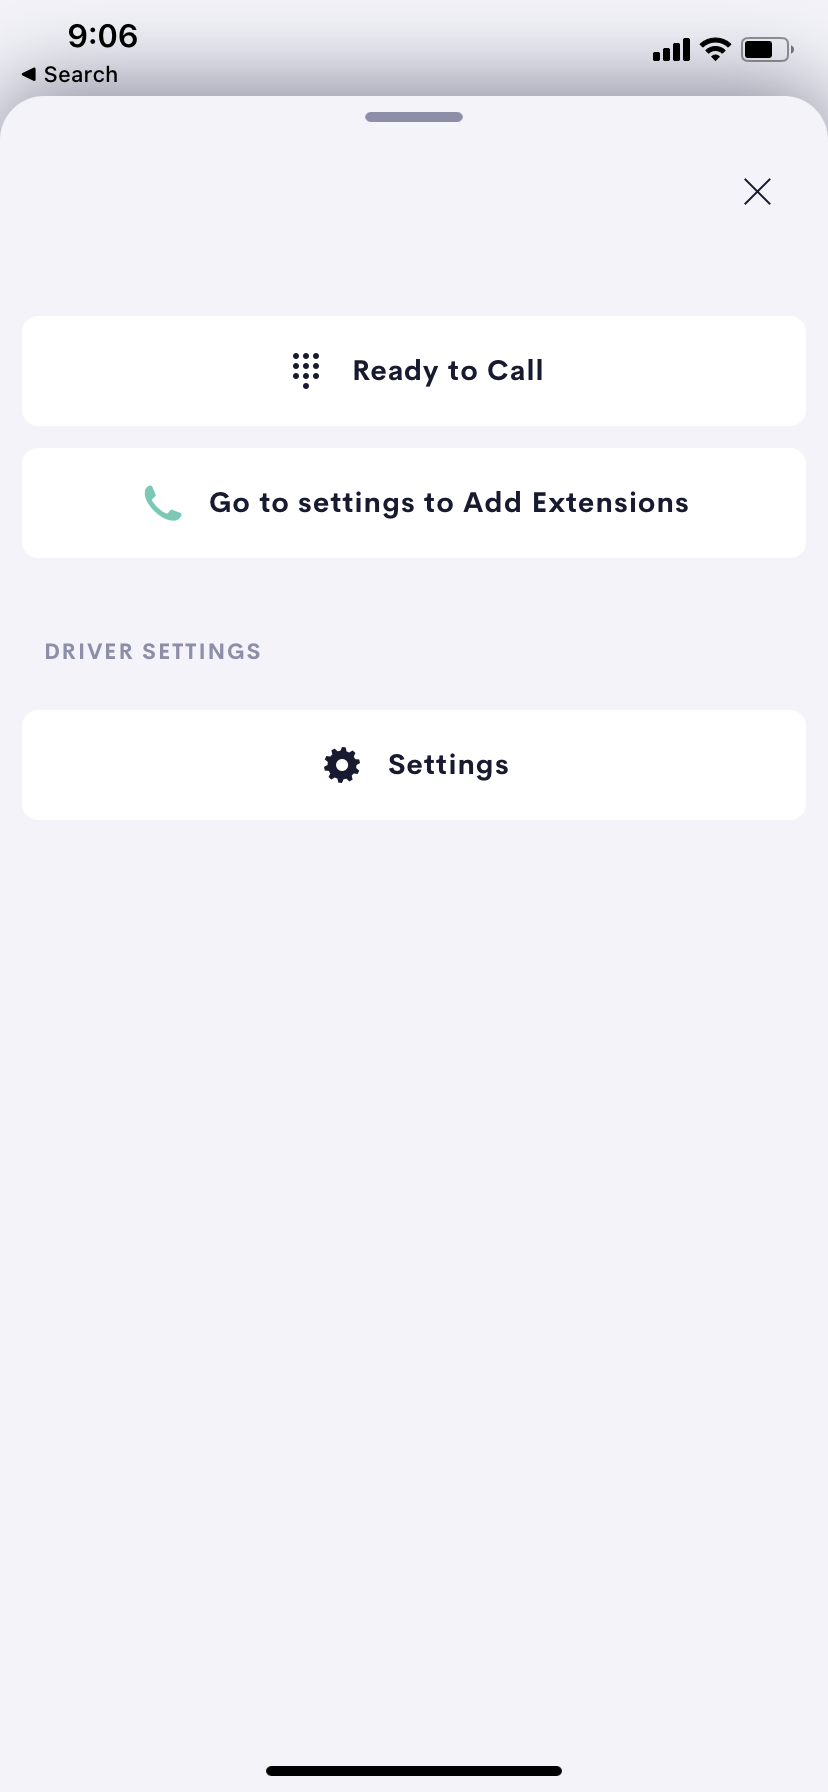
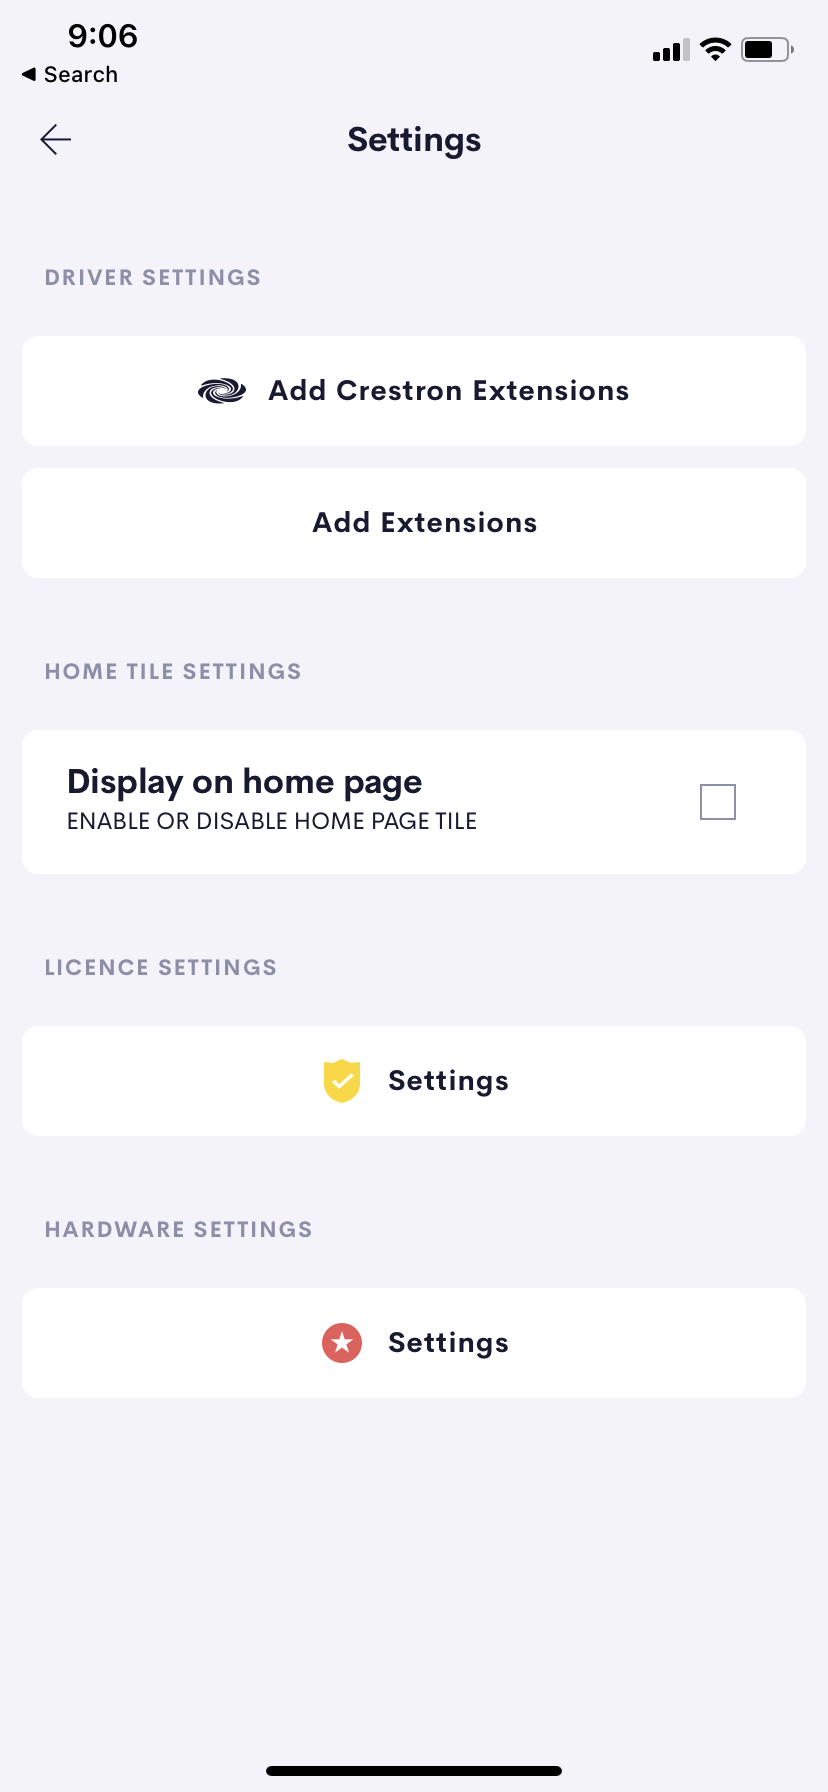
The Main page will show a button prompting you to add extensions.
Click the button to go straight to the settings page.
On the Settings page you can add Crestron Rava Extensions using device discovery.
Or you can choose to add extensions manually.
Adding Extensions

The Main Settings Page Shows
- List of Existing extensions.
- (Clickable to edit)
- Options to add Extentions
- Crestron (using Discovery)
- Manual.
Adding Crestron Panels

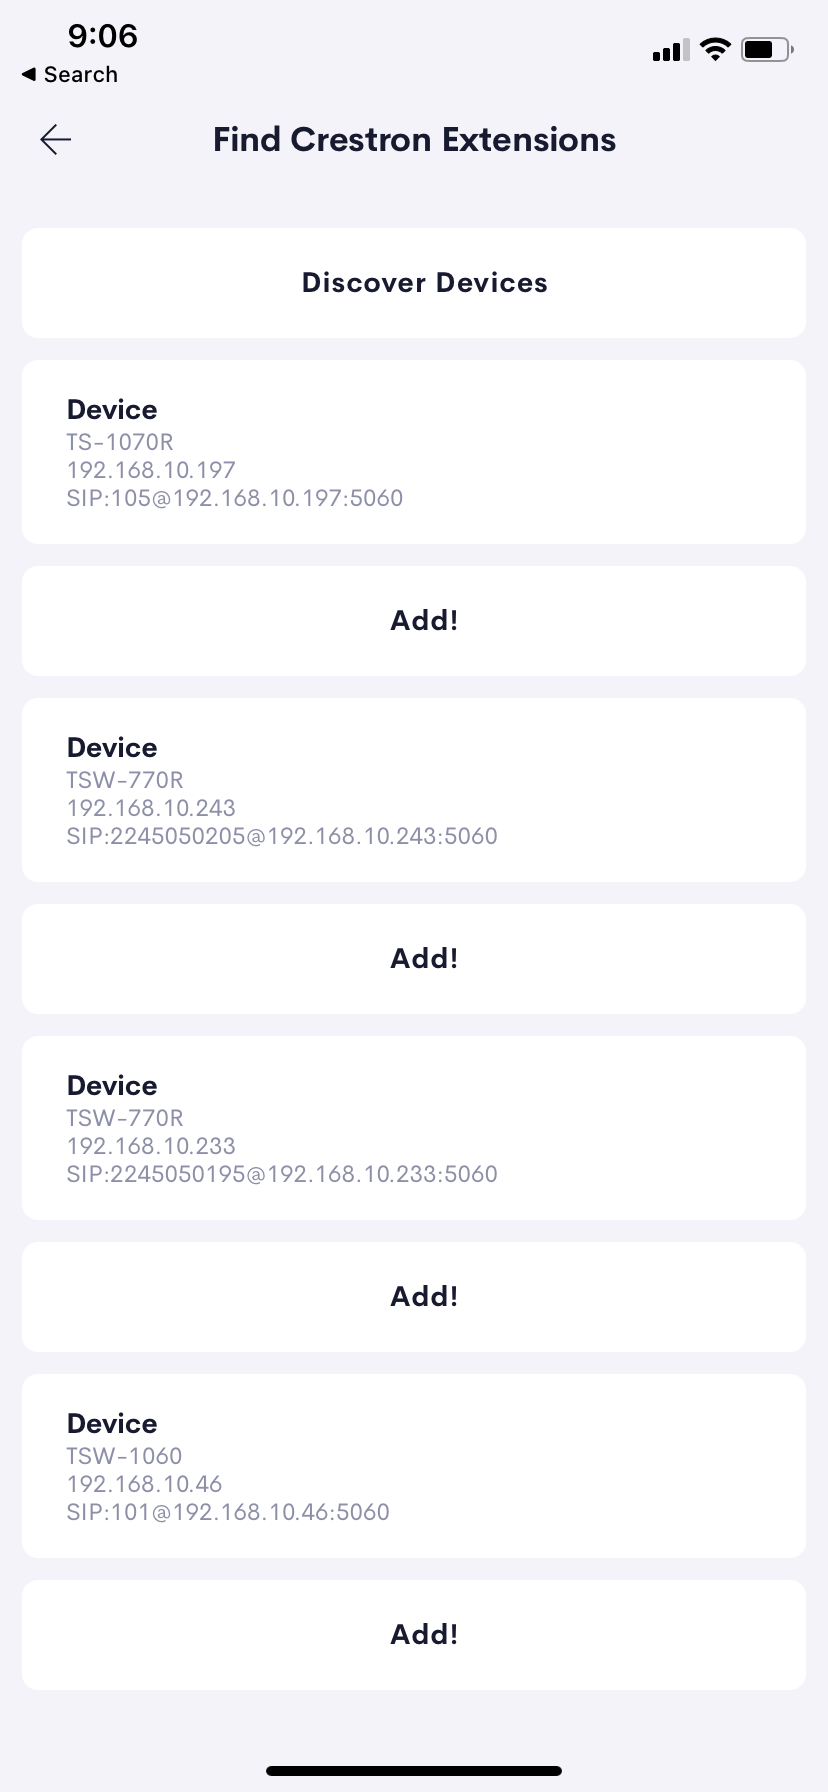
When you first connect and after adding new Rava devices you will need to press Discover devices.
This will discover all Crestron Rava Devices on the LAN.
The process takes approximately 30 seconds to complete and once finished you will see a list of Rava SIP panels ready to add to your system.
Add the extensions that you want to use to the system one by one.
(You can return to the list to add more by pressing the Button)

NB: We recommend that Crestron panels are setup with a fixed IP or a Statically assigned IP addess by DHCP.
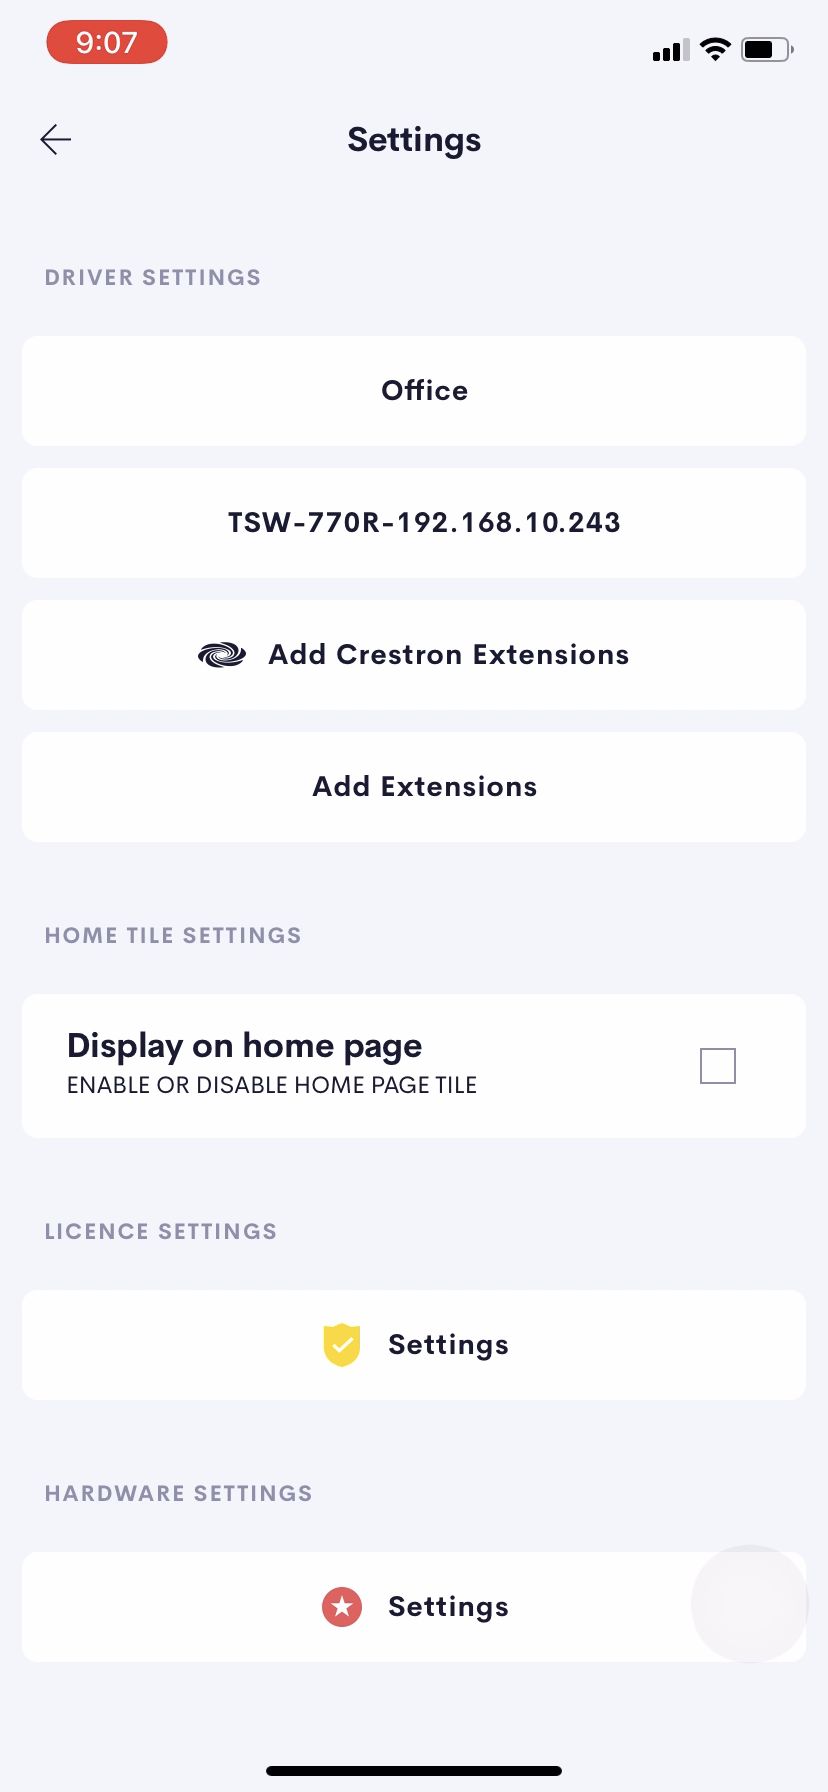
After adding an extension you will go back to the main settings page.
The Extension Showing up in the List of Extensions with the default information (Model-IPAddress)
From the main settings page you can return to add more extensions or continue to complete the setup of your added extensions.
Clicking on the newly added extension allows you to edit the Name of the extension which is presented to the user.
The name brought in from the system discovery is the Model name followed by the IP Address of the panel.
If you want to confirm that you have the correct panel before naming it then simply use the “Dial Panel to Identify ” button. This places a call to ring the panel allowing you to confirm which panel is which.

Adding non crestron Extensions
Extensions can be added manually to the system using the “Add Extensions” button on settings page of the central controller driver.
Non Crestron Sip phones can be added to be dialled from the system.
For example a 2N intercom can be added to the extension list or a concierge SIP Phone on the local area network.
It is possible with the correct NAT translation or by using a STUN Server to setup cross subnet calls in an MDU environment.
For more information or to discuss this capability for an MDU project please contact us.

Adding Addition Extensions After First Setup
Adding extensions to a system follows the same pattern as above. When an extension is added to the central controller all of the endpoint drivers are updated with the new extensions information and hence it is added to the list of available extensions to call.
Removing Extensions After First Setup
Extensions can be removed from the system on the setup page of the central controller driver. Click on the extension to remove
Extensions can be removed from the system on the setup page of the central controller driver. Click on the extension to remove to see that extensions detail page and then click the remove button to remove the extension from the system.
The Associated Intercom endpoint driver will need to be removed from the system using the setup app or associated with a different extension.
Adding Endpoint Drivers
We recommend adding an endpoint driver for each rava panel into the room where that panel is located. If the room has multiple panels you can either decide to only use one for intercom or put two endpoint drivers in the room making it obvious by naming which is which.
Once configured each driver will be paired to a panel.
The Endpoint Drivers have a very simple setup where the driver’s needs to be paired to its panel.

When first loaded to the system the driver main page will prompt you to set an extension.
On the Settings page Click Change Extension to assign an Extension to this driver.
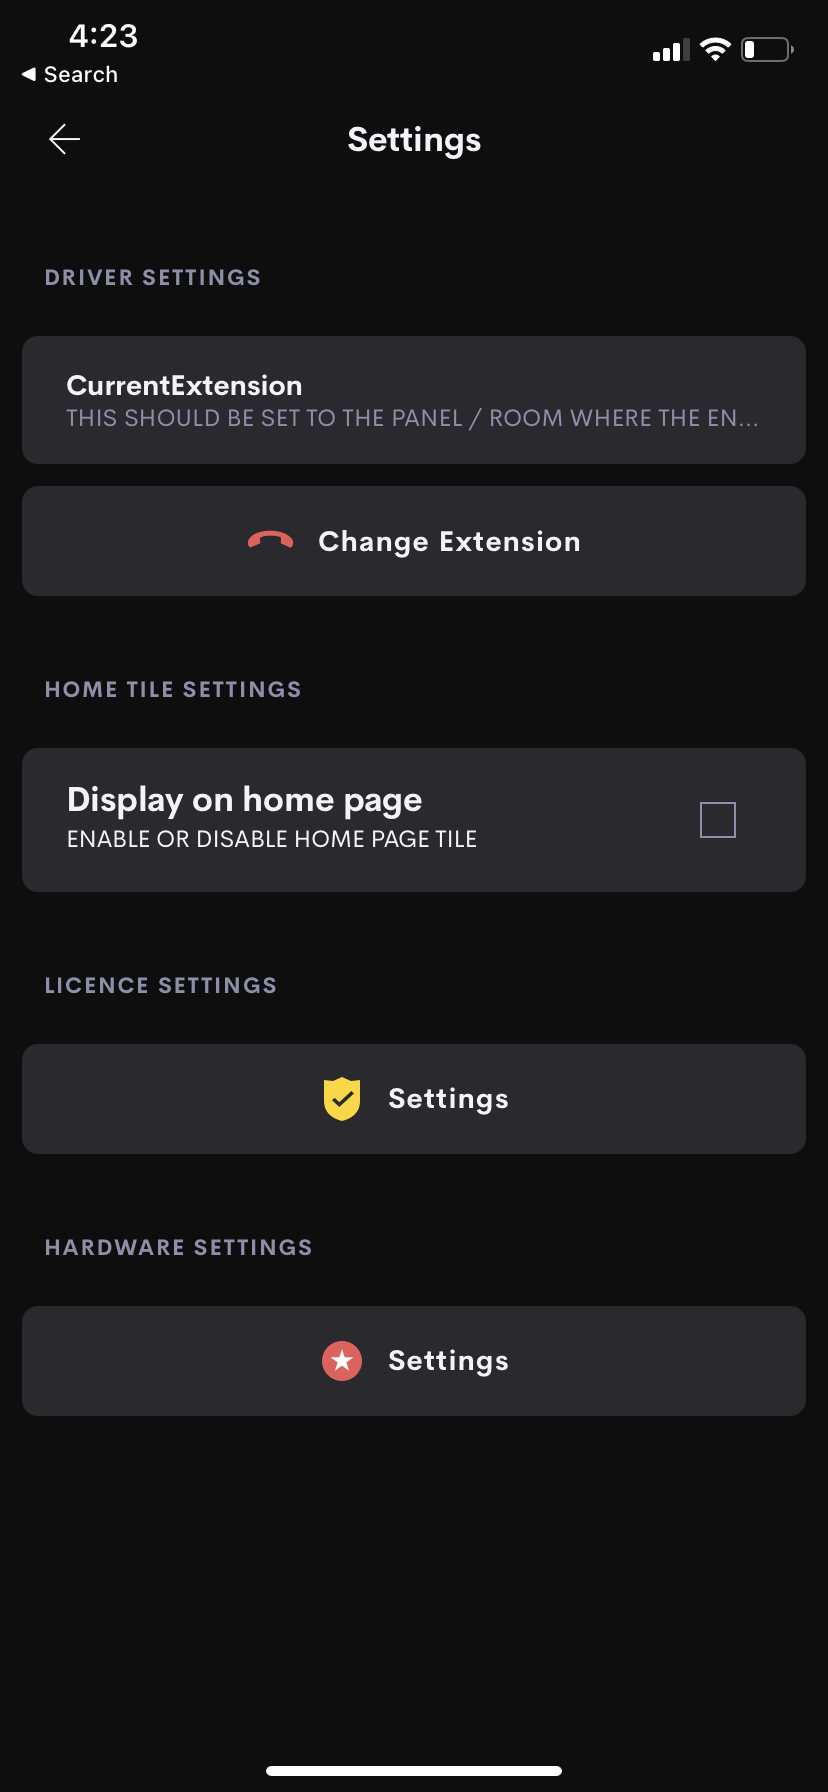

A list of all extensions ( setup using the Main Intercom Driver) will be shown.
Select the Extension that you want this driver to be associated with.
When you exit settings and return to the driver main page you will see options to call the other extensions in the system.
NB: These endpoint tiles are designed to be used only on the Rava Panel which they are assigned to.
Integrators are advised to consider hiding other rooms on the Rava Panels Crestron Home Application using the show rooms function in advanced settings.
Settings to achieve this can be found here
Mobile Devices and Non Rava Panels.
The drivers added to the System can be hidden easily on Rava Panels but on Mobile devices which are configured by users its more complicated to manage this. Calls can be controlled by the drivers running on mobile applications or non rava panels but the flow will not work as described unless a user is ready to accept an incoming call at both of the ends of the intercom call established.
Crestron Rava Panel (Zero)Configuration
Each Panel in your crestron home system should be setup with unique SIP extension number. Crestron Panels Self configure by doing a broadcast handshake on the network so you shouldn’t normally need to set your extension numbers manually.
If you want to make the experiance really slick for your users then Each Panel should also have a unique SIP Name for example “Lounge Door Panel” this means users will see information on who is calling them before choosing to answer a call.
This can be achieved by using the SIPLOCALNAME cmd at the panels console.
TSW-1060>SIPLOCALNAME GAMES ROOM
Success: New parameter has been set
TSW-1060>