AJAX Power User Manual
lamine benbada on June 10, 2022
Control and monitor the power consumption of AJAX Socket Automation modules
Connects to the homeowners AJAX account!
For cloud connected AJAX sockets, control the output (on/off) and monitor the power consumption.
Usage
Once the quick setup is completed users are able to monitor and control the sockets with just a few clicks!
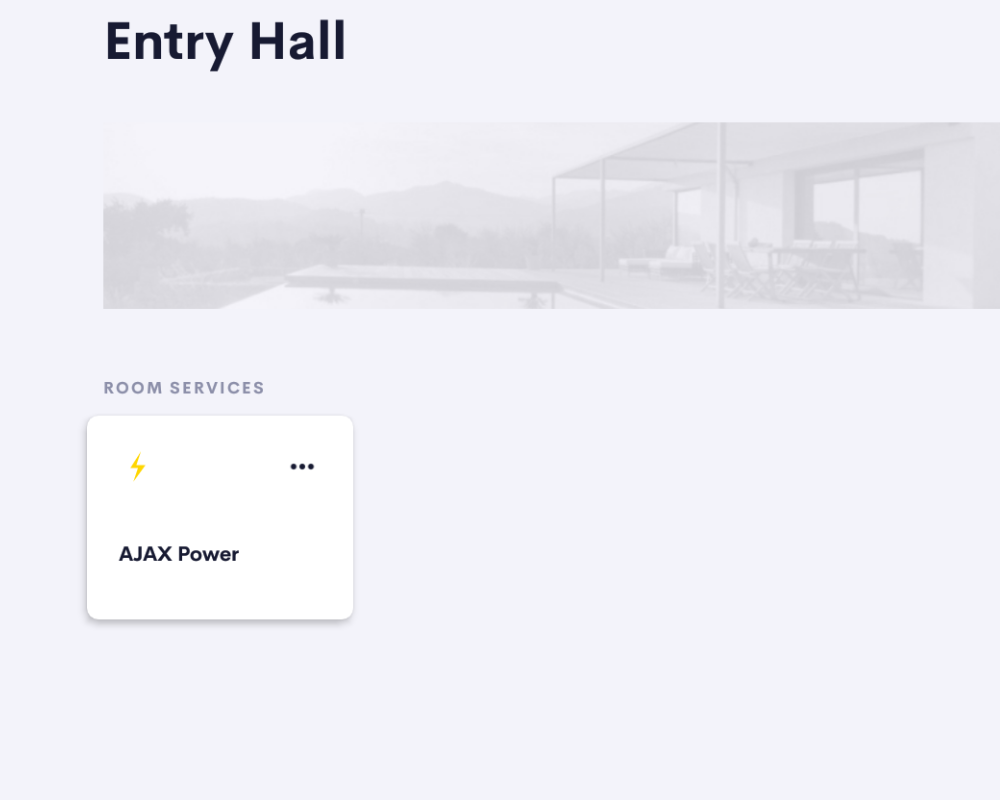
From the room page on the Crestron Home user interface the user clicks on the AJAX Power tile to open the overview page.
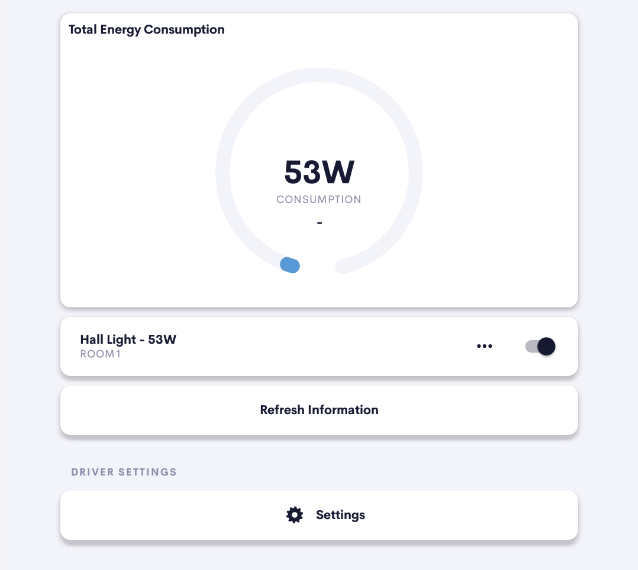
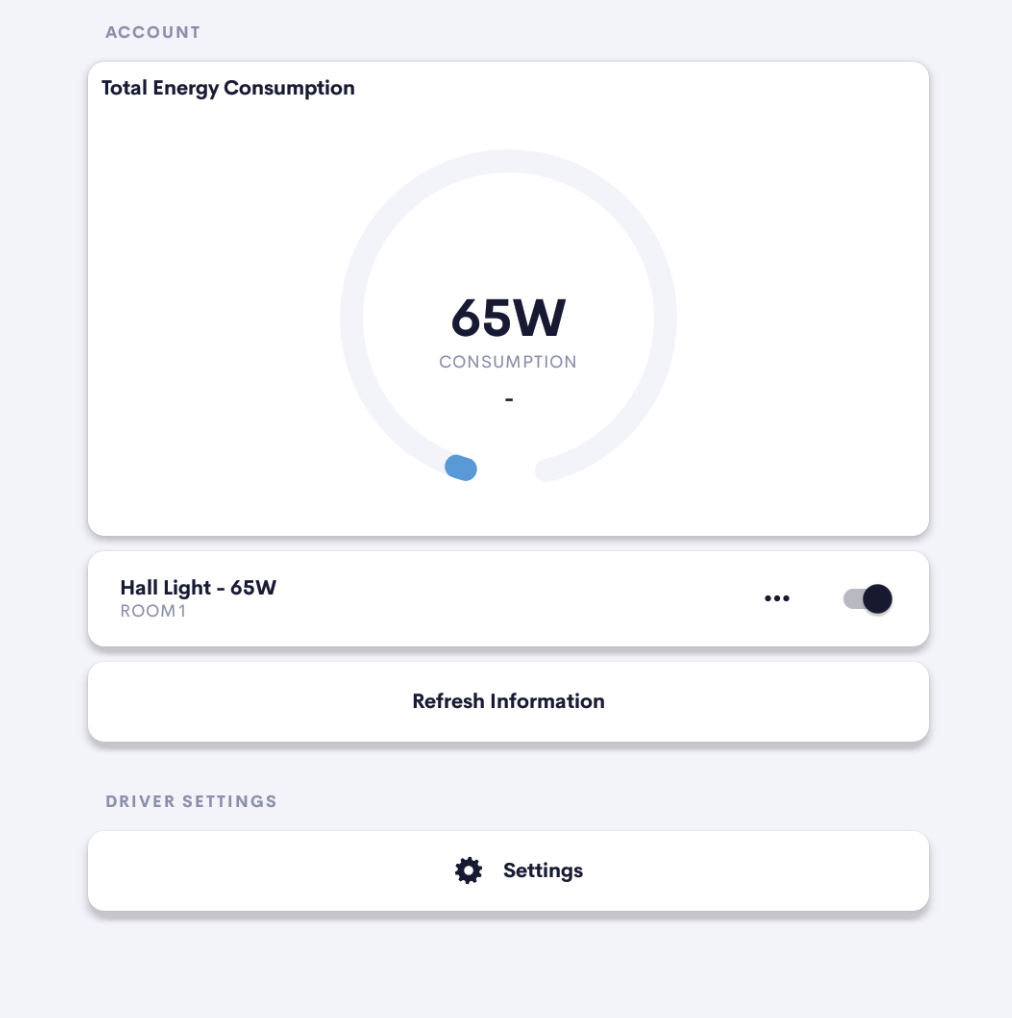
The user is presented with a list of all the connected AJAX Sockets
Simple click the desired socket switch to toggle the socket between on and off
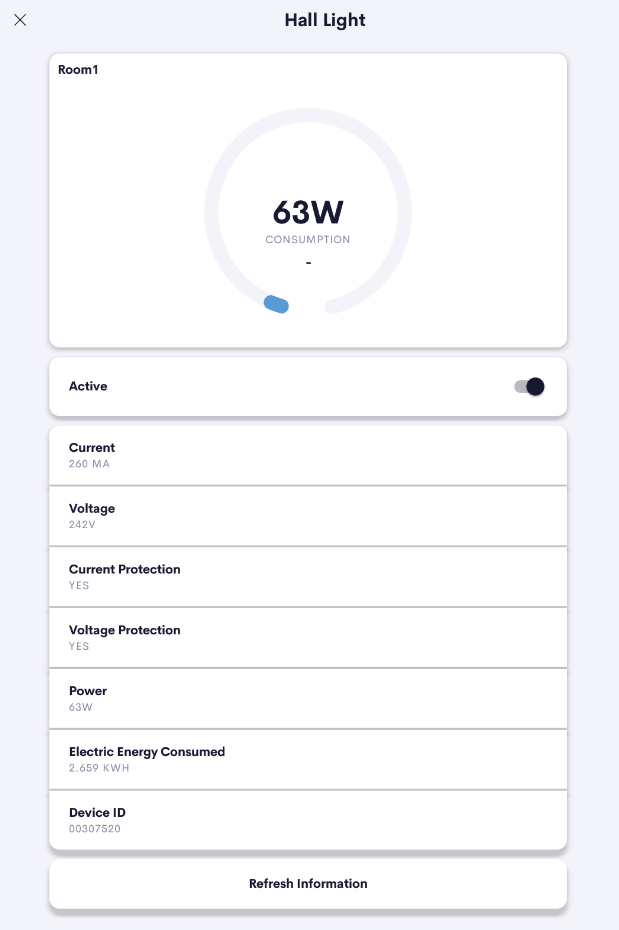
For more detailed information about an individual socket click the socket detail navigation button.
Here you can see detailed information for the AJAX Socket
use the refresh information button to get the latest energy usage information and socket status
Add the Driver
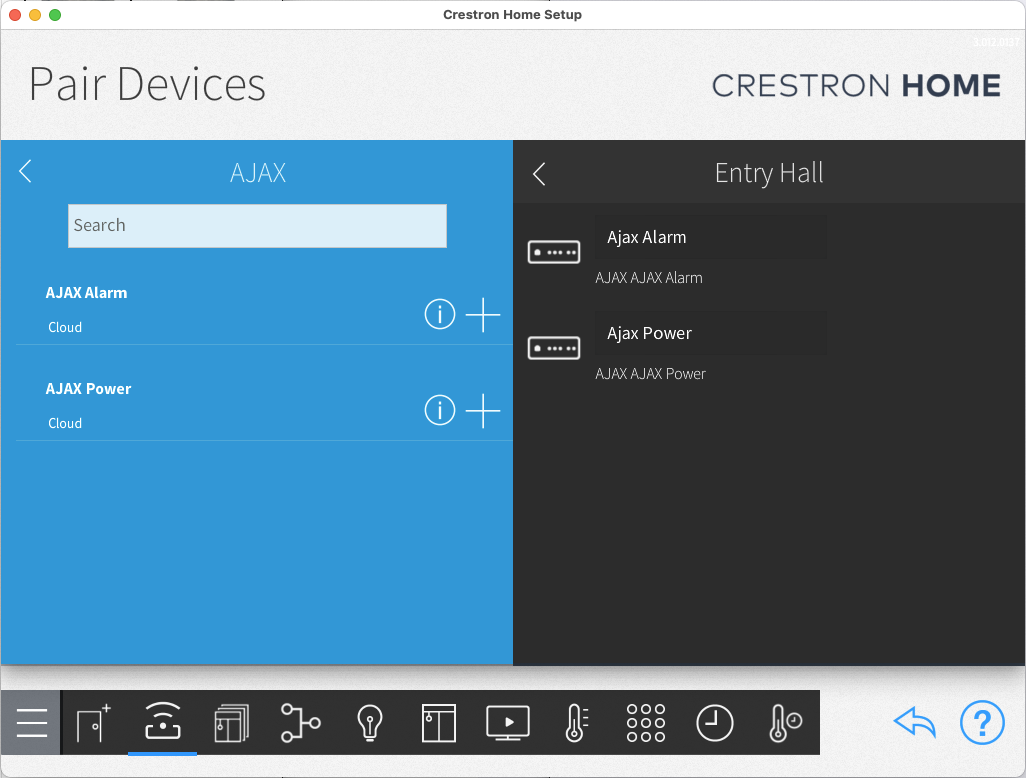
You can find the AJAX Power driver in the Drivers section of the Crestron Home Setup App under:
Drivers -> Security System -> AJAX
Add the AJAX Power driver to your desired room
Once you have added the driver to the room, look for the UI tile in the Crestron Home application or on a TSW touchscreen to continue the setup
AJAX Power Settings
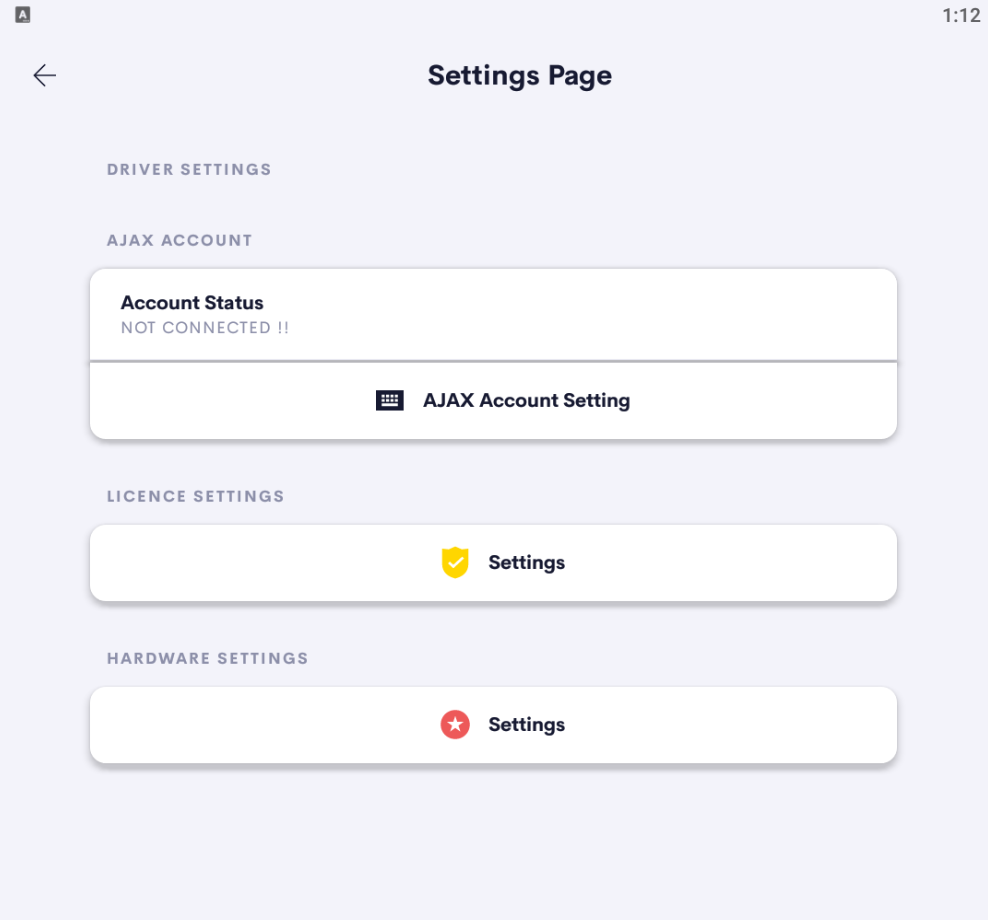
The main page will show the current connection status to the homeowners AJAX account and AJAX hub.
When you are setting up the driver for the first time you will need to add the homeowners AJAX account details:
- Press the Settings button
- If prompted enter the Advanced User Password
- Press the AJAX Account Setttings button
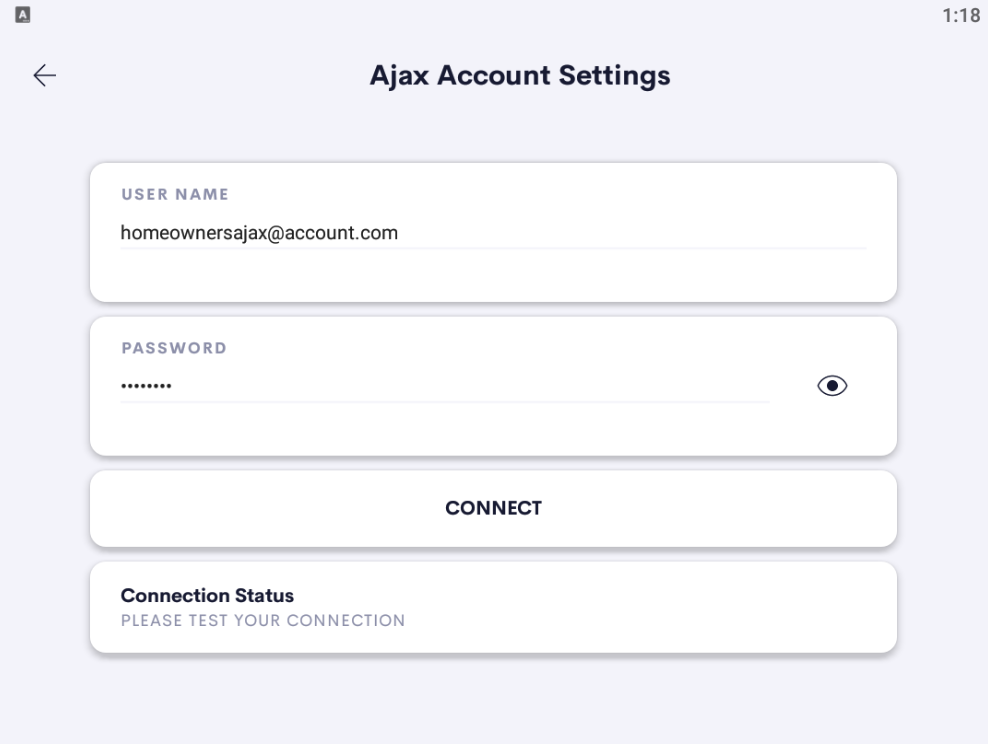
Add the homeowners AJAX account details
- Enter the AJAX account username
- Enter the AJAX account password
- Press the Connect button
The connection status window will inform you of a successful connection or of any errors
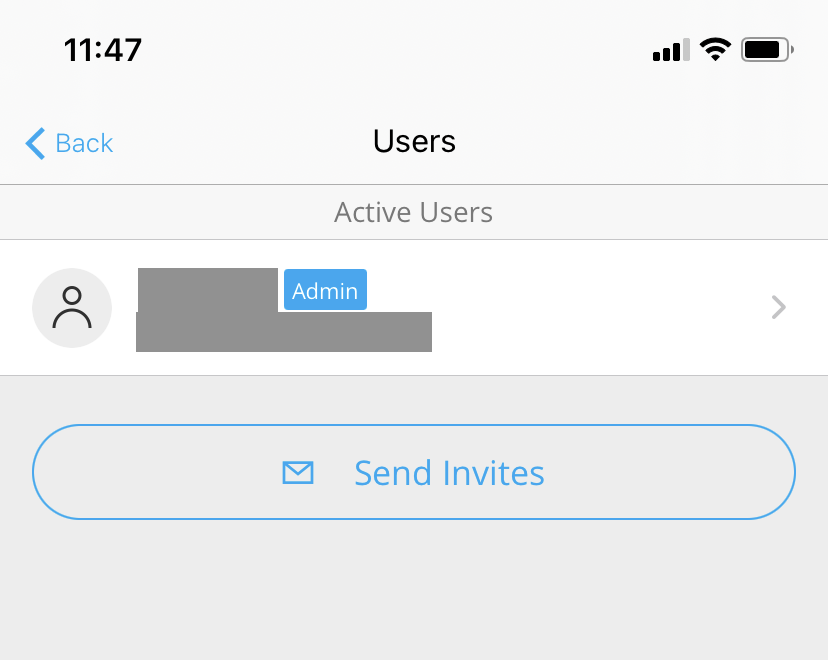
Note: It is preferable to setup a unique AJAX user account for the Crestron Home system. In this way the homeowner can see the events and allow/deny access to the Crestron home system separately to the main user account.
To do this the homeowner would need to use the Send Invites process inside the Active Users page of the AJAX system
Select the homeowners AJAX hub
Once connected to the homeowners AJAX account you will need to select the correct AJAX hub
- Press the Select AJAX Hub button
- Select the AJAX hub that you would like to associate with this alarm driver
- Return to the settings page
The selected hub status window on the settings page informs you of which hub you have selected
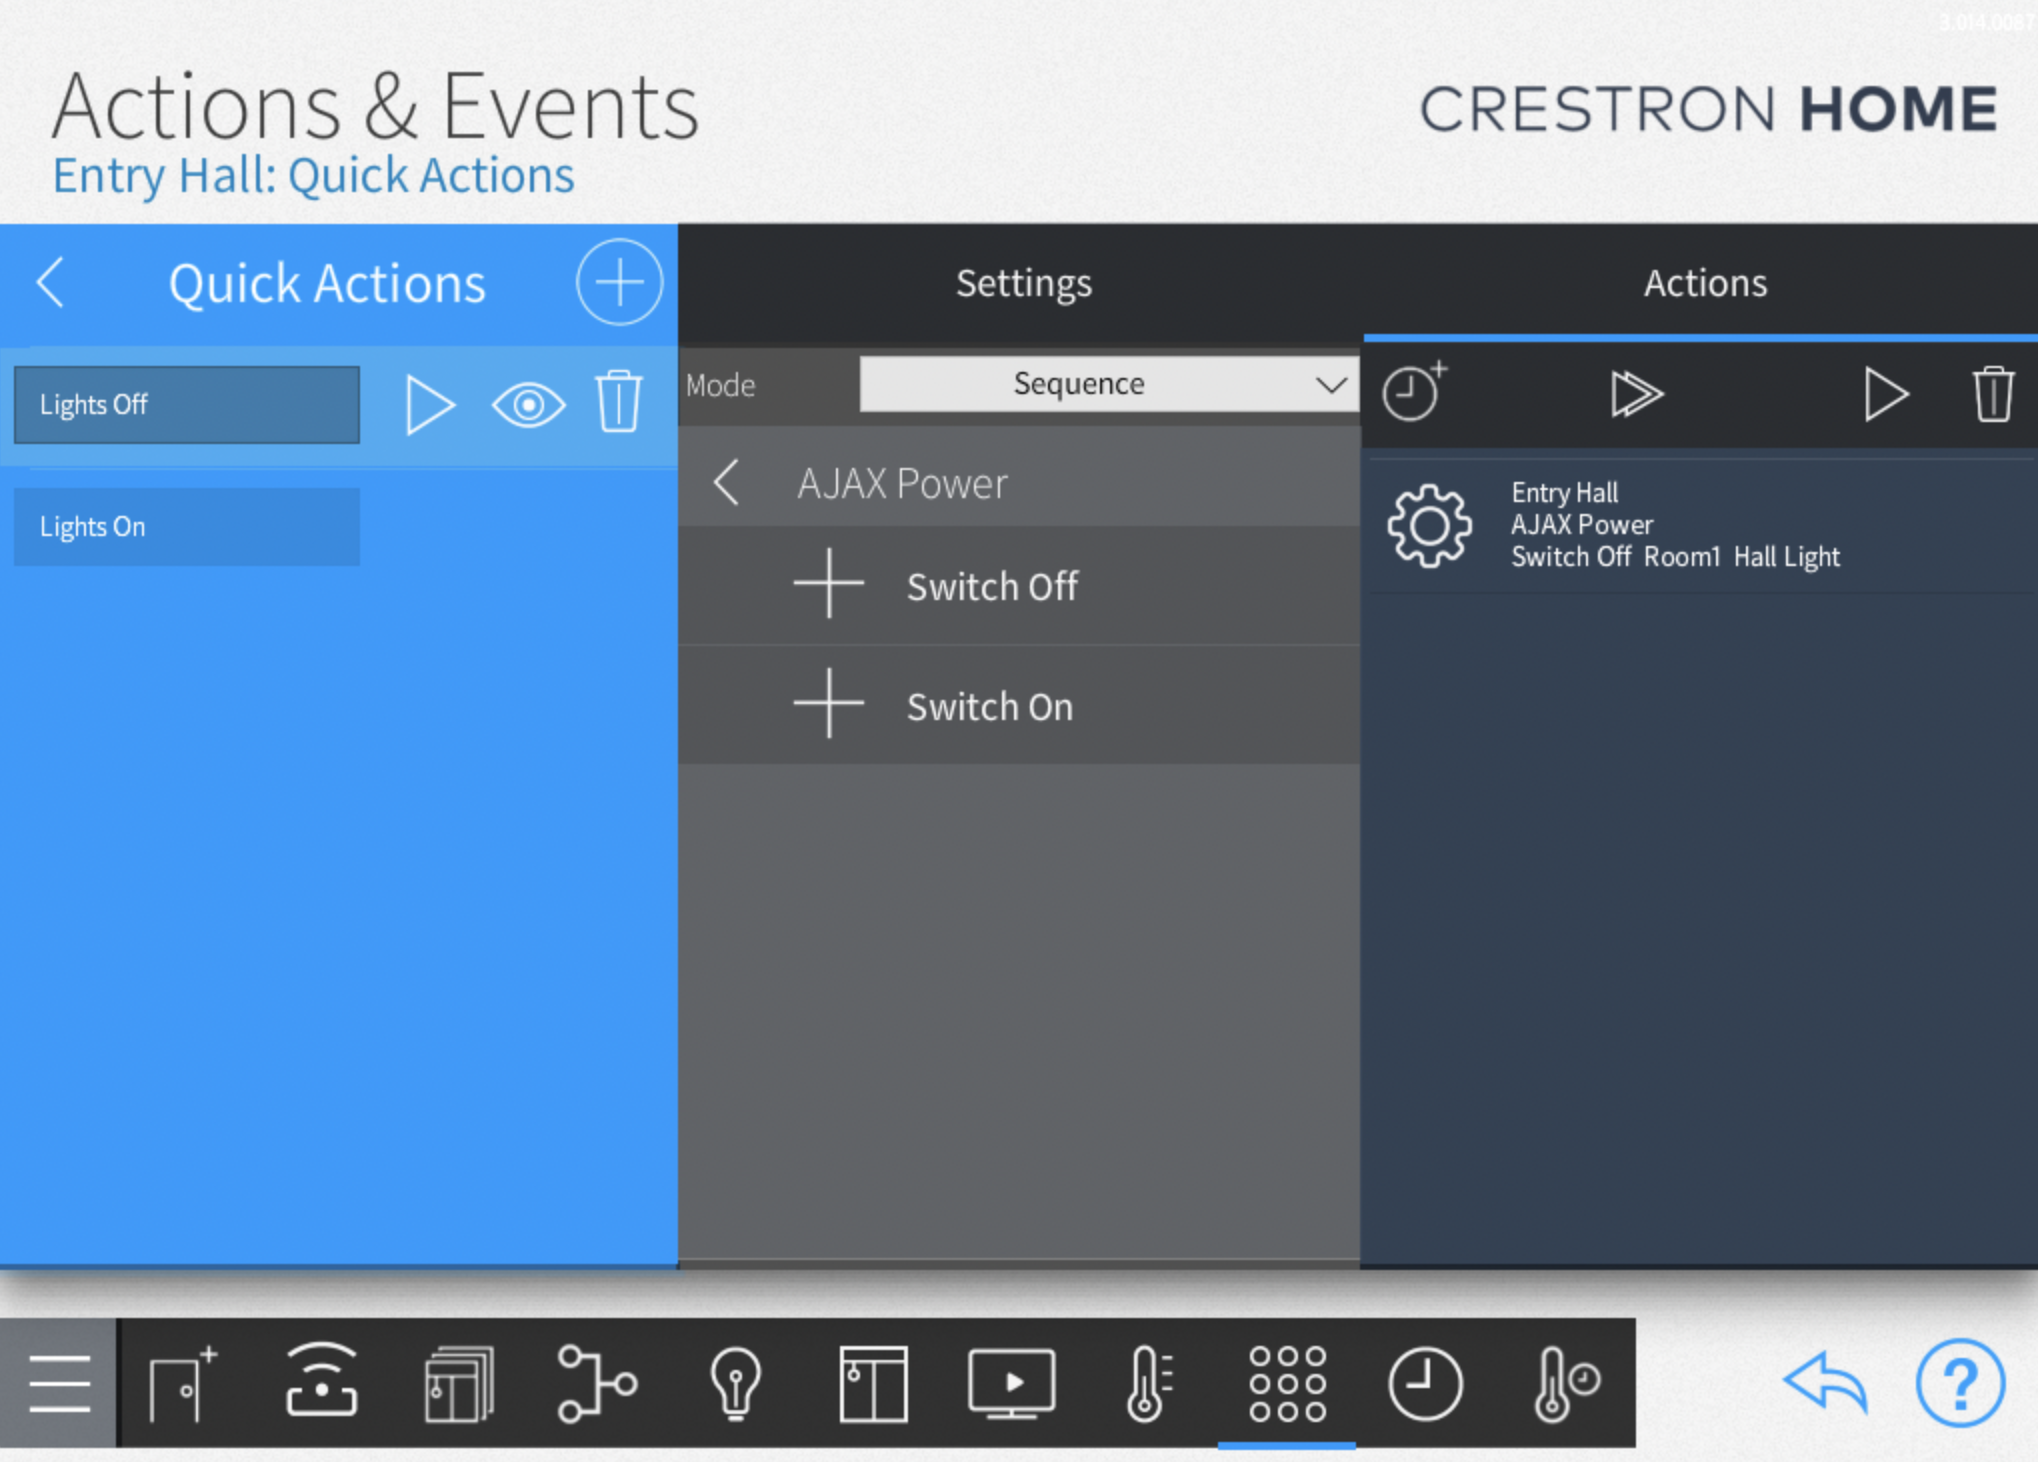
Crestron Home Actions and Events
AJAX Power Socket Overview
Once you have finished the AJAX account and hub setup you can navigate back to the AJAX power overview page where you will see a list of all AJAX Sockets connected to the AJAX hub
-
Crestron Home Drivers
-
-
- Connecting a UI Tile to events and actions
- Finding your Crestron Home API Key
- Load Crestron Driver Using Filezilla FTP
- Loading Drivers
- Removing Drivers from Crestron Home
- Upgrading Drivers
- V1.1 Upgrade
- Open Authentication
- What's new in drivers
- Past Events
- Some Dynamic UI Ideas
- Dynamic User interface Manual
- SIP Setup Explainers
- InnerRange Inception Security SIMPL Windows Module User Manual
- LCD Crestron Simpl Modules
- FAQ
- Show all articles ( 1 ) Collapse Articles
-
-
News and Events
-
Simpl Modules
-
LCD IR App
-
Licensing
-
Examples
-
Ordering
-
Legacy DataSheets
-
- 2N DoorStation - User Manual
- 2N Simpl Windows Module
- ATEN PDU - User Manual
- Door and Lock - User Manual
- Dynamic Buttons - Pre v 4.1.0.0
- Email Notifications
- Global Cache - User Manual
- HomePage Controllers User Guides
- IFTTT (Webhooks) User Manual
- Innerange Inception Crestron Home Setup Guide
- Intercom for Crestron Home
- MultiSpeed Fan Controller
- PINLOCK - User Manual
- Pushover Notifications - User Manual
- QSYS Snapshot Controller
- UI Tiles Switching - User Manual
- UI Tile - Home Control - Crestron Lighting
- UI Tile - Home Control - Crestron Shades
- WebRelay Hardware Interface Manual
- Wine Cellar Monitor
- CHNAX Trigger
- AJAX Alarm Product Manual
- AJAX Power User Manual
- Inner Range Inception Alarm UI Extension
- Nuki Smart Lock User Manual
- Temperature and Humidity Monitor
- SONOS CHIMES user Manual
- Alarm Clock User Manual
- Heating Scheduler User Manual
- Lighting Scheduler User Manual
- Sprinkler Scheduler User Manual
- Mode Area Controller User Manual
- Dynalite Area Controller
- Dynamic Button User Manual
- Dynamic User interface Manual
- InnerRange Inception Security SIMPL Windows Module User Manual
- Show all articles ( 21 ) Collapse Articles
-
- Blind Switch Datasheet
- Car Charge Switch Datasheet
- Coffee Machine Switch Datasheet
- Cooker Switch Datasheet
- Dishwasher Switch Datasheet
- Dryer Switch Datasheet
- Extractor Switch Datasheet
- Fan Switch Datasheet
- Fire Switch Datasheet
- Game Switch Datasheet
- Generic Power Switch Datasheet
- Heating Switch Datasheet
- Oven Switch Datasheet
- Overview Switching Driver Datasheet
- Spa Switch Datasheet
- Sprinkler SW Data Sheet
- Towel Rail Switch Datasheet
- Underfloor Heating Switch Datasheet
- Vacuum Switch Datasheet
- Washer Switch Datasheet
- Water Switch Datasheet
- Show all articles ( 6 ) Collapse Articles
-
-
DRAFTS
- Commercial Lighting Maintenance
- Corporate Client Pages
- MODE eDIN+ Hardware Configuration Manual
- Mode Lighting Crestron Home Driver Datasheet
- QSYS Snapshot Controller
- Cedia ISE Presentation 2022
- Product Manual Template
- Releases
- Temperature and Humidity Monitor
- Motion Blinds User Manual
- News Summary
- LCD IR App
- LCD IR App for SIMPL Windows Displays
- LCD IR App for Crestron Home Displays