This driver comes with a 7 day trial license system which requires a licence key from our web store.
End-User Experience
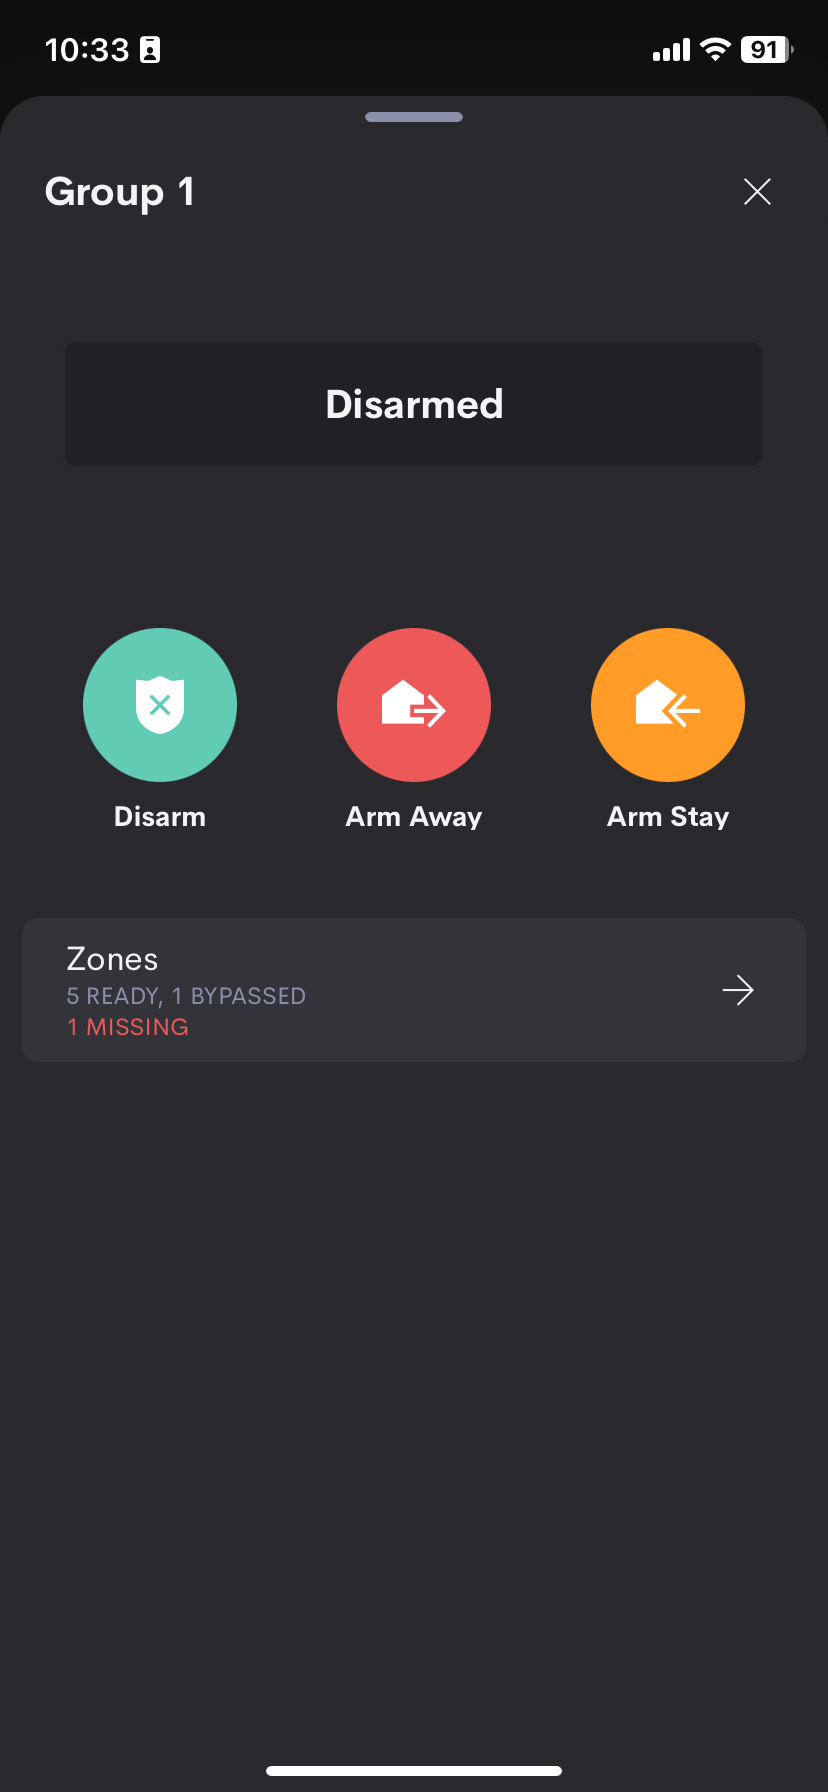
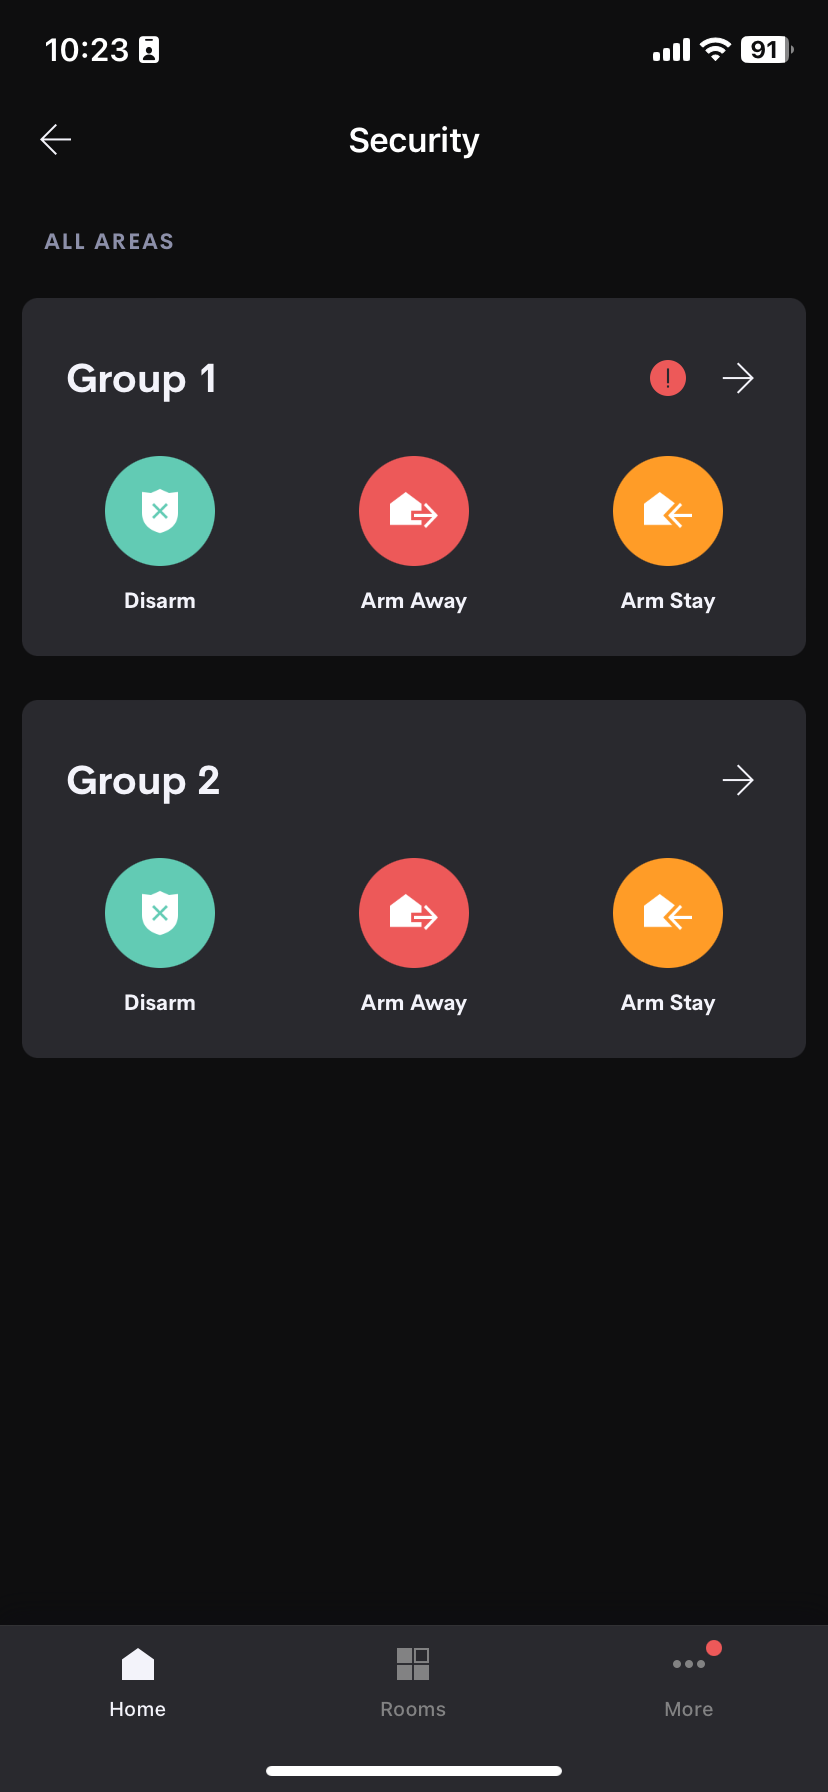
The Ajax security system driver is able to arm and disarm the system, and bypass any zone independently.
The current system status is displayed on the UI.
The tile is available on the Home screen, the default name is “Security System”. However, if you have more than one security system, each tile shows the descriptive name used when it was added.
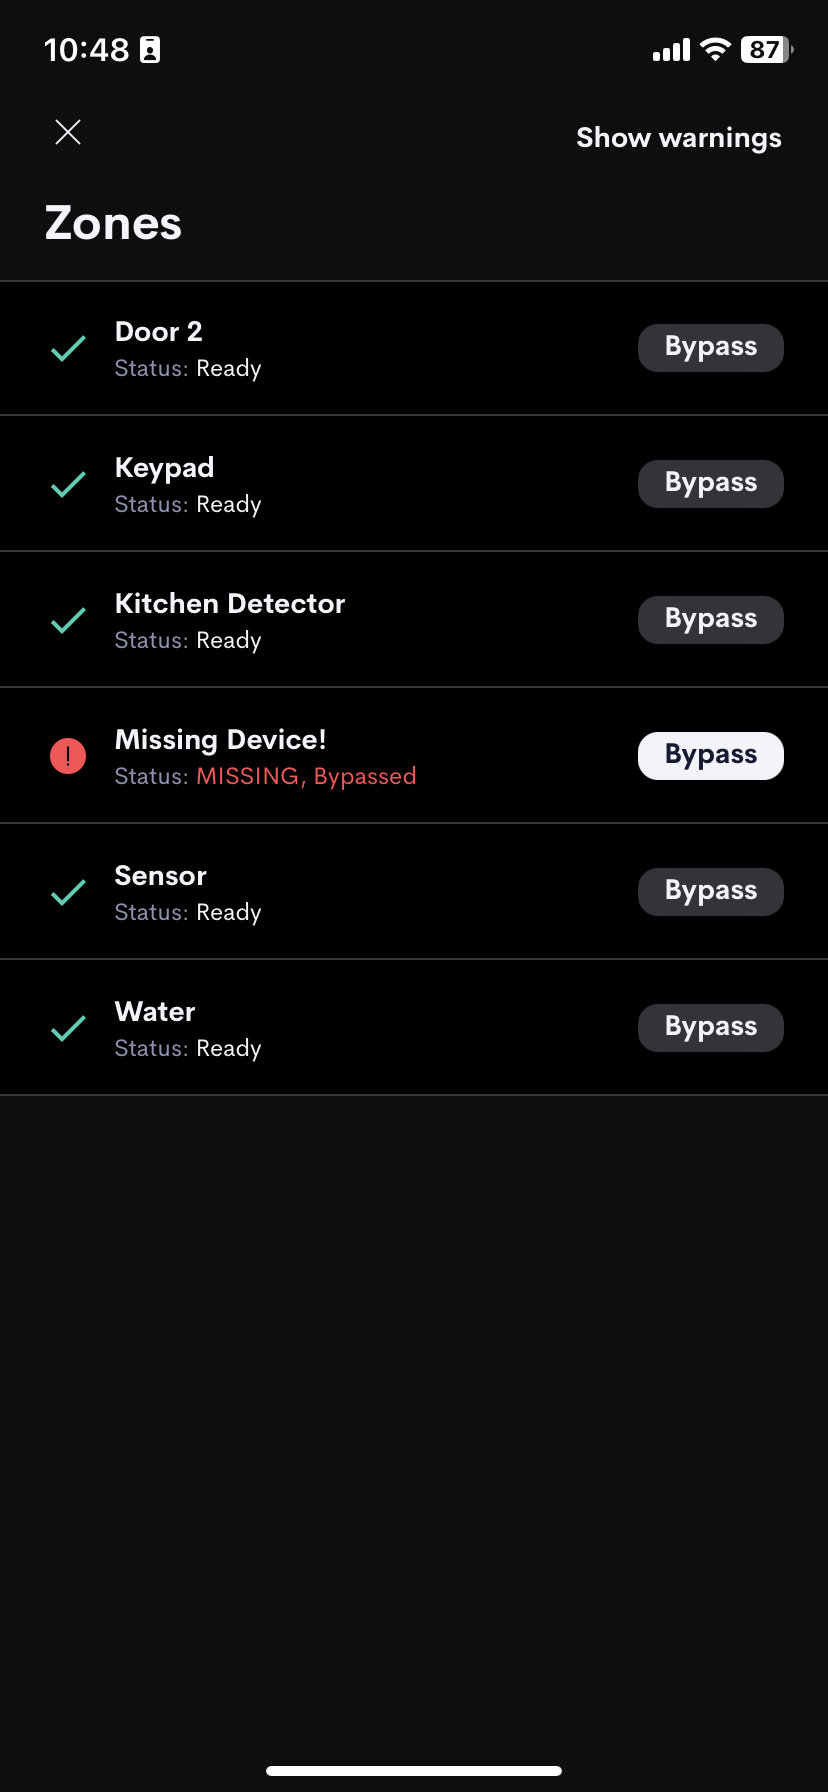
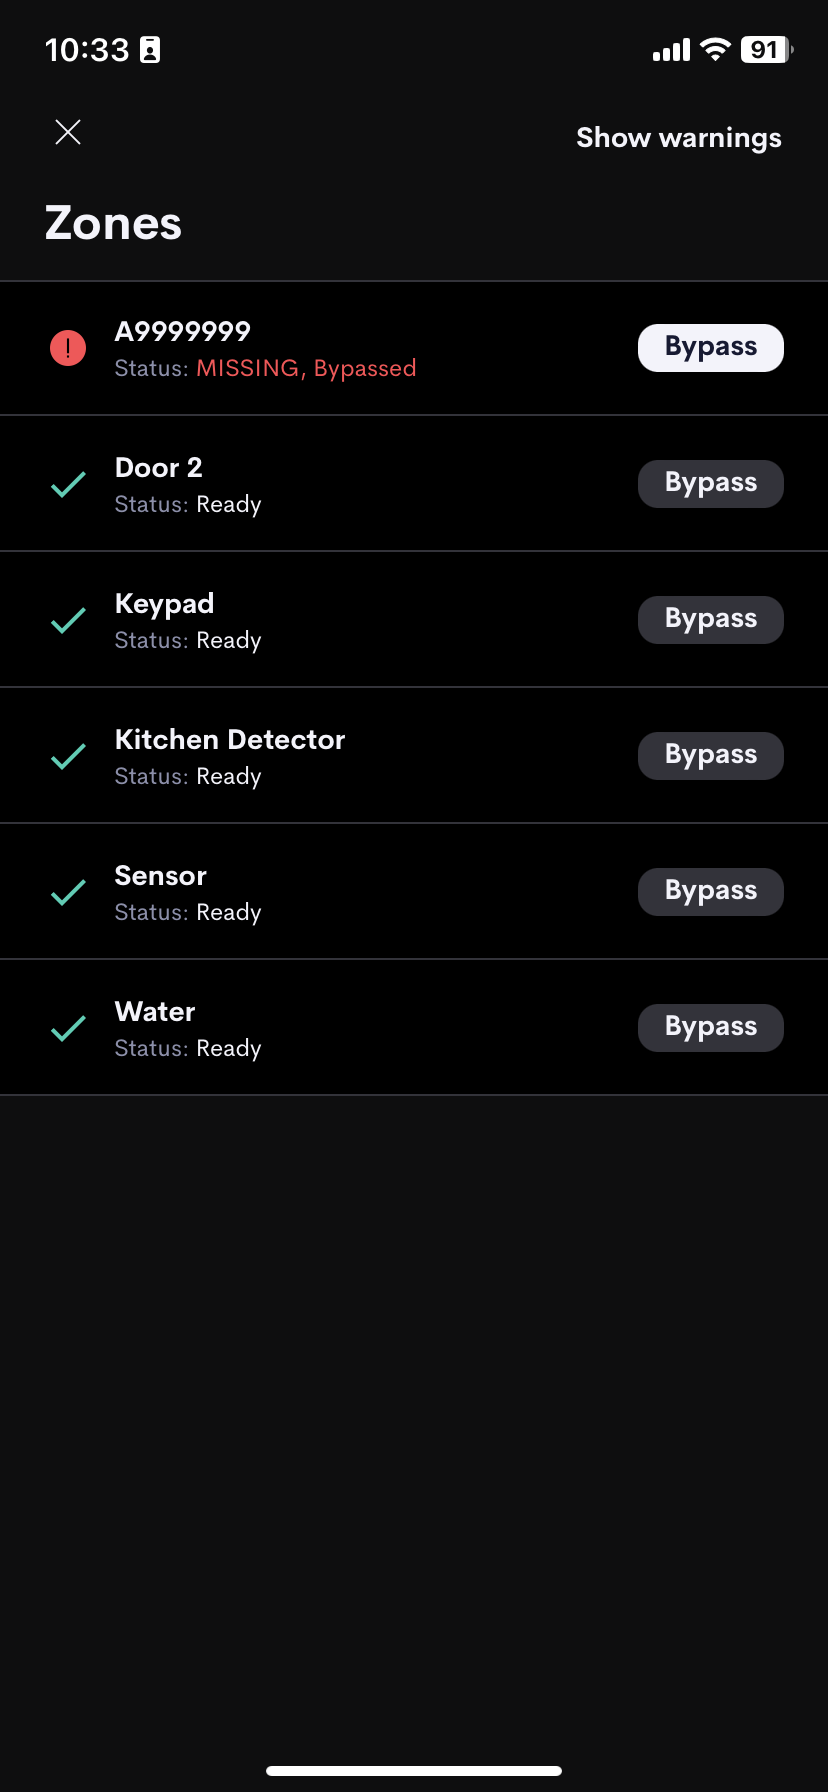
When you open the Security System tile, you will see the partition page The zone button displays the zone list with their names and current status.
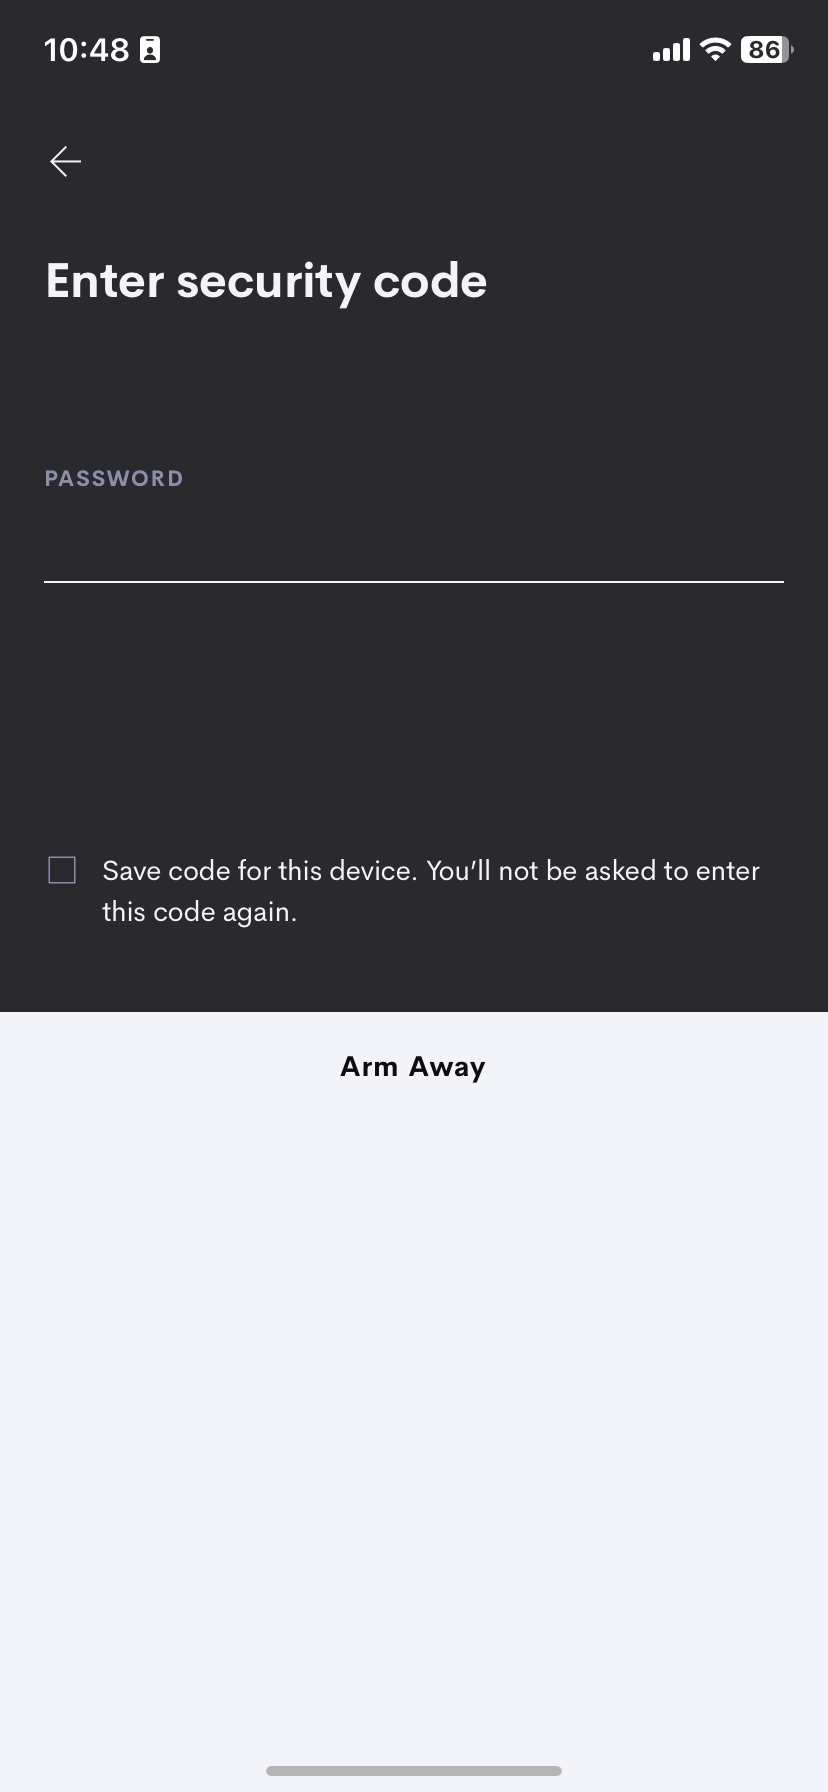
You can bypass or un-bypass any zone using the Bypass button, it will ask for the passcode.
To arm or disarm the system you must press and hold the button until the circle is completely filled. It will ask for the arm / disarm passcode.

Installing the Driver
The Driver can be found at :
Drivers -> Security System -> Ajax
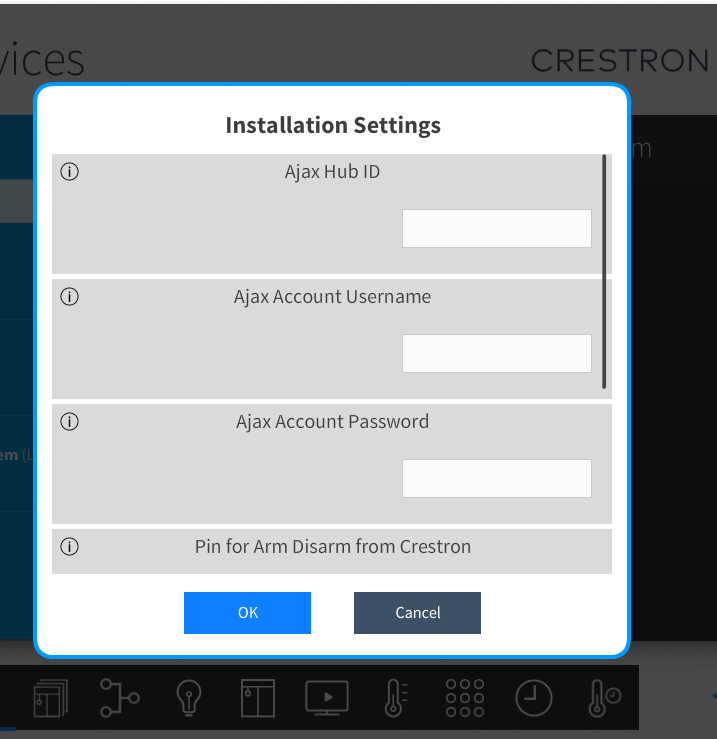
After adding the driver you will be prompted to setup some system credentials and Settings
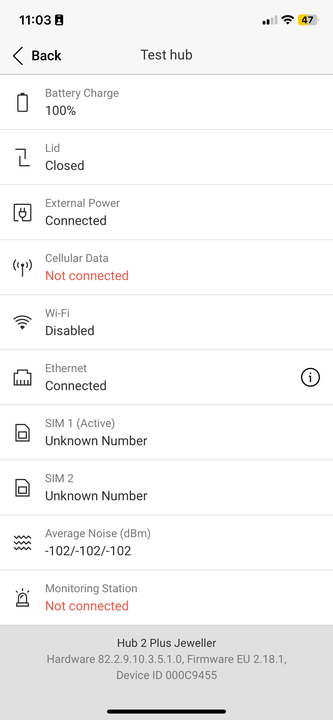
The Ajax Hub ID for your system can be found using your Ajax App. Navigate to the Hub Information page and find the Device ID at the bottom of the page (see above).
- Enter the AJAX account username
- Enter the AJAX account password
NB: Following any changes to User Attribute a System Reboot is required.
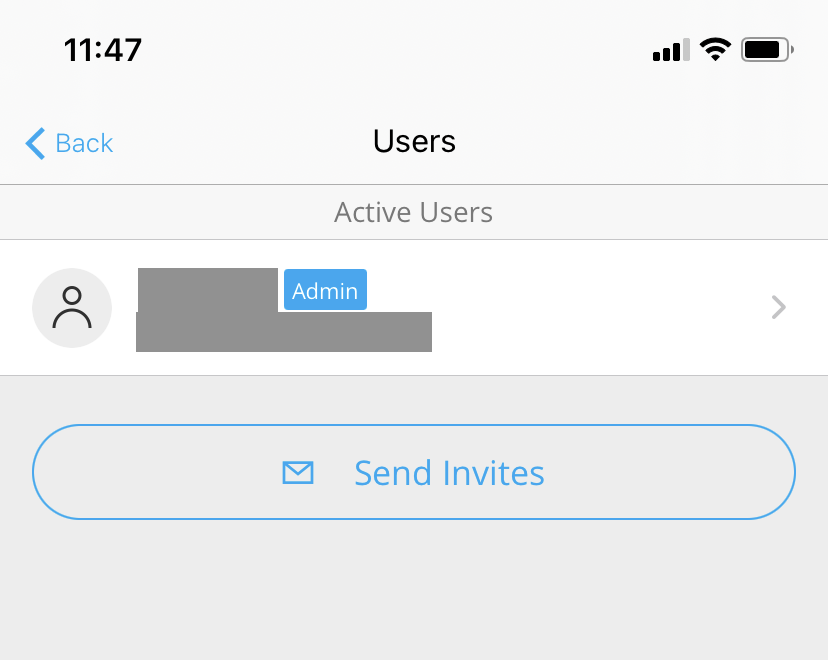
Note: It is preferable to setup a unique AJAX user account for the Crestron Home system. In this way the homeowner can see the events and allow/deny access to the Crestron home system separately to the main user account.
To do this the homeowner would need to use the Send Invites process inside the Active Users page of the AJAX system
Pin Codes
There are two pin codes settable in this page one for arming and disarming the system and one for device bypass.
Ajax App : Setting Up Groups
Groups in Ajax equate to Alarm Areas in Crestron Home and you must “Activate Group Mode” set to checked in the Ajax app even if you intend only to have one area (group) controlled on your crestron home system. Add Devices to your groups to see them within areas in Crestron Home.

SIA Protocol
Status of zones and system states uses the Monitoring Station feature of the AJAX hub and communicates the system states locally using a Alarm Standard called SIA.
NB:
It is not possible to use this integration and connect to a monitoring service concurrently.
In a future release it will be possible to concurrently relay monitoring messages to a monitoring station.
Ajax App : (SIA) Setup:
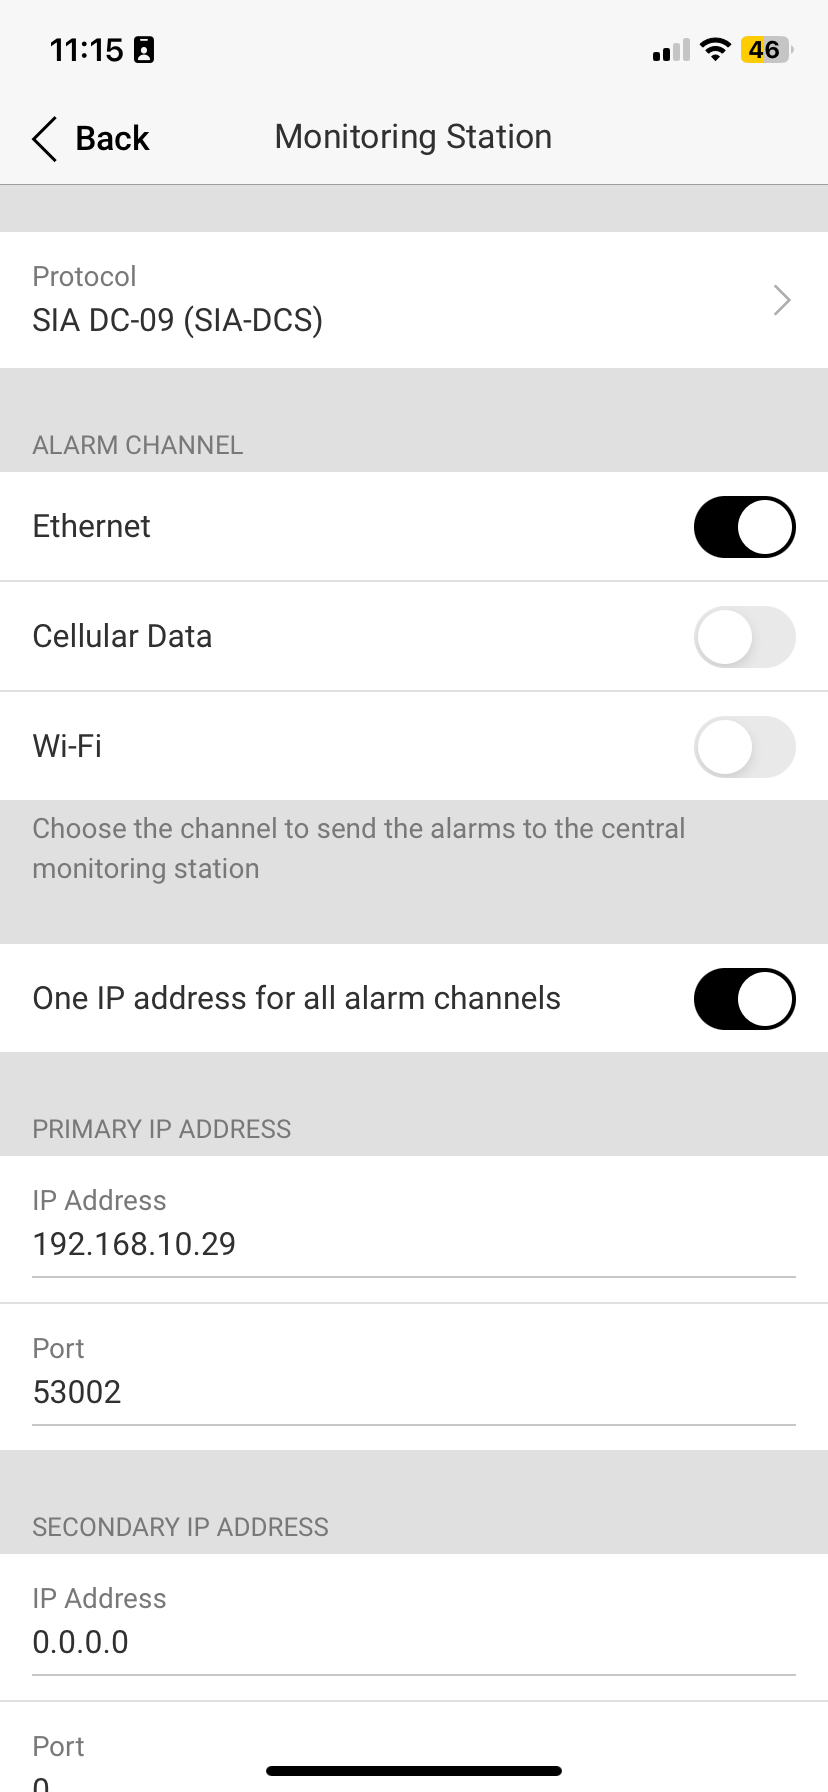
In your Ajax app navigate to the Hub Settings -> Monitoring Station or Hub Settings -> Security Companies
The Monitoring should be setup as follows:
Primary IP : IP address of your Crestron Home Processor
Port : most cases use default port 53002
Connect on Demand : True (Important)
Object Number : AAA
Crestron Home SIA ID Initial Setup
For status to be correctly updated it necessary to complete a configuration step during the commissioning process. This tells the Driver which device is which on the SIA message bus.
There are two options for this Step.
Update Device Name in Ajax App.
Before loading the driver to the system add the Device No in curly brackets to the end of your device name. On loading the system the driver will read the Device No and storing it in the configuration file ready for the next reboot. Once the System has been commissioned the Device Numbers in Curly Brackets can be removed.
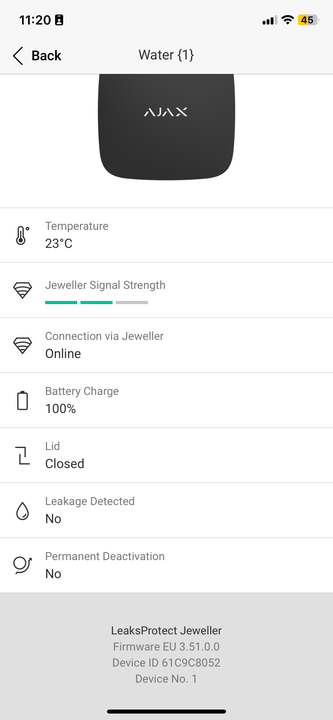
To use this method temporarily change the Name in each device to include the Device No. can be found on the bottom of the device page in the Ajax App.
In the Example here we have changed the name from
Water to Water {1}
Config File
The System creates a configuration file with all of your device information and if you haven’t passed in the Device No as described above you can download the file from the Crestron home processor add in the missing Device No’s and reupload. On next reboot the file will be read on load.
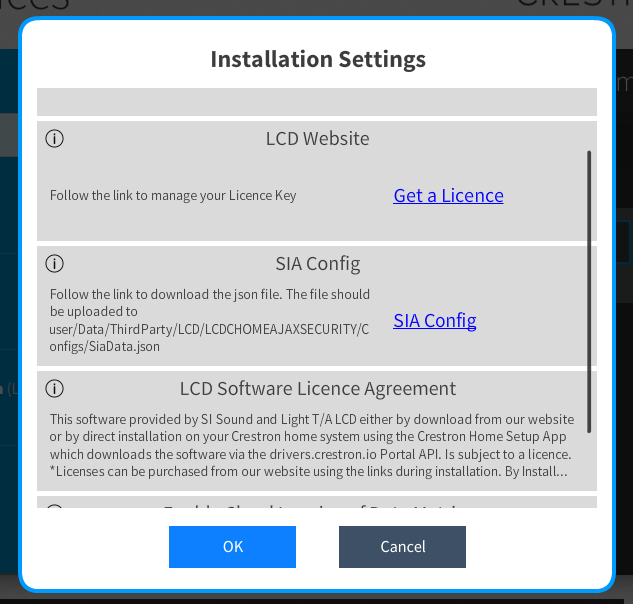
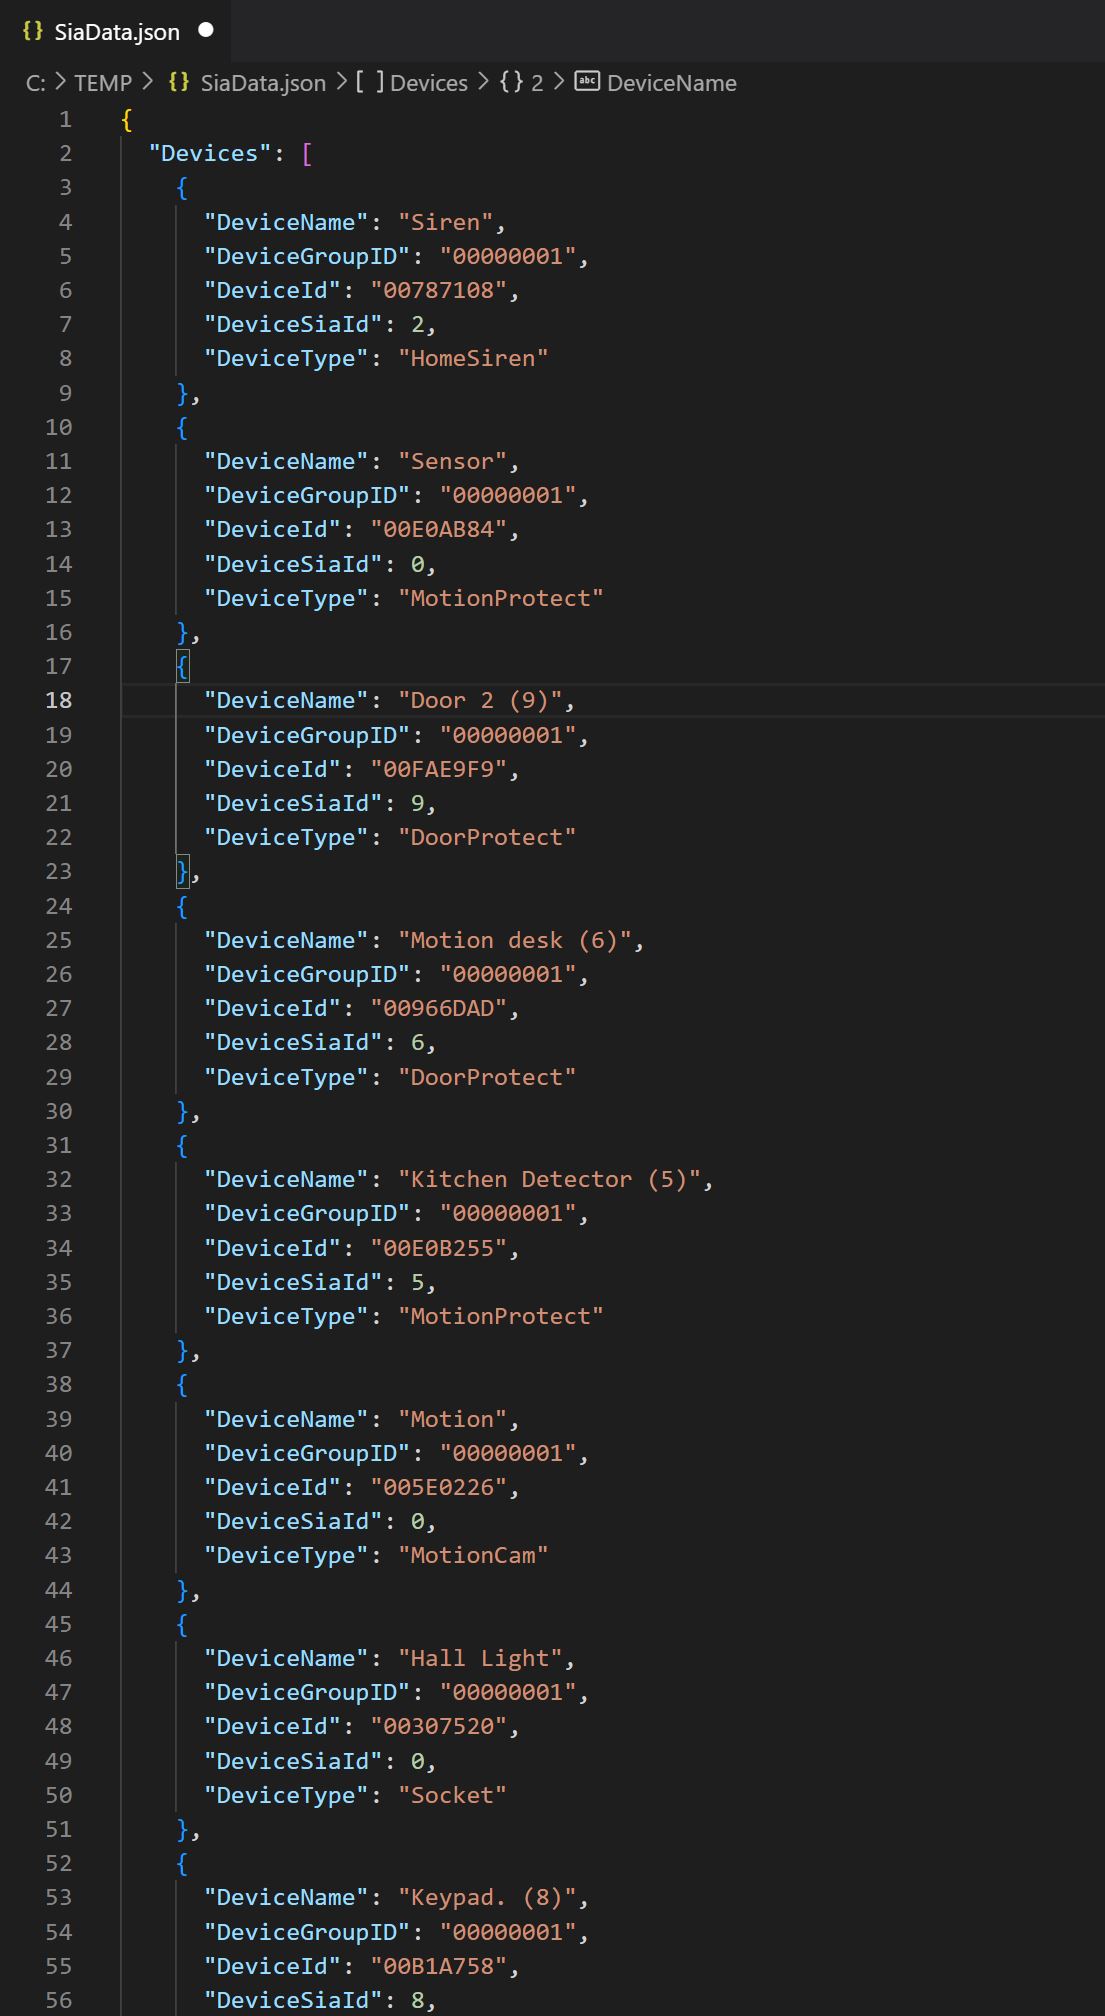
The config file is located at
/user/Data/ThirdParty/LCD/LCDCHOMEAJAXSECURITY/Configs/SiaData.json
Reboot Required
The Driver populates groups and devices on driver loading. Any changes to groups or devices requires a reboot of the system to reflect in the driver. Any change to settings using the user attributes following a change also requires a reboot following the change.
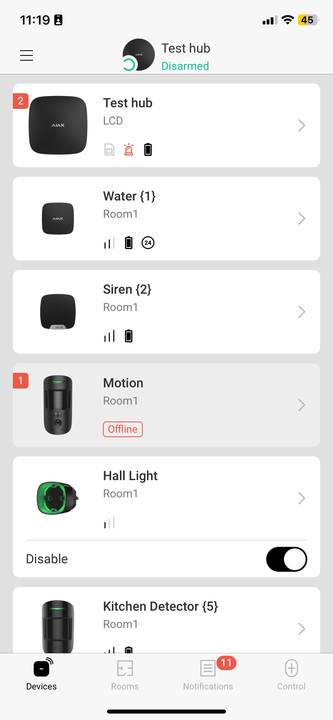
Device Setup
Devices in an Ajax system appear in the Crestron home as Zones. All Devices show Faulted,Tampered,Missing,OK and Low Battery State.
At initial Setup of the Driver all zones are setup to OK as all state reporting is based on active event. If a device was in fault / tamper state before installation (or rebooting of the system) the device will not show the fault state correctly until the fault has been cleared on the device.
Always Active is a popular feature which means it is possible to see the states and connect events to all activations of a device. However when a device is setup to always active it means that Alarm and Burglary alarms will be triggered as per the table below.
Alarm Types
| Medical Alarm | This Event will trigger when the Ajax System Panic is pressed. |
| Fire Alarm | This Event will trigger when the any Fire Sensor is triggered in the System |
| Alarm | This Event will trigger when any Sensor goes into Fault State. If the Area that the sensor belongs to is Armed. NB: If devices are setup to “always active” then these sensors will trigger even when setup to Entry and Exit Delay during those periods. |
| Burglary Alarm | This Event will trigger when any Sensor goes into Fault State regardless of arming state. e.g. A water sensor is wet , a door is opened , motion is detected. NB: If devices are setup to “always active” then this will trigger on any fault state regardless of Alarm arming state |
| Ajax term | Crestron Term |
| Device | Zone |
| Group | Area |