“Simple & Easy Installation
Web Powered Security
Integrated Security – Access Control”
Usage
Once the quick setup is completed users are provided with the complete list of Inception arming options as well as detailed arming and disarming progress information.
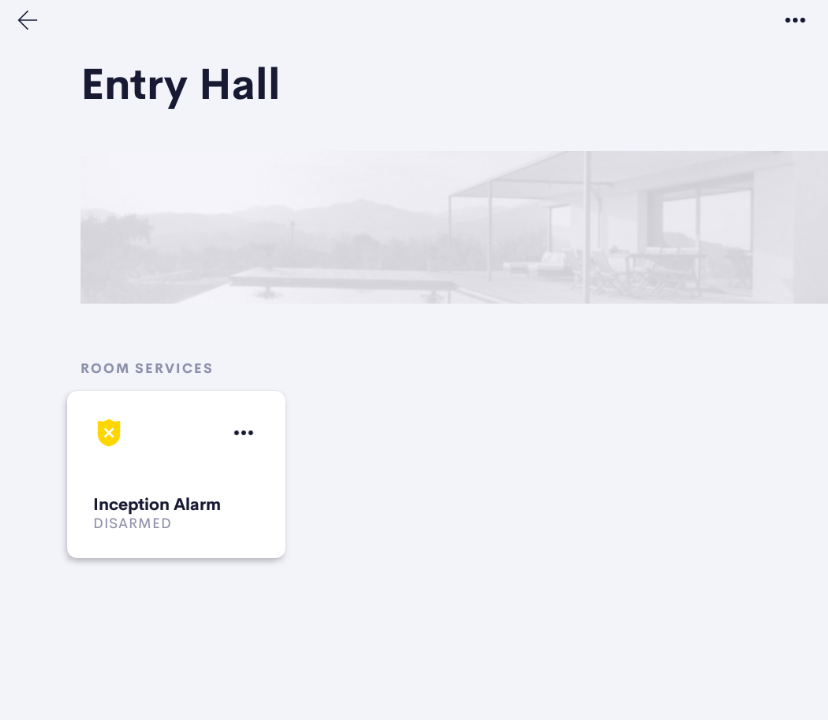
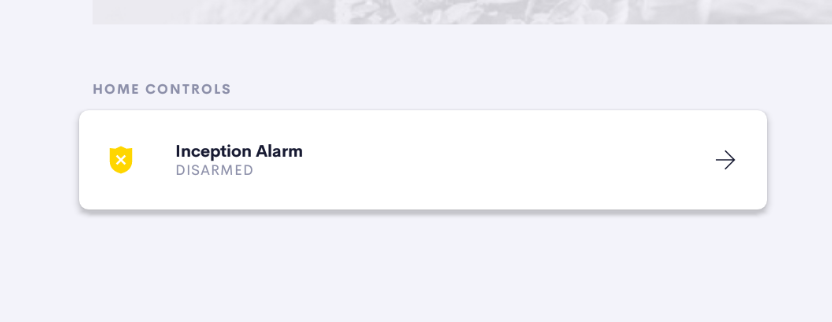
From the room page or home page of the Crestron Home Interface the user clicks on the Inception Alarm UI tile
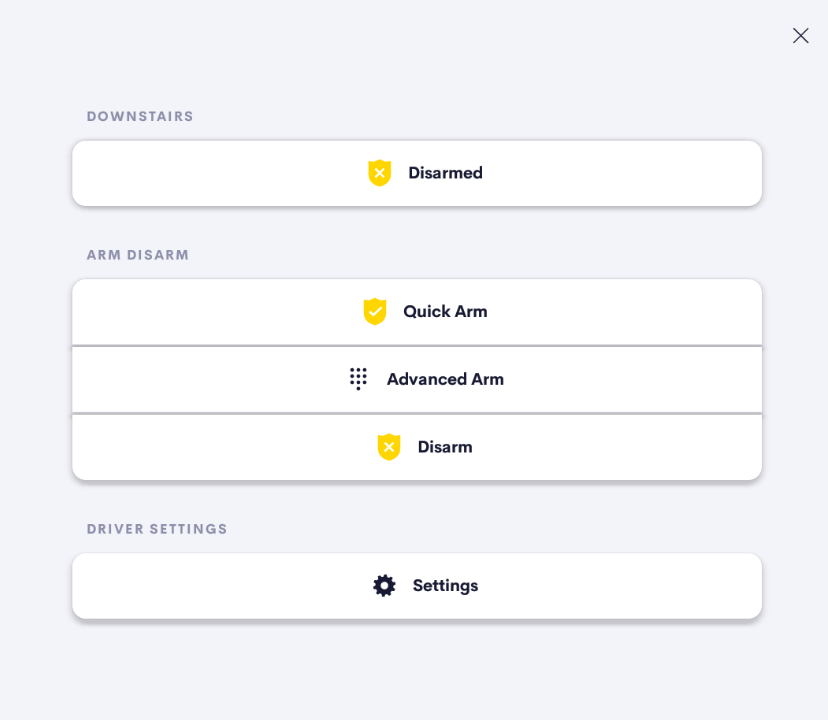
The user is presented with the current status of the alarm system and options to Disarm, Quick Arm or select from one of the Advanced Arming options
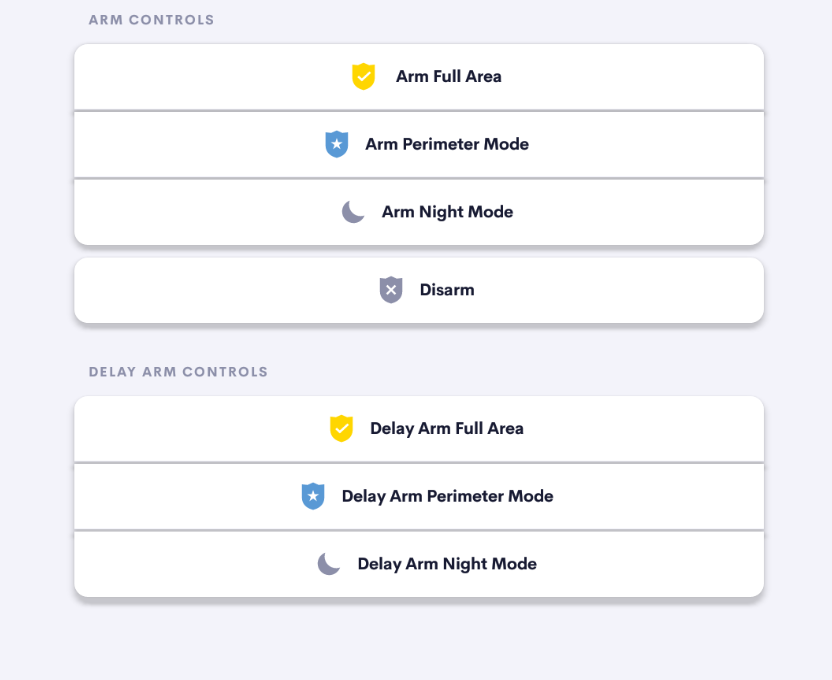
Advanced arming options include
- Arm Full Area
- Arm Perimeter Mode
- Arm Night Mode
Advanced delayed arming options include
- Delay Arm Full Area
- Delay Arm Perimeter Mode
- Delay Arm Night Mode
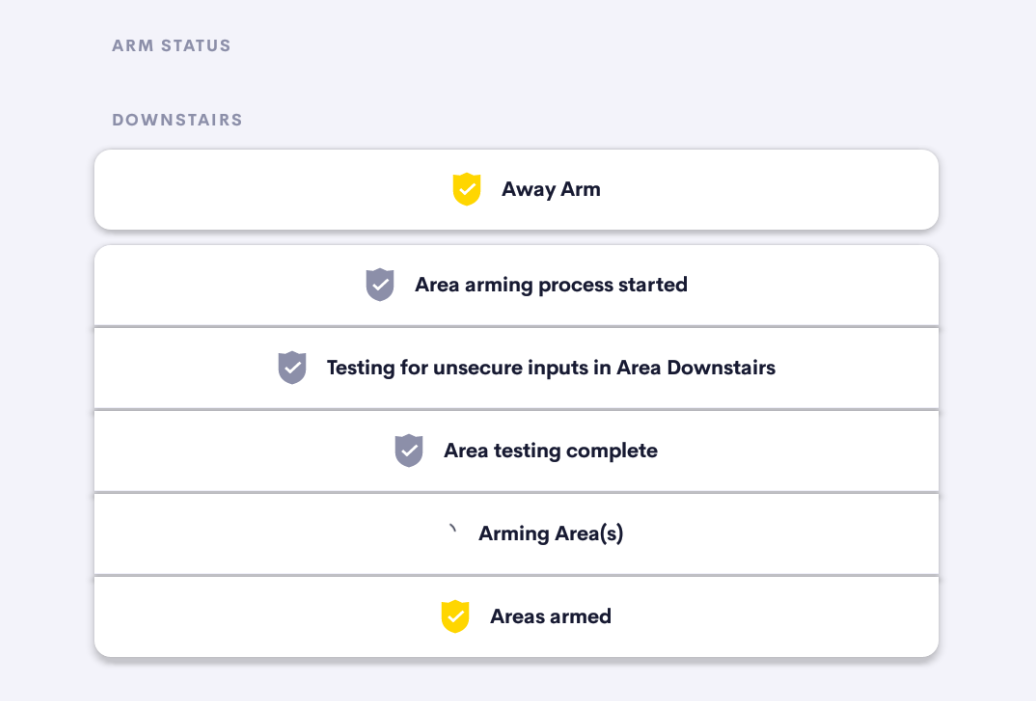
While arming and disarming the Inception alarm system users are shown detailed information of the progress
Inner Range Inception Drivers
Our suite of Inner Range Inception drivers allow you to make the most of this powerful Security and Access Controller. The Inner Range Inception Alarm UI Extension can be used as a standalone driver or in conjunction with any of the Inner Range Inception suite of drivers.


- Inception Events & Actions Driver – Allows control and monitoring of 20 Inception security areas through the Crestron Home Actions and Events systems.
- Inception Access Doors Driver – Allows control and monitoring of 200 Inception doors through the Crestron Home Actions and Events systems and a setup UI tile.
- Inception Interface Outputs Driver – Allows control and monitoring of 200 Inception outputs through the Crestron Home Actions and Events systems and a setup UI tile.
- Inception Interface Inputs Driver – Allows control and monitoring of 200 Inception inputs through the Crestron Home Actions and Events systems and a setup UI tile.
- Inception Alarm UI Extension Driver – Allows control and monitoring of Inception Areas a simple extension user interface.
- Inception Security Core Driver – Allows control and monitoring of Inception Areas using the Crestron Home native security user interfaces.
The Inception drivers can be used in any combination or as standalone drivers, except for the Inception Security Core driver. The Security Core driver must be purchased and used with the Inception Events & Actions driver as we do not provide any Actions and Events in the core module.
Inception User Permissions
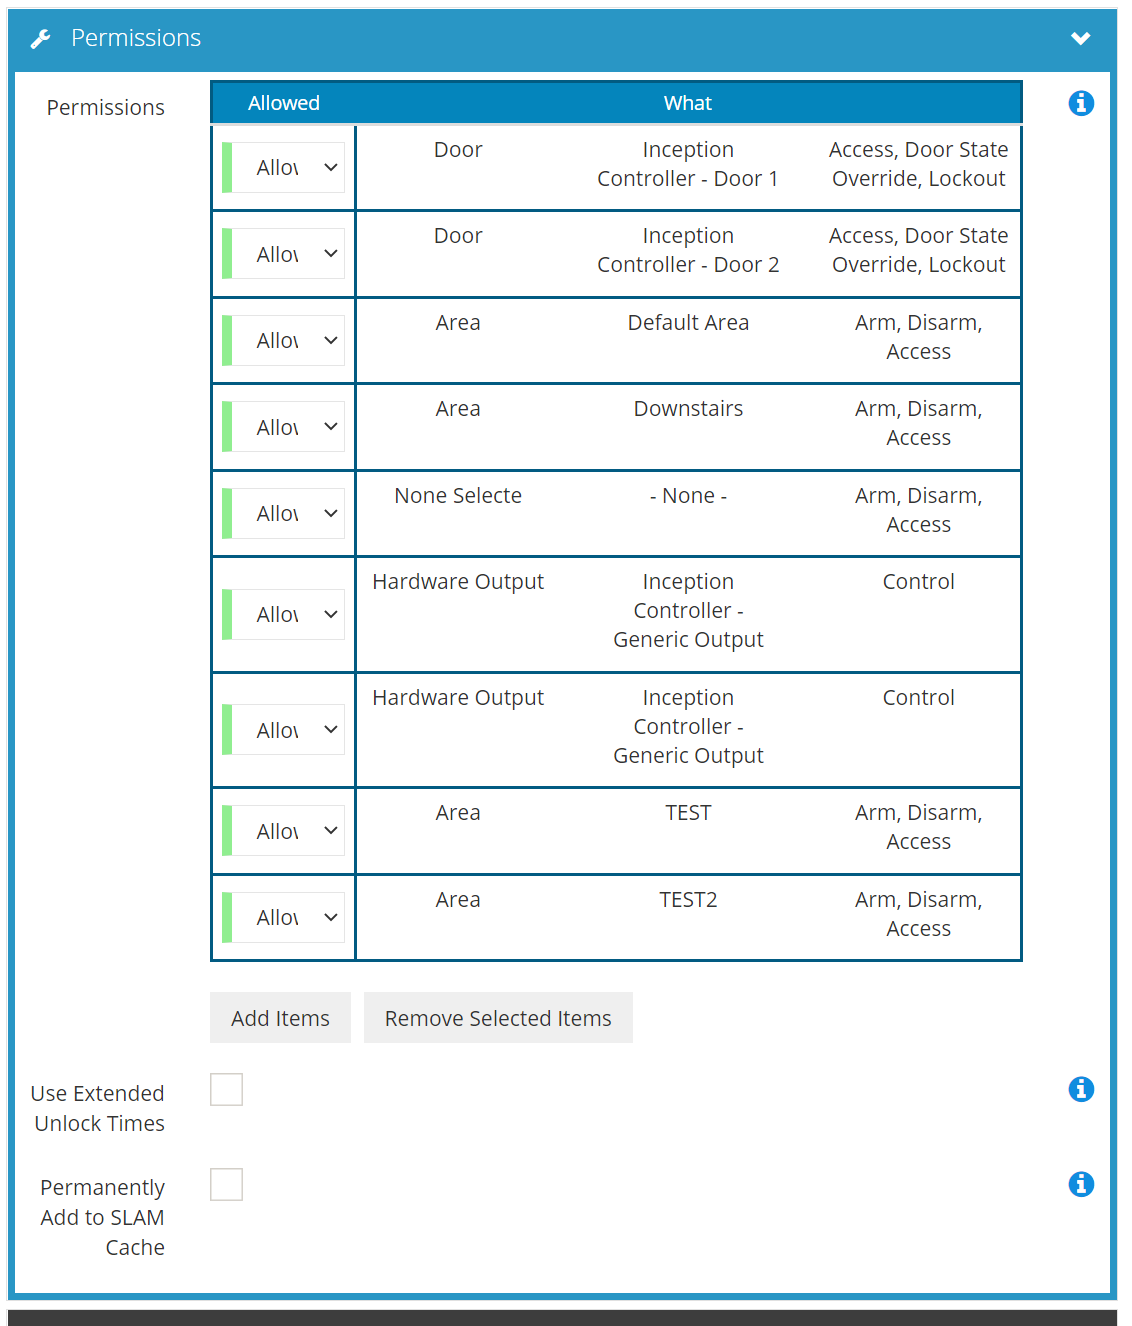
The Inception Alarm UI Extension driver and additional Inception drivers connect to the Inception alarm as a standard user. The best practice is to create a user just for the Crestron Home system and set the web page profile to “REST Web Api User”. It is up to you if you share a single user (recommended) or create a user per driver. The user must be added the relevant permissions for the Areas, Doors, Inputs and Outputs that you wish to control and monitor.
Alarm actions that require a PIN to be entered will be associated with the the users PIN set in Inception. The user associated with the PIN will be the user that performs the action, with their permissions checked and their name logged in the review event history.
Any control requests of areas, outputs or doors that don’t require a PIN will be performed by the api user and must have the appropriate permissions set on all devices.
Here is an example of a user that is setup with access to the arm and disarm multiple security areas, control doors and monitor input status.
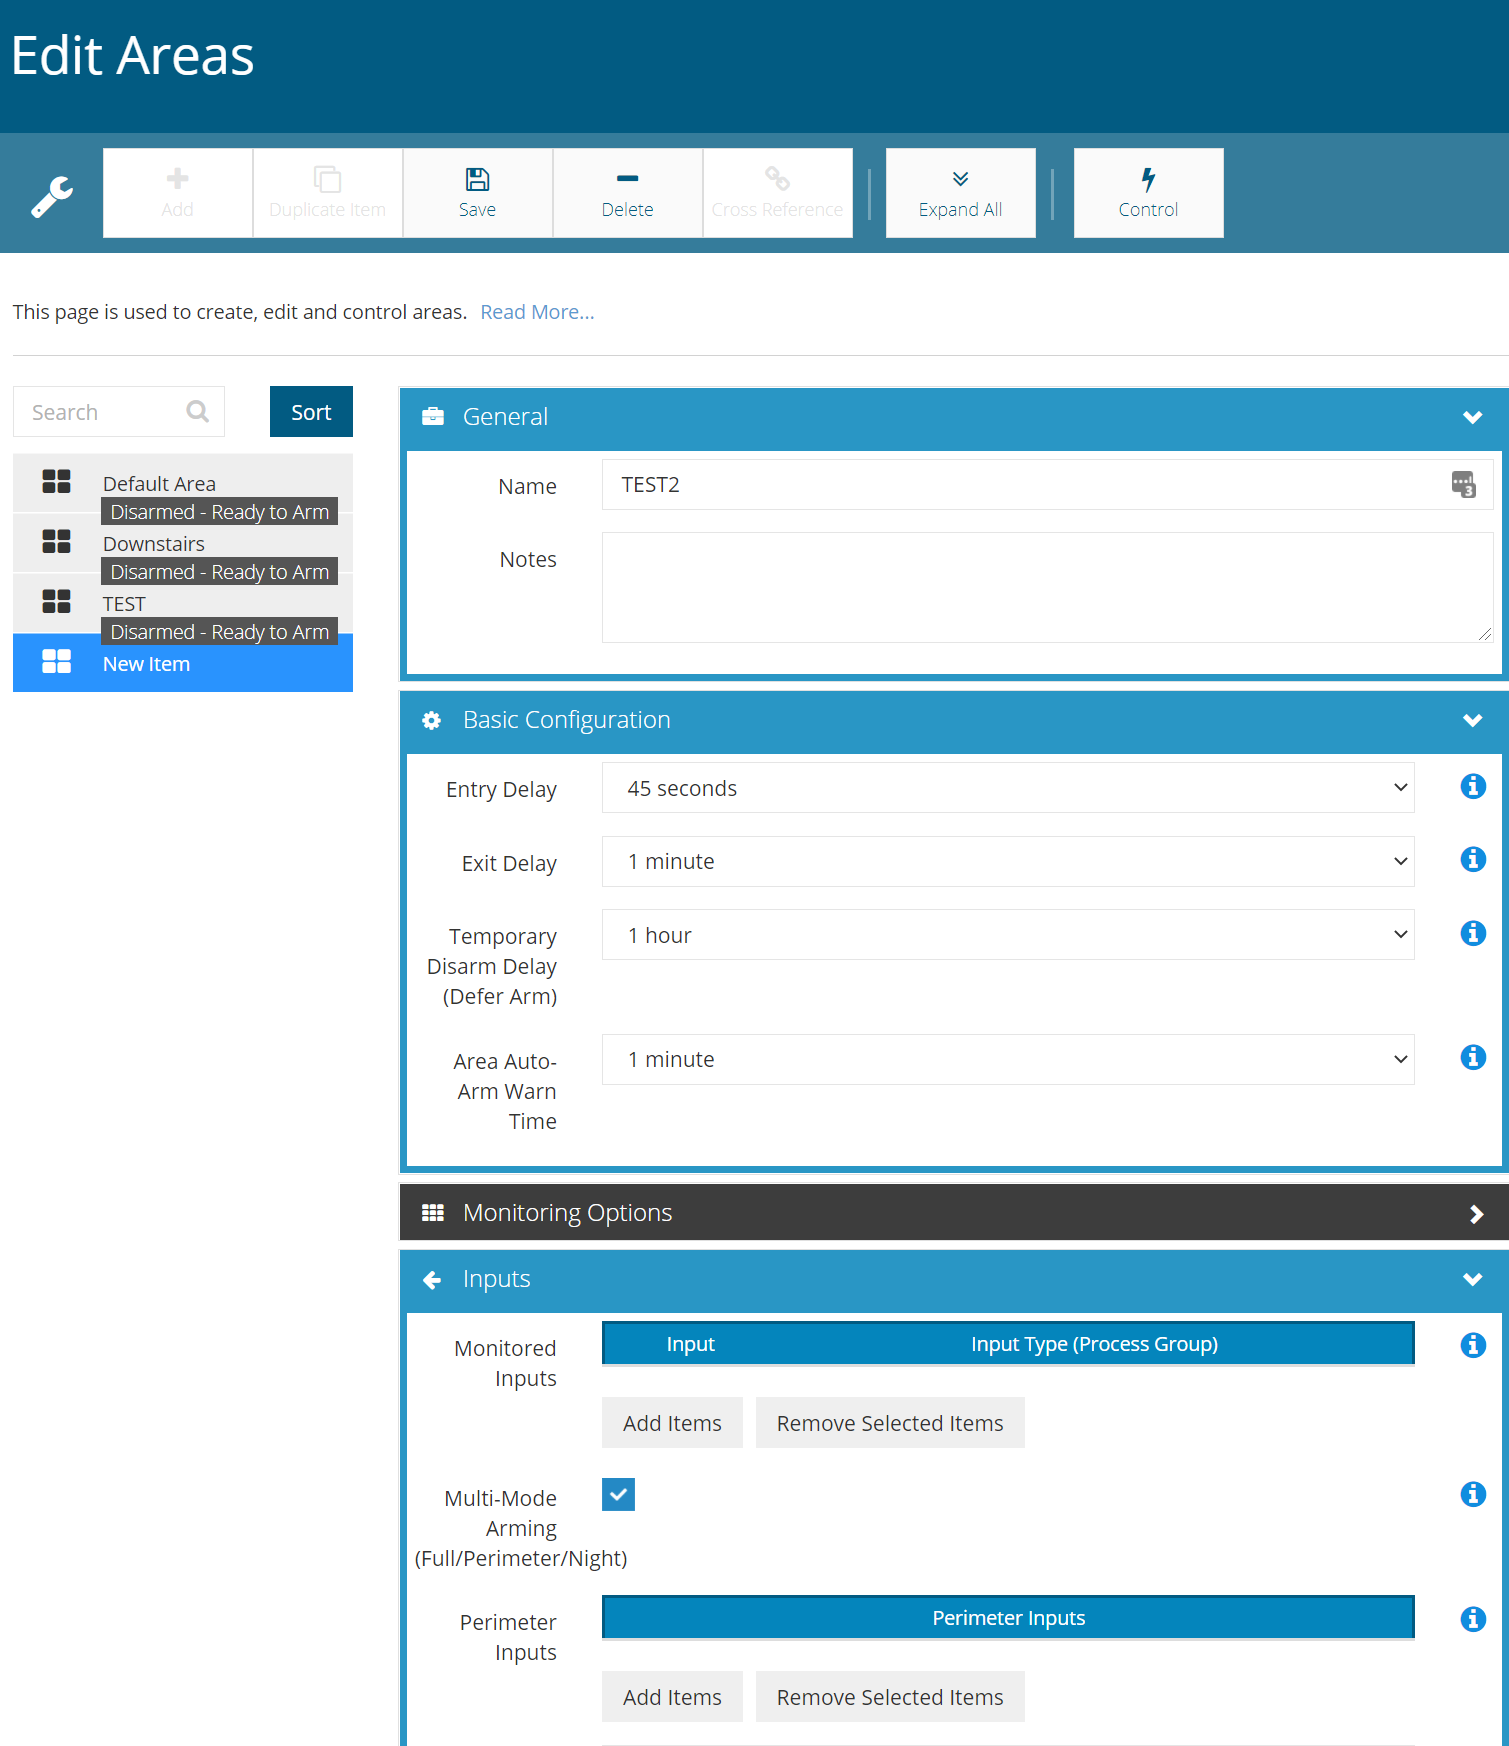
In addition, any of the security areas you wish to control should have the Multi-Mode Arming setting checked as shown in this screenshot.
Add the Driver
You can add the Inception alarm extension driver to any room you like using the Crestron Home Setup application
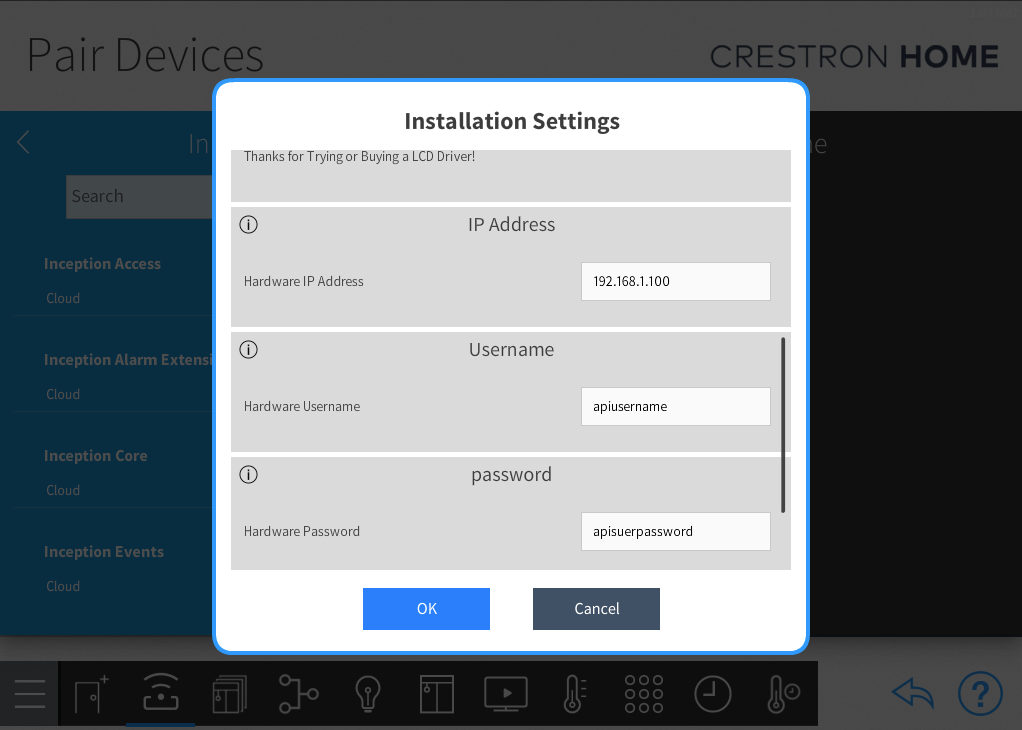
Follow the installation settings prompts and enter the connection details for the Inception Alarm
- IP Id – the IP address of the Inception Alarm System
- Username – the username of the Inception api user (see user permissions above)
- Password – the password of the Inception api user (see user permissions above)

Once you have added the driver to the room, look for the UI tile in the Crestron Home application or on a TSW touchscreen to continue the setup

Inception Alarm Connection Settings
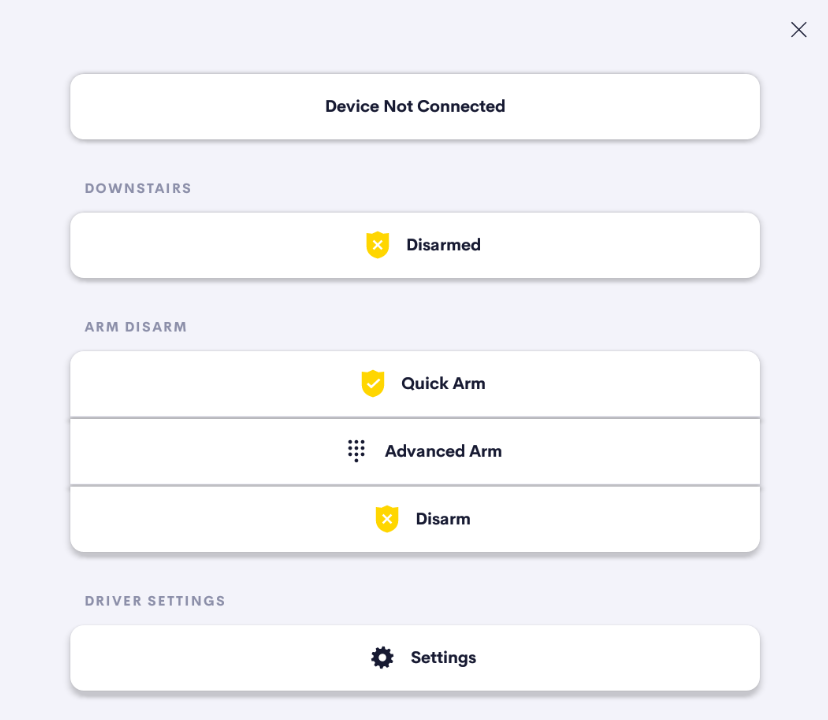
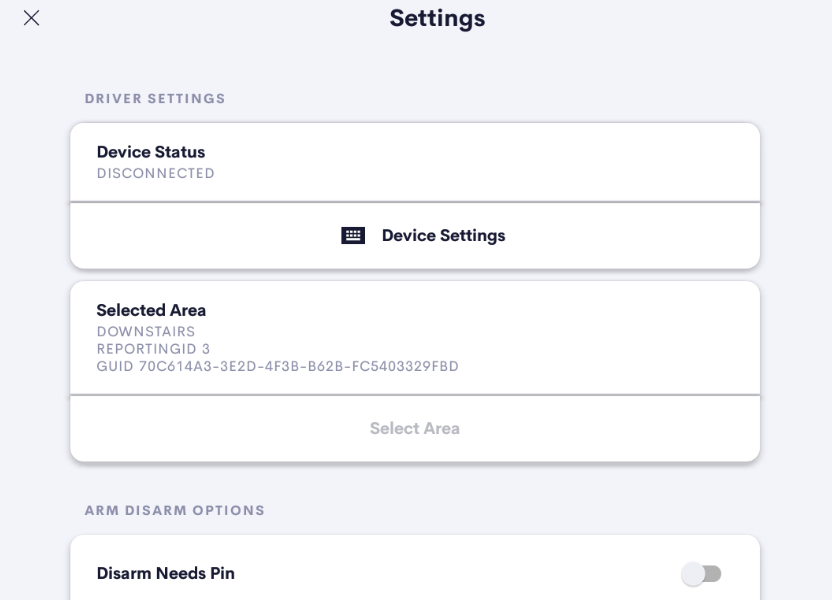
The main page will show you if the Inception alarm is not connected
You can update the IP address and user account details in the installer settings of the Crestron Home Setup App, or here in the Crestron Home UI.
To modify the Device connection details in the Crestron Home UI:
- Press the Settings button
- If prompted enter the Advanced User Password
- Press the Device Setttings button
Connect to the Inception Alarm
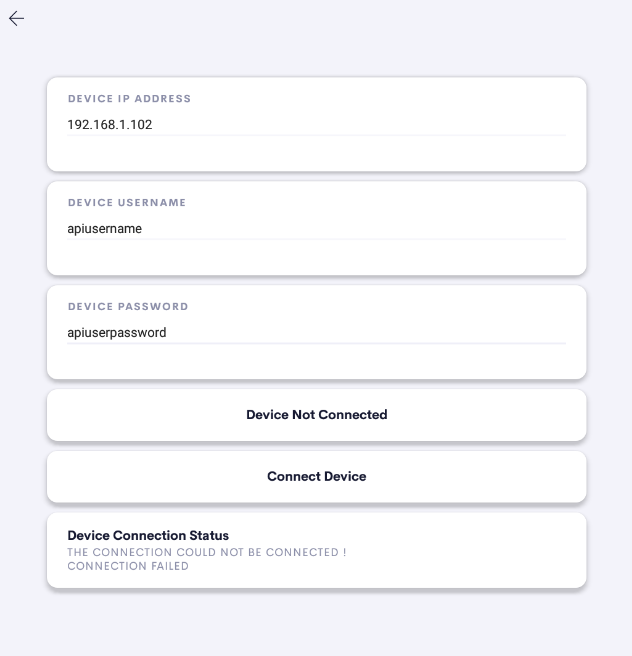
- Enter the IP Address of the Inception Alarm System
- Enter the username of the user you set for API access
- Enter the password of the user you set for API access
- Press the Connect Device button
The connection status window will inform you of a successful connection or of any errors
Select the Inception Area
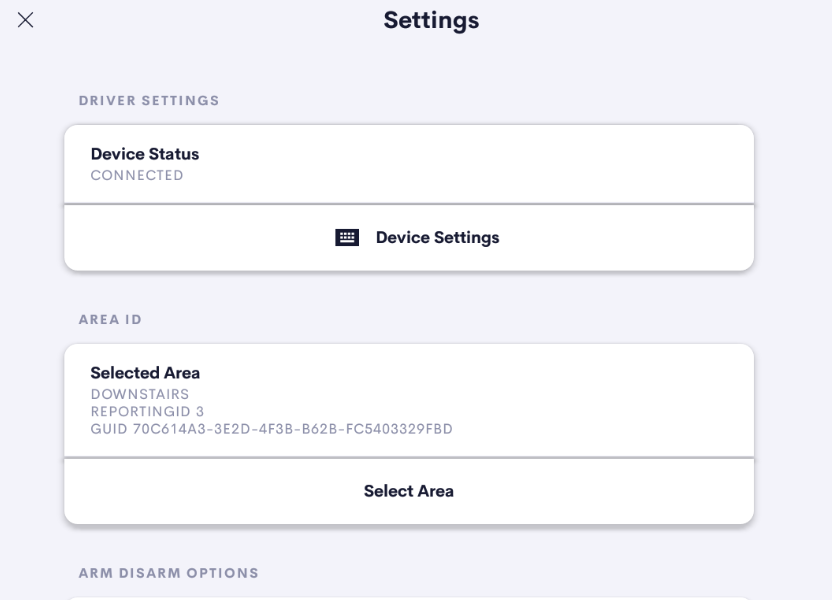
Once connected to the Inception Alarm, you will need to select the correct Area ID for the Inception security area that you would like to associate with this driver for status and control.
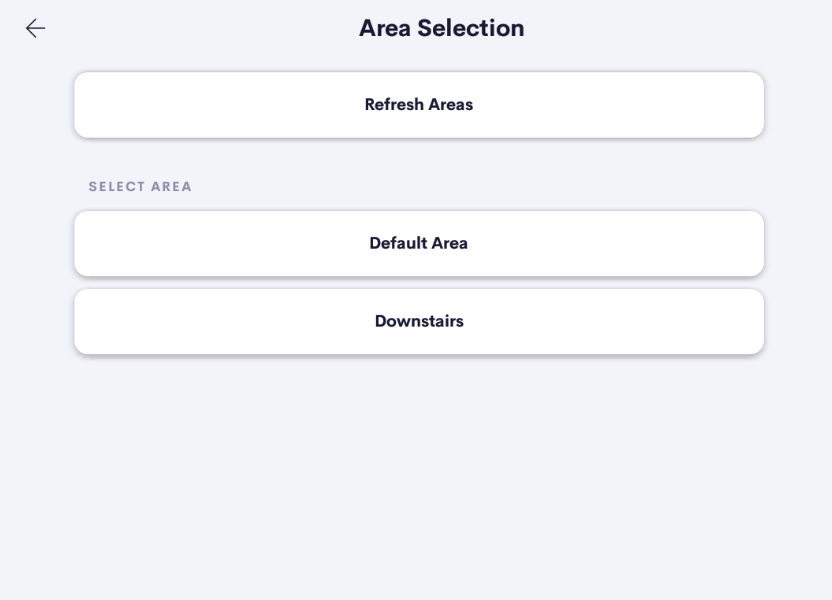
- Press the Select Area
- Select the Inception Area that you would like to associate
- Return to the settings page
The Selected Area status window on the settings page informs you of which area you have selected
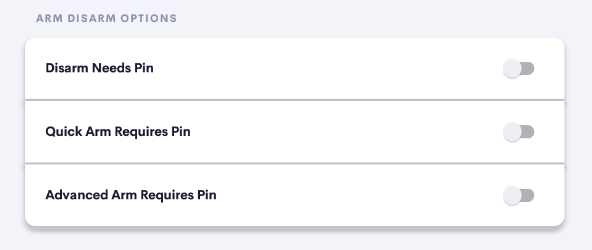
User Pins Settings
The user PIN is optional for arming and disarming opperations.
- Arming and disarming operations with a PIN will be associated to the inception user with matching PIN for permissions and logging. Ensure you set the individual user permissions as required.
- Arming and disarming operations without a PIN will use the permissions and logging of the API user. Ensure you set the API users permissions as required.
On the settings page you can turn the PIN requirement on and off for each of the following three functions:
- Pin required to Disarm the system
- Pin required to Quick Arm the system
- Pin required to Advanced Arm the system